
How to Make Mochi in a Microwave
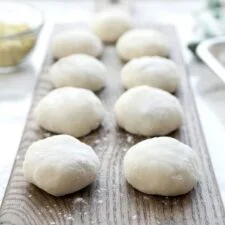
These Japanese mochi cakes are made by blending soaked sweet rice and cooking the mixture in short bursts in the microwave. Shape them plain, coat them with kinako, or fill them with anko, Nutella or jam.
Ingredients
- 450 gmochigome rice (Japanese short-grain sweet rice)
- 375 mlwater
- to tastepotato starch or cornflour
- to tasteanko (sweet red bean paste)
- to tasteNutella
- to tastejam
- to tastekinako
Instructions
- 1
Rinse the rice
Rinse the rice under running water in a rice-washing bowl until the water runs clear, then drain. Alternatively, put it in a bowl, cover halfway with water, swirl and drain most of the water; repeat 5–6 times, then drain through a sieve. Don’t use a sieve while rinsing, as grains may fall through.
- 2
Soak the rice
Put the rice and 375 ml water in a bowl and leave to soak for 90 minutes. It is normal for the grains to absorb most of the water.
- 3
Blend until smooth
Blend half the rice and water in an immersion blender cup until the grains are pulverised into a milky liquid; it may still feel slightly grainy. Add the remaining rice and water, then blend until smooth and milky. Take your time to blend it thoroughly.
- 4
Prepare the spatula
Put a spatula in a bowl of room-temperature water and set it aside.
- 5
Transfer and cover
Pour the mixture into a microwave-safe bowl or plastic container and cover it loosely with a lid.
- 6
Microwave in stages
Microwave on high for 1 minute, then take out the container and fold the mixture with a plastic or rubber spatula or spoon. It will still be quite liquid. Replace the lid and microwave for 1 more minute. Take it out, fold again, replace the lid and microwave for a final 1 minute.
- 7
Finish cooking
Fold the mixture until the mochi looks glossy, then replace the lid and microwave for 30 seconds. Repeat this 30-second cooking and folding step two more times. The total microwave time is 4½ minutes: three 1-minute intervals and three 30-second intervals.
- 8
Spread the mochi
Cover a baking sheet generously with potato starch, then place the mochi dough on it. Sprinkle more starch over the top and stretch the dough across the sheet with your hands. Leave it to cool for 2 minutes so it is easier to handle.
- 9
Prepare a plate
Place a serving plate beside the baking sheet and dust it with potato starch.
- 10
Separate a portion
Dust your hands with potato starch while they are dry. Take a small, palm-sized portion of mochi and pull and twist to separate it.
- 11
Shape the first piece
Shape the piece into a ball or another shape you like, then place it on the prepared plate.
- 12
Shape the remaining dough
Take another palm-sized portion, pull and twist to separate it, then shape it and place it on the plate. Repeat until all the mochi has been used.
- 13
Add kinako
For a kinako coating, mix 2 parts kinako with 1 part sugar and a pinch of salt. To serve, wet the mochi and dip it in the mixture, or arrange the mochi on a plate and sprinkle the mixture over it.
- 14
Fill with anko
Take a small palm-sized portion of mochi and pull and twist to separate it. Gently pull the sides to widen the surface, add a little anko to the centre, then stretch the mochi a little more. Fold the sides into the centre and pinch the edges together, continuing to pinch as you shape it into a ball. Set it on a plate.
What is mochi?
Mochi is a Japanese treat made from glutinous rice, also called sweet rice, which becomes sticky and chewy when cooked and pounded. This home method blends soaked rice into a batter and cooks it in the microwave rather than pounding steamed rice.
The short-grain mochigome gives the cakes their characteristic chewy texture. Once cooked, the dough can be served plain, coated with kinako or wrapped around a sweet filling.
Nutrition and macros by portion
The nutrition label shows one serving as written: 119 calories, 2g protein, 26g carbs, 0g fat.
| Portion | Adjustment | kcal | Protein | Carbs | Fat |
|---|---|---|---|---|---|
| Lighter | Use less sweet filling | 83 kcal | 2g | 18g | 0g |
| This serving | As written | 119 kcal | 2g | 26g | 0g |
| Hungry | Serve a larger portion | 179 kcal | 3g | 39g | 0g |
Most of the carbohydrates come from the sweet rice, with additional carbohydrates from the sweet fillings or kinako coating. The rice and fillings also contribute a little protein, while the recipe is very low in fat unless you choose a richer filling such as Nutella. Enjoy a few pieces alongside fresh fruit or unsweetened tea for a more balanced snack.
Choosing the rice
Mochigome: Use Japanese short-grain sweet rice, not ordinary short-grain rice. The rice’s starch is what gives the cooked dough its stickiness and chew.
Rinsing: Rinse until the water runs clear, and drain carefully so you don’t lose grains. The long soak helps the rice blend into a smooth mixture.
Blending the mixture
Two batches: Blending half the rice and water first makes room in the blender cup; add the rest once the first portion is broken down. Blend thoroughly until the mixture looks milky and smooth, even if it retains a little graininess to the touch.
Equipment: An immersion blender cup or another tall container works for blending. Transfer the mixture to a microwave-safe container before cooking.
Cooking in the microwave
Short bursts: The mixture cooks in three 1-minute intervals, with folding between each, followed by three 30-second intervals. Keep the lid loosely on while microwaving, and take care when handling the hot container.
Texture cue: Fold until the mixture looks glossy, as directed, before proceeding to the final short bursts. The repeated folding helps work the cooked mixture into a cohesive dough.
Handling sticky dough
Starch layer: Cover the baking sheet and the dough generously with potato starch so the sticky surface is easier to stretch and portion. Keep extra starch nearby for your hands and serving plate.
Cool briefly: Let the dough rest for 2 minutes after spreading it. Dust dry hands before taking a portion, then pull and twist to separate each piece.
Filling and serving
Anko: Stretch a piece of dough wide enough to hold a little sweet red bean paste in the centre. Bring the edges together and pinch them closed as you shape the mochi into a ball.
Kinako: The recipe serves kinako mixed with sugar and a pinch of salt. Dip mochi that has been lightly wetted, or sprinkle the mixture over the pieces on a plate; Nutella and jam are other suggested fillings.
Plan the timing
Soaking: Allow 90 minutes for the rice to sit in the water before blending. The mixture is then cooked in stages, with folding between microwave intervals.
Shaping: Set out the starch, plate and chosen fillings before handling the dough. The recipe gives the dough 2 minutes to cool after it is spread, so work with it while it is still pliable.
Recipe notes & tips
- Rinse the rice in a bowl or rice-washing bowl, not a sieve, to avoid losing grains.
- Blend in two batches if needed, and make sure the mixture is smooth and milky before microwaving.
- Use a microwave-safe container and leave its lid loose rather than sealing it.
- Fold the mixture between every microwave interval, including the shorter 30-second intervals.
- Keep the potato starch close at hand because the dough is very sticky.
- Dust your hands while they are dry before pulling portions from the dough.
Variations
- Anko filling: Place a little sweet red bean paste in the centre and pinch the dough closed around it.
- Nutella filling: Add a small spoonful of Nutella to the centre before shaping the dough into a ball.
- Jam filling: Use a little jam in place of anko, taking care to keep it within the dough as you seal it.
- Kinako coating: Mix 2 parts kinako, 1 part sugar and a pinch of salt, then dip or sprinkle over the mochi.
- Plain mochi: Shape the dough without filling and serve the pieces as they are.
Common mistakes to avoid
- Rinsing in a sieve: Grains can slip through the holes; rinse in a bowl and sieve only to drain at the end.
- Under-blending: Unblended grains can leave the mixture uneven; blend patiently until it looks smooth and milky.
- Sealing the lid: The method calls for a loose cover; don’t close the container airtight in the microwave.
- Skipping the folds: The mixture needs folding between cooking intervals; use the dampened spatula and follow the staged method.
- Using too little starch: The dough can stick to the sheet and hands; coat the work surface generously and dust your hands.
- Handling wet hands: Starch will not coat wet hands properly; dry them before dusting.
How to store
Store leftover mochi in an airtight container at room temperature for up to 1 day, or refrigerate for up to 2 days. Refrigeration can make the texture firmer; let pieces come towards room temperature before serving.
Frequently asked questions
Can I use ordinary short-grain rice?
The recipe calls for mochigome, Japanese short-grain sweet rice, which gives the dough its sticky, chewy texture. Ordinary rice may not produce the same result.
Why does the rice need to soak for 90 minutes?
The soak softens the grains so they can be blended into the milky mixture. It is normal for the rice to absorb much of the water during this time.
Can I use cornflour instead of potato starch?
Yes. The recipe lists potato starch or cornflour for dusting the sticky dough and work surface.
How do I know when the mochi dough is ready?
After the staged microwave cooking and folding, the recipe uses a glossy appearance as the cue. Take care when handling the hot container.
Can I make mochi without an immersion blender cup?
Yes. The method suggests using any tall cup with the immersion blender. Blend in two portions as described.
What can I use to fill the mochi?
The recipe suggests anko, Nutella or jam. Add a little to the centre of a stretched portion, then fold and pinch the dough closed.
Cook it from the original
This recipe comes from pickledplum.com. Their page has the author’s own photos, notes and tips — the best place to cook it from.
Open the recipe on pickledplum.com