
Dark Chocolate Fudge Brownies
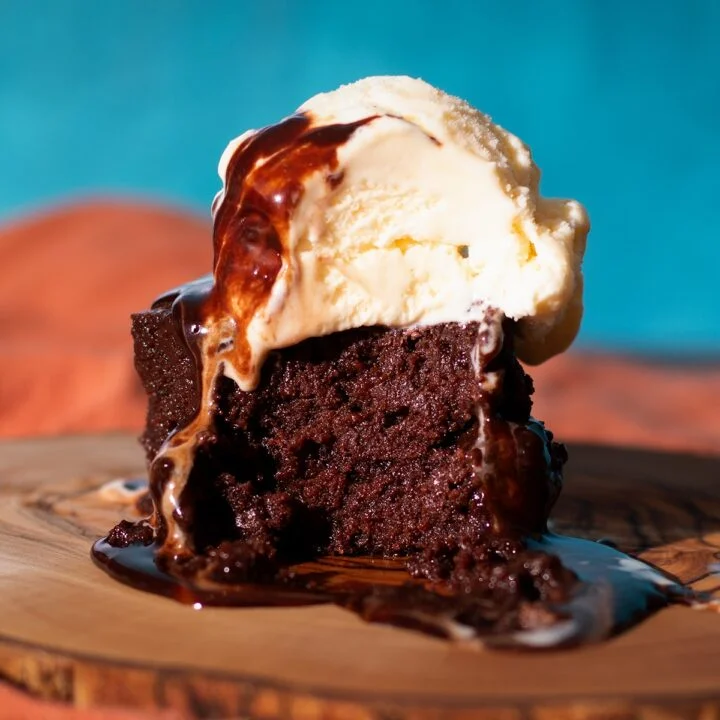
These dark chocolate brownies are rich, smooth and deeply chocolatey, with sour cream helping give them a fudgy texture. Bake a generous tray to share, or cut it into individual squares to freeze for later.
Ingredients
- 9 ounces (18 tablespoons/254 g), dividedsalted butter
- ½ cup (60 g)plain flour
- ½ teaspoonbaking powder
- 1 teaspoon kosher salt, or ½ teaspoon table saltsalt
- 1 teaspooninstant espresso powder
- 4 largeeggs
- 1 tablespoonpure vanilla extract
- ⅔ cup (152 g/5.3 ounces)sour cream
- ¾ cup (150 g)granulated sugar
- ¾ cup (160 g)dark brown sugar
- 16 ouncesgood-quality semisweet or bittersweet chocolate, chopped into pieces about the size of chocolate chips
Instructions
- 1
Preheat the oven
Heat the oven to 149°C (300°F).
- 2
Line the tin
To line a 9 × 13-inch tin, turn it upside down and press a piece of foil over its base, sides and corners to shape it. Remove the foil, turn the tin the right way up and fit the shaped foil inside. Melt 2 tablespoons of butter and brush or spread it over the foil, then set the tin aside.
- 3
Mix dry ingredients
Whisk the flour, baking powder, salt and espresso powder together in a small bowl. Set aside.
- 4
Whisk eggs and cream
In a large bowl, whisk the eggs, vanilla and sour cream just until combined. Alternatively, use a stand mixer with the whisk attachment, taking care not to overmix. Set aside.
- 5
Melt chocolate mixture
Melt the remaining 8 ounces (16 tablespoons) of butter in a medium saucepan over a medium heat. Add both sugars and stir for 1 minute to begin melting them. Reduce the heat to low, add the chocolate and stir until melted.
- 6
Combine wet mixtures
Slowly whisk the chocolate mixture into the egg and sour cream mixture, whisking continuously. If using a stand mixer, run it with the whisk attachment on medium-low speed as you slowly pour in the chocolate, and mix until combined.
- 7
Add dry ingredients
Stir in the dry ingredients until the batter is completely smooth. If needed, briefly beat it with an electric mixer to smooth it out.
- 8
Bake the brownies
Pour the batter into the prepared tin and bake for 50–60 minutes, until the brownies are pulling slightly away from the sides and a toothpick inserted in the centre comes out mostly, but not completely, clean. The recipe also says to check them after 1 hour of baking.
- 9
Cool and cut
Leave the brownies at room temperature until completely cool. Centre a baking sheet or chopping board over the tin and turn everything over so the brownies rest upside down on it. Carefully remove the foil, lay it back over the brownies, then turn everything right side up. Cut into squares and serve, or wrap the squares individually and freeze for up to 3 months.
What are dark chocolate brownies?
Brownies are a rich, square American bake, somewhere between a cake and a more compact chocolate dessert. This version leans into the fudgy end of that range, with plenty of semisweet or bittersweet chocolate.
Sour cream adds richness to the batter, while a little espresso powder can deepen the chocolate flavour. The low oven temperature and the cue of a slightly moist toothpick help keep the centre from baking completely dry.
Nutrition and macros by portion
The nutrition label shows one serving as written: 219 calories, 3g protein, 16g carbs, 16g fat.
| Portion | Adjustment | kcal | Protein | Carbs | Fat |
|---|---|---|---|---|---|
| Lighter | Smaller brownie square | 153 kcal | 2g | 11g | 11g |
| This serving | As written | 219 kcal | 3g | 16g | 16g |
| Hungry | Larger brownie square | 329 kcal | 5g | 24g | 24g |
The chocolate, butter and sour cream contribute most of the fat, while the flour and sugars supply carbohydrates. Eggs and chocolate provide some protein. Pair a square with fresh fruit for a simple contrast and a more balanced plate.
Choosing the chocolate
Chocolate: Choose semisweet or bittersweet chocolate you enjoy eating, then chop it into small, roughly chip-sized pieces so it melts evenly into the butter.
Espresso powder: The small amount is there to complement the chocolate rather than make the brownies taste like coffee. It can be left out if you prefer.
Preparing the tin
Foil lining: Shaping the foil over the outside of the tin first helps it fit inside without a struggle. Buttering the lining makes it easier to lift the cooled slab out.
Butter: The method specifies 2 tablespoons for greasing the foil, then the remaining butter for the chocolate mixture. Follow the stated quantities carefully, as the recipe’s butter amounts are not fully consistent.
Mixing the batter
Egg mixture: Whisk the eggs, vanilla and sour cream only until mixed; excess whisking is unnecessary here.
Chocolate mixture: Let the chocolate melt over low heat and pour it into the egg mixture gradually while whisking. This steady addition helps combine the mixtures smoothly.
When the brownies are done
Edges: Look for the brownies to pull slightly away from the sides of the tin as they bake.
Centre: A toothpick should come out mostly clean, with a little batter still clinging to it. The recipe gives a 50–60-minute baking window and also says to check after 1 hour, so use the visual and toothpick cues to judge doneness.
Cooling and serving
Cooling: Allow the brownies to cool completely at room temperature before turning them out. They are delicate while warm, and cooling makes it easier to remove the foil and cut neat squares.
To serve: Cut the slab into the recipe’s 30 portions. These rich squares work well on their own or alongside fresh fruit.
Recipe notes & tips
- Chop the chocolate to roughly chip-sized pieces so it melts readily.
- Whisk the egg and sour cream mixture only until combined.
- Keep the saucepan on low once you add the chocolate.
- Pour the chocolate mixture into the eggs gradually while whisking continuously.
- Begin checking for the stated doneness cues within the recipe’s baking window.
- Cool the slab completely before turning it out and cutting it.
Variations
- Skip the espresso: Leave out the espresso powder for a version without coffee notes.
- Choose bittersweet chocolate: Use bittersweet chocolate for a less sweet, more intense result.
- Choose semisweet chocolate: Use semisweet chocolate for a sweeter chocolate flavour.
- Serve with fruit: Add fresh berries alongside a square for a bright contrast.
- Freeze portions: Wrap individual squares to keep some for another day.
Common mistakes to avoid
- Overmixing the eggs: Whisk just until the eggs, vanilla and sour cream are combined.
- Adding chocolate too quickly: Pour it in gradually while whisking so the mixtures combine evenly.
- Using high heat: Keep the chocolate mixture over low heat after adding the chocolate.
- Baking until completely dry: Take the brownies out when a toothpick is mostly, but not completely, clean.
- Removing the foil while warm: Wait until the brownies are completely cool before turning them out.
- Cutting too soon: Cool the whole slab first to make cutting easier.
How to store
Wrap cooled squares individually and freeze for up to 3 months. The recipe does not specify how long they keep at room temperature or in the fridge. Thaw a frozen square before serving; no reheating method is given.
Frequently asked questions
Can I leave out the espresso powder?
Yes. The recipe marks it as optional, so you can omit it.
How can I tell when the brownies are baked?
Look for the edges to pull slightly away from the tin and for a toothpick inserted in the centre to come out mostly, but not completely, clean.
Why does the recipe say to cool them completely?
The brownies are easier to lift from the foil and cut once fully cool. They are more fragile while warm.
Can I freeze the brownies?
Yes. Wrap the squares individually and freeze them for up to 3 months.
Can I use a stand mixer?
Yes. The recipe suggests a whisk attachment for the egg mixture and for slowly combining it with the chocolate mixture. Avoid overmixing the eggs.
How many portions does the recipe make?
It makes 30 portions, cut from the cooled slab.
Cook it from the original
This recipe comes from ofbatteranddough.com. Their page has the author’s own photos, notes and tips — the best place to cook it from.
Open the recipe on ofbatteranddough.com