
Korean Mozzarella Cheese Balls
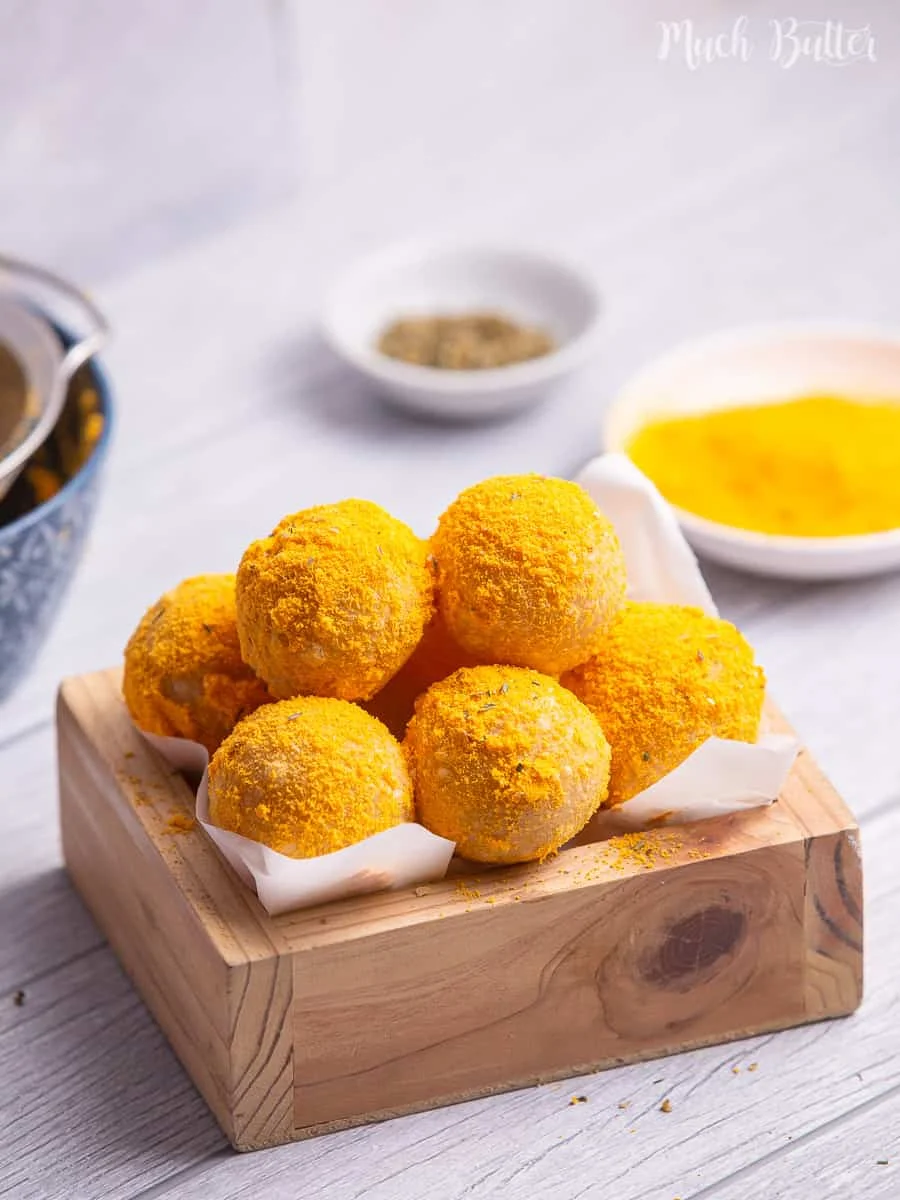
These Korean-inspired mozzarella cheese balls wrap stretchy cheese in a soft, chewy glutinous-rice-flour dough, then fry it until golden and coat it in savoury seasoning. They make a fun sharing snack; take care to seal the dough well so the cheese stays inside as it fries.
Ingredients
- 300 g (2 cups)glutinous rice flour
- 40 g (⅓ cup)plain flour
- ½ tbspbaking powder
- 50 g (¼ cup)granulated sugar
- 1 tspsalt
- 20 gmelted butter
- 170 mlhot water
- 100 ggrated mozzarella
- 240 ml (1 cup)cheese seasoning
- 1 tspgarlic powder
- 1 tsp, optionalparsley
Instructions
- 1
Mix the dough
In a large bowl, combine the glutinous rice flour, plain flour, baking powder, sugar, salt, melted butter and hot water.
- 2
Knead by hand
Knead the mixture with your hands until it forms a dough.
- 3
Shape the portions
Divide the dough into 25 g portions and roll each one between your hands into a ball.
- 4
Cover the dough
Drape a damp towel over the dough balls to keep them from drying out.
- 5
Portion the cheese
Weigh out 6–8 g of mozzarella for each ball and shape each portion into a small ball.
- 6
Fill the dough
Flatten a dough ball and place a mozzarella ball in the centre.
- 7
Seal each ball
Carefully bring the dough around the cheese, close it, and roll it back into a ball.
- 8
Smooth any cracks
Check that the dough has no cracks; use a little water to smooth any that appear.
- 9
Heat the oil
Warm the cooking oil over low heat.
- 10
Check the heat
Keep the oil from getting too hot when frying the cheese balls.
- 11
Fry until golden
Fry the balls for about 3–5 minutes, until they are golden.
- 12
Turn them gently
Stir the balls from time to time so they stay round and cook evenly.
- 13
Drain the balls
Once cooked, transfer the cheese balls to a cooling rack to drain excess oil.
- 14
Mix the coating
Combine the cheese seasoning with the garlic powder and parsley.
- 15
Coat and serve
Add the cheese balls to the seasoning mixture and turn them until evenly coated, then arrange them in a serving dish.
- 16
Enjoy
Serve and enjoy.
What are Korean mozzarella cheese balls?
These are fried, cheese-filled bites inspired by Korean snack foods, where crisp or chewy coatings and punchy seasonings often meet melted cheese. This version uses glutinous rice flour for a pleasantly chewy shell, with mozzarella at the centre.
The dough is wrapped around small portions of cheese, fried until golden, then tossed in cheese seasoning with garlic and parsley. A tight seal helps the cheese melt inside without escaping into the oil.
Nutrition and macros by portion
The nutrition label shows one serving as written: 550 calories, 11g protein, 78g carbs, 22g fat.
| Portion | Adjustment | kcal | Protein | Carbs | Fat |
|---|---|---|---|---|---|
| Lighter | Fewer balls, extra salad | 385 kcal | 8g | 55g | 15g |
| This serving | As written | 550 kcal | 11g | 78g | 22g |
| Hungry | Larger portion | 825 kcal | 17g | 117g | 33g |
The glutinous rice flour, plain flour and sugar provide most of the carbohydrates, while mozzarella and butter contribute fat and some protein. The cheese seasoning and added salt are the main sources of sodium; serve a few balls with vegetables or a fresh salad to balance the plate.
Why use glutinous rice flour?
Chewy dough: glutinous rice flour gives the outer layer its distinctive stretchy, chewy texture. It is different from ordinary rice flour, so use the glutinous kind specified.
Plain flour: the smaller amount of plain flour works alongside the rice flour in the dough. Measure it carefully so the texture stays balanced.
Getting the filling inside
Small portions: shape the dough into 25 g balls and the mozzarella into 6–8 g portions, as directed. Keeping the filling centred makes it easier to wrap the dough around it.
A full seal: flatten the dough, enclose the cheese and pinch the opening closed before rolling it smooth. Use a little water to patch cracks, which could otherwise let cheese leak out.
Frying for an even finish
Gentle heat: the method calls for low heat and warns against oil that is too hot. Work patiently so the outside has time to brown while the inside warms.
Keep them moving: stir from time to time to encourage even cooking and help the balls keep their round shape. The recipe gives about 3–5 minutes, with a golden colour as the cue to remove them.
Seasoning and serving
Even coating: mix the cheese seasoning with garlic powder and optional parsley before adding the fried balls. Toss them while warm so the coating can cling to the surface.
Serve promptly: a cooling rack lets excess oil drain while the shells stay less soggy than they would on a flat plate. They are best enjoyed warm, when the mozzarella is soft.
Planning the batch
The stated quantities make four servings, but the method does not specify how many balls to expect. Use the dough and filling portions as your guide, and keep any dough not being shaped under the damp towel.
Allow time for shaping as well as frying: filling each piece carefully takes longer than cooking a single batch. Fry in manageable batches if needed, keeping the oil at low heat.
Recipe notes & tips
- Keep the dough covered with a damp towel whenever you are not shaping it.
- Use a scale for the 25 g dough portions and 6–8 g cheese portions for more consistent balls.
- Pinch the dough closed firmly, then roll the seam smooth before frying.
- Use low heat as directed, since overly hot oil can brown the outside too quickly.
- Turn the balls from time to time so they cook evenly and stay round.
- Drain the cooked balls on a cooling rack before coating them.
Variations
- Extra garlic: Add a little more garlic powder to the seasoning mixture for a stronger savoury note.
- Herb coating: Keep the parsley in the seasoning mix, or leave it out for a simpler coating.
- Cheese blend: Replace some of the mozzarella with another grated melting cheese, keeping the total filling amount similar.
- Milder finish: Use less cheese seasoning in the coating and adjust to taste.
- Smaller bites: Make smaller dough and cheese portions, taking care to seal each one fully.
Common mistakes to avoid
- Drying dough: Leaving the portions uncovered can make them crack; keep them under a damp towel.
- Loose seams: A weak seal can let the mozzarella escape; pinch the opening closed and smooth it with a little water.
- Cracked shells: Frying cracked dough risks leaks; patch visible cracks with water before cooking.
- Oil too hot: Excessively hot oil can brown the outside too quickly; keep the heat low as directed.
- Uneven cooking: Leaving the balls untouched can give patchy results; stir them from time to time.
- Skipping the rack: A flat surface can leave the bottoms oily; drain the balls on a cooling rack.
How to store
These are best served freshly fried. If you have leftovers, cool them, refrigerate in a covered container and use within 2 days; reheat in an oven or air fryer until warmed through and crisp again. The coating and texture may soften in storage.
Frequently asked questions
Can I use ordinary rice flour instead of glutinous rice flour?
The texture will be different: glutinous rice flour is what gives this dough its chewy quality. Use the specified flour for the closest result.
How do I stop the mozzarella leaking out?
Centre the cheese, wrap the dough around it and seal the seam firmly. Smooth any cracks with a little water before frying.
How long should I fry the cheese balls?
The recipe gives about 3–5 minutes, until golden. Keep the heat low and turn the balls from time to time.
Can I leave out the parsley?
Yes. The parsley is marked optional, so you can omit it from the seasoning mixture.
Can I prepare the balls ahead of time?
You can shape them shortly before frying, keeping the uncooked dough covered with a damp towel so it does not dry out. Frying and coating just before serving gives the best texture.
Cook it from the original
This recipe comes from muchbutter.com. Their page has the author’s own photos, notes and tips — the best place to cook it from.
Open the recipe on muchbutter.com