
Korean Fried Chicken
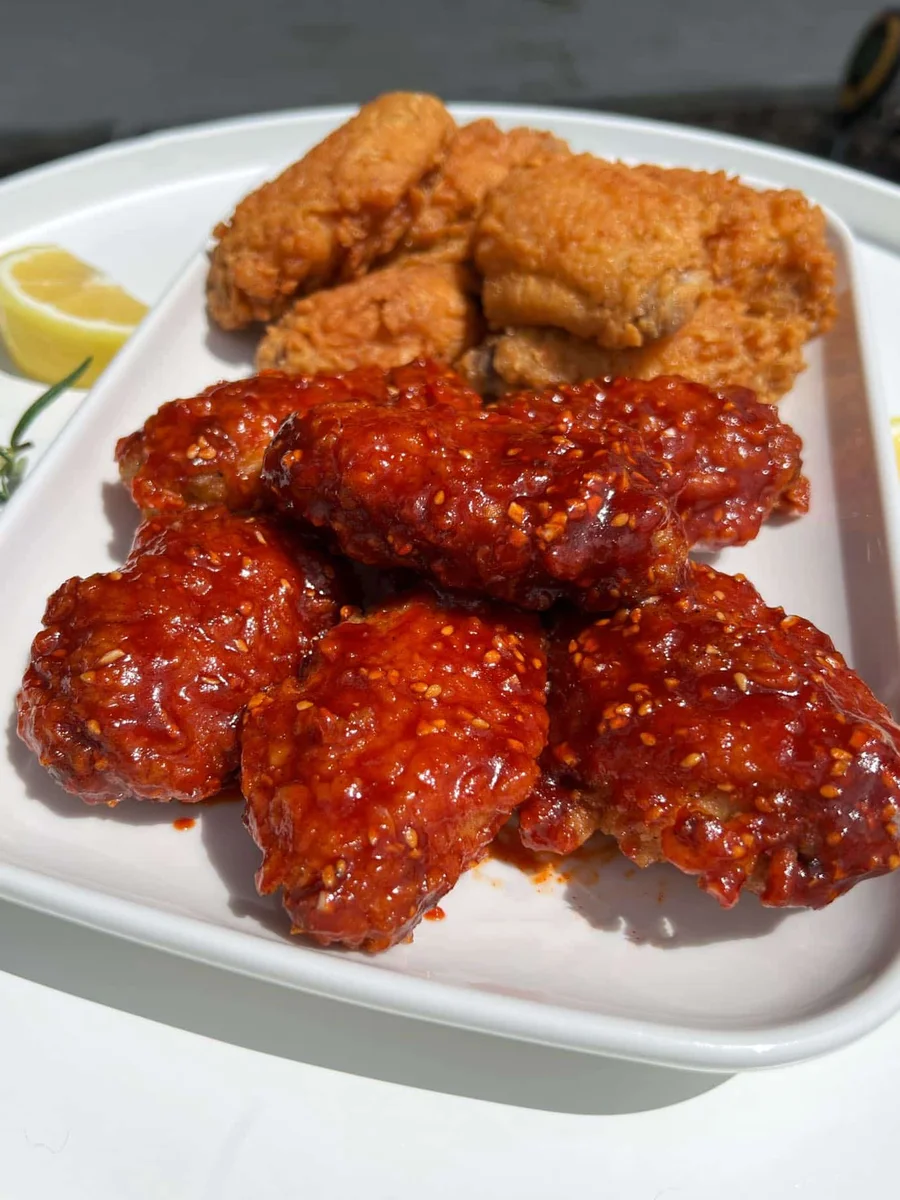
These Korean fried chicken wingettes are brined, coated in a crisp batter and fried twice before being tossed in a sweet, savoury gochujang sauce. The overnight brine takes planning, but the final fry and glossy sauce make them a crowd-pleasing choice for sharing.
Ingredients
- 16chicken wingettes (or drumettes)
- 500 gcold water
- 15 gsalt
- 1 tspKorean chilli powder
- 1/2 tspgarlic powder (or 1 tsp freshly chopped garlic)
- 240 gKorean fried chicken mix, for the batter
- 240 gcold water
- 240 gKorean fried chicken mix, for coating
- Enough to fill a medium pot halfwayvegetable oil, for frying
- 3 tbspgochujang
- 1/2 tbspKorean chilli powder
- 1 tbspsoy sauce
- 2 tbspketchup
- 4 tbsphoney (or light corn syrup)
- 1 tbspapple cider vinegar
- 1 tbsplemon juice
- 2 tspminced garlic
- 1 tspminced ginger
- 1 tspsesame seeds
Instructions
- 1
Mix the brine
In a large bowl, stir the salt, Korean chilli powder and garlic powder (or freshly chopped garlic) into the cold water until the salt has dissolved.
- 2
Brine the chicken
Add the wingettes or drumettes, ensuring they are completely covered by the brine. Cover the bowl with cling film and refrigerate overnight, or for at least 8 hours.
- 3
Drain the chicken
The next day, lift the chicken out of the brine and place it on a plate.
- 4
Make the batter
Whisk 240 g Korean fried chicken mix with 240 g cold water in a bowl until smooth and combined.
- 5
Coat in batter
Pour the batter over the chicken, turning each piece so that it is coated all over.
- 6
Load the bag
Put the remaining 240 g Korean fried chicken mix into a large resealable bag. Add 6 batter-coated wingettes, seal the bag tightly and leave some air inside.
- 7
Shake to coat
Shake the bag vigorously until the chicken is evenly covered with the dry mix.
- 8
Finish coating
Remove the chicken and gently shake off excess mix, then transfer it to a large plate. Repeat in batches of 6 with the remaining pieces.
- 9
Heat the oil
Heat the oil in a heavy-based pot to 160°C (320°F).
- 10
Fry the chicken
Carefully add the chicken and fry for about 3 minutes, until golden and crisp, keeping the oil at around 160°C (320°F). Fry in batches if needed, and transfer the pieces to a wire rack to drain.
- 11
Fry it again
Once all the chicken has rested on the rack, raise the oil temperature to 180°C (355°F). Carefully return the chicken to the oil and fry for 1 minute more, or until crisp and golden. Work in batches if needed.
- 12
Drain the chicken
Lift the chicken from the oil and place it on the wire rack to drain.
- 13
Make and toss
Put all the sauce ingredients in a non-stick frying pan. Stir over low heat until the sauce bubbles and thickens, then toss the fried chicken in it until evenly coated. Serve hot.
What is Korean fried chicken?
Korean fried chicken is known for a crisp coating and a bold sauce, and it is often served as food to share. This version uses wingettes, a seasoned brine and two rounds of frying before the pieces are coated in a gochujang-based sauce.
The combination of a light batter and a separate dry coating helps build a textured crust. The second fry restores crispness before the sauce goes on.
Nutrition and macros by portion
The nutrition label shows one serving as written: 132 calories, 0g protein, 0g carbs, 0g fat.
| Portion | Adjustment | kcal | Protein | Carbs | Fat |
|---|---|---|---|---|---|
| Lighter | Less sauce, more vegetables | 92 kcal | 0g | 0g | 0g |
| This serving | As written | 132 kcal | 0g | 0g | 0g |
| Hungry | Add rice and extra wings | 198 kcal | 0g | 0g | 0g |
The chicken supplies most of the protein, while the coating mix and honey contribute carbohydrates; the frying oil and chicken skin contribute fat. Pair a portion with vegetables and rice for a more rounded plate, adjusting the rice to suit your appetite.
Why brine the wings?
Seasoned brine: the salt, chilli powder and garlic powder flavour the chicken while it rests in the fridge. Keep every piece submerged and allow at least 8 hours, as directed.
Cold chicken: after brining, remove the pieces from the liquid and coat them as described. The recipe does not call for rinsing the chicken.
Building the coating
Wet layer: whisk the Korean fried chicken mix and cold water in equal weights to make the batter. Turn the chicken through it so that no surfaces are left bare.
Dry layer: shake six pieces at a time in the bag, leaving some air inside. This makes it easier for the dry mix to move around and cover the sticky batter evenly.
The two-stage fry
First fry: cook the chicken at 160°C (320°F) for about 3 minutes, keeping an eye on the oil temperature. Use batches suited to the size of the pot rather than crowding it.
Second fry: after all the pieces have been fried once, raise the oil to 180°C (355°F) and fry them for another minute. Drain on a wire rack between and after frying, as the method directs.
Getting the sauce right
Low heat: stir the gochujang, chilli powder, soy sauce, ketchup, honey, vinegar, lemon juice, garlic and ginger together in a non-stick pan. Let the mixture bubble and thicken gently.
Coating: toss the chicken in the sauce just before serving, so the pieces are coated without sitting in it for too long. Finish with the sesame seeds included in the sauce ingredients.
Serving ideas
Serve the wings hot, while the coating is at its crispest. Steamed rice and a simple vegetable side make a useful contrast to the sticky, savoury-sweet sauce.
If serving as part of a spread, offer the chicken with fresh, crunchy vegetables or a lightly dressed salad. Keep extra sauce separate if you want some pieces less heavily coated.
Recipe notes & tips
- Keep the chicken fully submerged during its overnight brine.
- Use cold water for the batter, as specified in the recipe.
- Shake off loose dry mix before putting the coated chicken on the plate.
- Use a thermometer to keep the oil close to the stated temperatures.
- Fry in batches if necessary so the pot is not crowded.
- Toss the chicken in the sauce immediately before serving.
Variations
- Use drumettes: swap them for the wingettes while keeping the method the same.
- Fresh garlic: replace the 1/2 tsp garlic powder in the brine with 1 tsp freshly chopped garlic.
- Use corn syrup: replace the honey in the sauce with light corn syrup.
- Adjust the heat: use less Korean chilli powder in the sauce for a gentler finish.
- Serve sauce on the side: offer the thickened sauce separately for a less-coated result.
Common mistakes to avoid
- Short brining: allow at least 8 hours so the chicken has the full time specified in the recipe.
- Uneven batter: turn each wingette through the batter before adding it to the coating bag.
- Overfilling the bag: coat six pieces at a time so the dry mix can move around them.
- Crowding the pot: fry in batches when needed to maintain the oil temperature.
- Skipping the second fry: return all the chicken to the hotter oil for the extra minute.
- Saucing too early: toss the chicken just before serving to help preserve its crisp coating.
How to store
Refrigerate leftover chicken in a covered container and use within 3 days. Reheat in an oven or air fryer until piping hot; the coating may be less crisp once sauced and stored.
Frequently asked questions
Can I use drumettes instead of wingettes?
Yes. The recipe specifically allows drumettes as an alternative; follow the same brining, coating and frying method.
How long should the chicken stay in the brine?
Leave it overnight in the fridge, or for at least 8 hours, with all the pieces submerged.
Can I prepare the chicken coating ahead?
The chicken can be brined overnight, but for the crispest result, batter and coat it shortly before frying.
Why is the chicken fried twice?
The first fry cooks and colours the coating; the brief second fry at a higher temperature makes it crisp again.
How can I tell when the sauce is ready?
Stir it over low heat until it bubbles and thickens, as the method describes.
Can I make the sauce less spicy?
Use less Korean chilli powder in the sauce. The recipe notes that the chilli powder used in the brine is not especially spicy.
Cook it from the original
This recipe comes from msshiandmrhe.com. Their page has the author’s own photos, notes and tips — the best place to cook it from.
Open the recipe on msshiandmrhe.com