
Crispy Chicken Skin
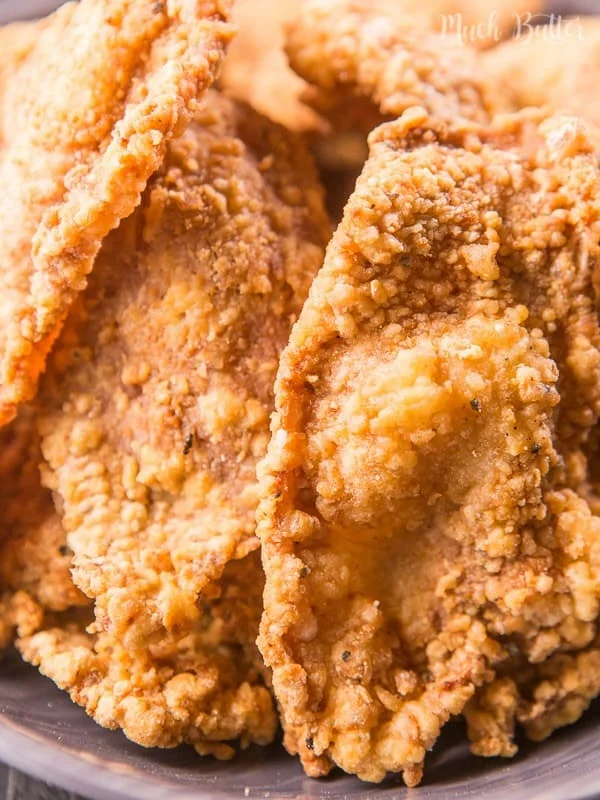
Crispy chicken skin is a crunchy, savoury snack made by coating chicken skin in seasoned flour and frying it until golden. It is a simple way to turn a small amount of chicken skin into a moreish appetiser or topping.
Ingredients
- 250 gchicken skin
- 1egg
- 1/2 tspgarlic powder
- to tastesalt
- to tastewhite pepper
- to tastecooking oil
- 50 gflour
- 50 gcornflour
- 1 tspgarlic powder
- 1/2 tspchicken stock powder
- to tasteblack pepper
- to tastesalt
Instructions
- 1
Season the skin
Season the chicken skin with salt and white pepper, then leave it to marinate for about 15 minutes.
- 2
Add egg
After 15 minutes, add the egg and 1/2 teaspoon of garlic powder. Mix until evenly combined, then set aside.
- 3
Mix the coating
Combine the flour, cornflour, 1 teaspoon of garlic powder, chicken stock powder, black pepper and salt, mixing evenly.
- 4
Coat the skin
Cover the chicken skin with the dry seasoning mixture.
- 5
Heat the oil
Heat cooking oil in a frying pan over a medium heat to 170°C (350°F).
- 6
Fry until golden
Fry the coated chicken skin until golden brown.
What is crispy chicken skin?
Crispy chicken skin is a crunchy fried snack found in several Asian cuisines, where seasoned, fried morsels are enjoyed as a starter or accompaniment. This version uses an egg-based coating and a mix of flour and cornflour for a crisp outside.
The seasoning is straightforward: garlic, pepper, salt and chicken stock powder bring savoury flavour without overpowering the chicken.
Nutrition and macros by portion
The nutrition label shows one serving as written: 190 calories, 8g protein, 12g carbs, 12g fat.
| Portion | Adjustment | kcal | Protein | Carbs | Fat |
|---|---|---|---|---|---|
| Lighter | Smaller snack portion | 133 kcal | 6g | 8g | 8g |
| This serving | As written | 190 kcal | 8g | 12g | 12g |
| Hungry | Serve with rice | 285 kcal | 12g | 18g | 18g |
The chicken skin and frying oil contribute most of the fat, while the flour, cornflour and egg provide some carbohydrate and protein. Serve a modest portion alongside vegetables or salad for a plate with more freshness and variety.
Why use two starches?
Flour: it gives the coating body and helps it cling to the egg-coated skin.
Cornflour: it lightens the coating and helps it fry up crisp. Mix the dry ingredients thoroughly so the seasoning is distributed through every piece.
The coating step
Egg: mixing it with the marinated skin gives the dry coating something to adhere to. Make sure the pieces are coated evenly before moving them into the flour mixture.
Dry mix: turn the skin through the seasoning until covered. Shake off any heavy clumps so the coating stays even rather than patchy.
Getting the frying right
Oil temperature: the method calls for 170°C over medium heat. If the oil is too cool, the coating can absorb more oil; if it is too hot, the outside may colour before the skin is crisp.
Pan space: fry in batches if needed so the temperature does not drop sharply. Keep an eye on the skin as it colours; the recipe gives golden brown as the doneness cue.
A crisp, even finish
Coating: aim for a thin, even layer rather than thick patches, which can brown unevenly. Mix the pieces gently so the coating stays attached.
Doneness: look for a golden-brown exterior. The recipe does not specify a frying time, so use colour and crispness rather than a fixed number of minutes.
Serving ideas
Serve the skin freshly fried while the coating is at its crunchiest. It works as a snack or as a crunchy garnish for rice, noodles or a savoury soup.
For a fuller plate, pair it with fresh vegetables or a lightly dressed salad to bring contrast to the rich, crisp pieces.
Recipe notes & tips
- Measure the oil temperature at 170°C for more controlled frying.
- Mix the flour and seasonings well before coating the chicken skin.
- Coat the skin evenly so it fries with a consistent crust.
- Fry in batches if the pan is crowded.
- Watch for a golden-brown colour, since no exact frying time is given.
Variations
- Extra garlic: add a little more garlic powder to the dry coating.
- More pepper: increase the black pepper for a sharper savoury note.
- Chilli: add chilli powder to the flour mixture for heat.
- Herb finish: scatter chopped spring onion over the fried skin just before serving.
- Dipping sauce: serve with a favourite savoury dipping sauce on the side.
Common mistakes to avoid
- Uneven seasoning: mix the dry ingredients thoroughly before coating.
- Patchy coating: make sure the egg mixture reaches all the chicken skin before adding the flour mix.
- Oil too cool: bring it to 170°C before frying so the coating can crisp.
- Overcrowding the pan: fry in batches to help the oil stay at temperature.
- Cooking by the clock: use the stated golden-brown colour cue, as the recipe gives no frying duration.
How to store
For the best crunch, eat the chicken skin soon after frying. If there are leftovers, refrigerate them in a sealed container and reheat in an oven or air fryer until hot and crisp; the coating may soften during storage.
Frequently asked questions
Can I prepare the chicken skin ahead?
You can season it and leave it for the stated 15 minutes before cooking. For the crispest result, coat and fry it shortly before serving.
How do I know when the oil is ready?
The recipe specifies 170°C. Use a kitchen thermometer if available, and let the oil return to temperature between batches.
Can I use only flour or only cornflour?
The recipe uses 50 g of each for its coating. Changing the balance will alter the texture, so keep both for the intended result.
How long should I fry the chicken skin?
No exact frying time is provided. Fry until the coating is golden brown, keeping a close eye on it as it cooks.
What can I serve with crispy chicken skin?
Serve it as a snack or add it to rice, noodles or soup as a crunchy topping. Fresh vegetables or salad also make a good contrast.
Cook it from the original
This recipe comes from muchbutter.com. Their page has the author’s own photos, notes and tips — the best place to cook it from.
Open the recipe on muchbutter.com