
Chicken fingers
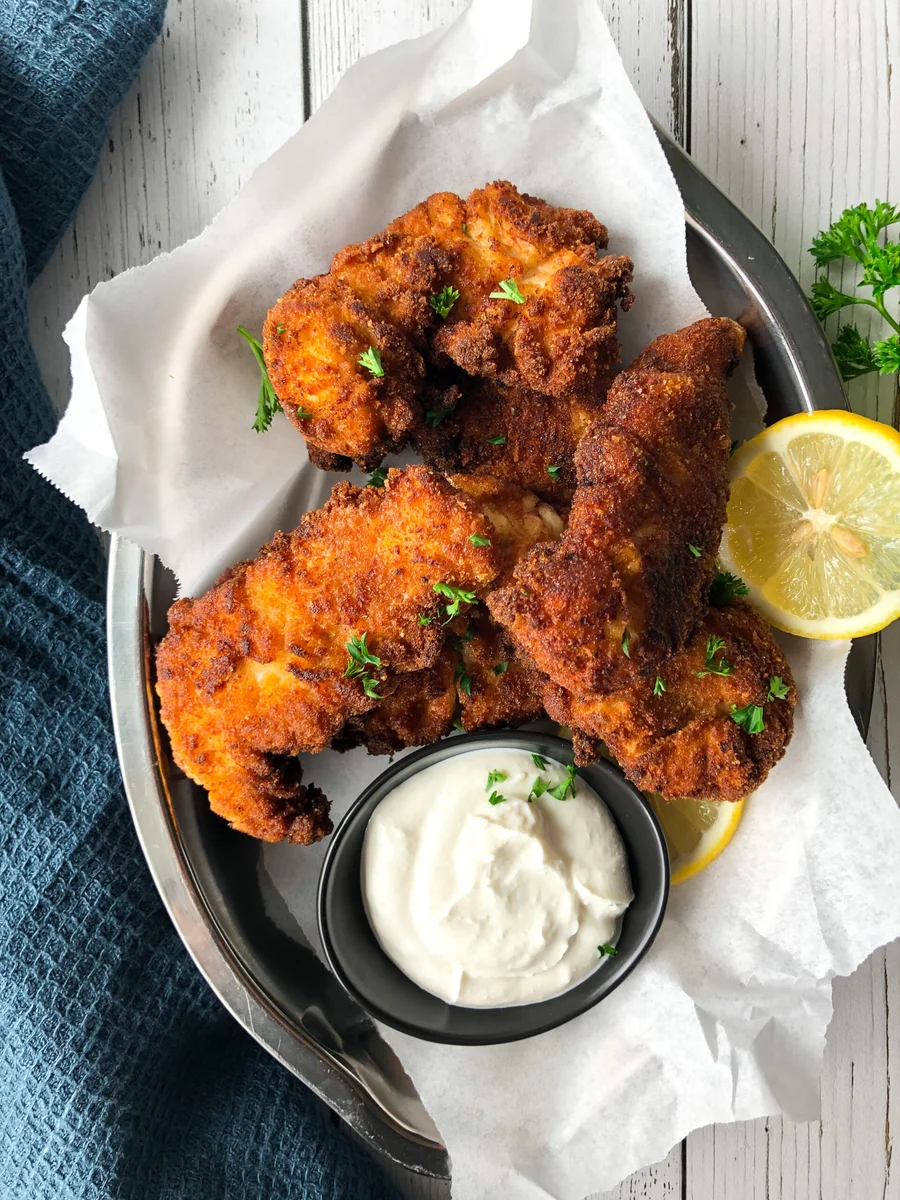
These American-style chicken fingers are coated in seasoned flour, herbed buttermilk and breadcrumbs, then fried until crisp and golden. They make a comforting main course, with lemon to cut through the rich, crunchy coating.
Ingredients
- 8–10chicken tenders
- 225 g (1½ cups)plain flour
- 5 ml (1 tsp)salt
- 3.75 ml (¾ tsp)ground black pepper
- 250 ml (1 cup)buttermilk
- 5 ml (1 tsp)chilli flakes
- 2.5 ml (½ tsp)salt
- 5 ml (1 tsp)Herbes de Provence
- 150 g (1½ cups)breadcrumbs
- 5 ml (1 tsp)salt
- 3.75 ml (¾ tsp)ground black pepper
- As needed for a depth of 2 cm (¾ inch)oil for frying
- To taste, optionallemon, for serving
Instructions
- 1
Dry the chicken
Pat the chicken tenders dry with a paper towel and set them aside.
- 2
Season the flour
Whisk the flour with 5 ml (1 tsp) salt and 3.75 ml (¾ tsp) ground black pepper in a shallow bowl. Set it aside.
- 3
Mix the buttermilk
In a second bowl, whisk together the buttermilk, chilli flakes, 2.5 ml (½ tsp) salt and Herbes de Provence. Set aside.
- 4
Season the breadcrumbs
Combine the breadcrumbs with 5 ml (1 tsp) salt and 3.75 ml (¾ tsp) ground black pepper in a third shallow bowl. Set aside.
- 5
Coat in flour
Working with one tender at a time, coat each piece evenly in the seasoned flour.
- 6
Dip in buttermilk
Dip the floured tenders, one at a time, into the buttermilk mixture.
- 7
Add breadcrumbs
Coat each tender evenly in the breadcrumb mixture, then set the coated pieces aside.
- 8
Heat the oil
Pour enough oil into a frying pan to reach a depth of 2 cm (¾ inch) and heat it to about 175°C (350°F). Without a thermometer, add a little oil or a small cube of bread; it is ready when it starts to sizzle.
- 9
Fry the chicken
Fry the tenders in batches, taking care not to crowd the pan. Cook until golden on the first side, about 7–10 minutes, then turn and continue cooking until the other side is golden. Transfer each batch to a plate lined with paper towel or to a rack, and repeat with the remaining tenders.
- 10
Finish with lemon
If you like, squeeze fresh lemon juice over the chicken fingers before serving.
What are chicken fingers?
Chicken fingers are strips of chicken coated in a crisp breading and fried, a familiar American-style comfort food often served with a dip or a squeeze of lemon. This version builds flavour in layers, seasoning the flour, buttermilk and breadcrumbs separately.
The chicken tender is naturally suited to quick cooking, while the buttermilk helps the coating cling and brings a gentle tang. Herbes de Provence and chilli flakes give the middle layer a fragrant, lightly spicy note.
Nutrition and macros by portion
The nutrition label shows one serving as written: 660 calories, 44g protein, 62g carbs, 25g fat.
| Portion | Adjustment | kcal | Protein | Carbs | Fat |
|---|---|---|---|---|---|
| Lighter | Smaller portion, extra salad | 462 kcal | 31g | 43g | 18g |
| This serving | As written | 660 kcal | 44g | 62g | 25g |
| Hungry | Add another tender | 990 kcal | 66g | 93g | 38g |
The chicken provides most of the protein, while the flour and breadcrumbs contribute much of the carbohydrate. Frying oil and the breading contribute most of the fat; serve with vegetables or salad to balance the plate with a fresh side.
Why use three coatings?
Flour: the first layer dries the surface and gives the buttermilk something to grip. Shake off any excess so the coating does not become thick or pasty.
Buttermilk: this moist layer carries the herbs and chilli and helps the breadcrumbs adhere. Turn each tender through it so there are no dry patches.
Breadcrumbs: the final layer creates the crisp outside. Press them on gently, then set each coated piece aside while you finish the batch.
Getting the frying oil right
Aim for about 175°C (350°F) before adding the chicken. If the oil is too cool, the coating can absorb more oil; if it is too hot, it may brown before the chicken is cooked through.
A thermometer gives the clearest reading. If using the bread test from the method, add only a small cube and look for an immediate sizzle.
Batch size and timing
Avoid crowding the pan: too many tenders at once can cool the oil and make it harder to turn them evenly. Fry in batches, leaving space around each piece.
The method gives about 7–10 minutes for the first side and asks you to continue until the second side is golden. Tenders vary in thickness, so check that the centre is cooked through rather than relying on colour alone.
Crisp coating cues
Look for an evenly golden breadcrumb crust before turning the tenders. Turning them too early can disturb the coating, so give it time to set against the pan.
Transfer cooked pieces to a rack or a paper-towel-lined plate as directed. A rack lets steam escape from underneath, helping the coating stay crisp.
What to serve alongside
A squeeze of lemon adds brightness to the savoury coating and is already suggested in the recipe. Serve the tenders with a fresh salad or steamed vegetables for a lighter contrast.
For a more filling meal, add potatoes or another starchy side. A dip can be served alongside, though it is not included in the ingredient list.
Recipe notes & tips
- Set out the three coating bowls before you start so the dipping process stays orderly.
- Keep one hand for the dry coatings and the other for the buttermilk to reduce sticky fingers.
- Let excess buttermilk drip off before coating each tender in breadcrumbs.
- Fry in batches to help the oil maintain its temperature.
- Use a rack after frying if you want to limit steam collecting beneath the coating.
- Squeeze the lemon over the tenders just before serving.
Variations
- More heat: Increase the chilli flakes in the buttermilk to suit your taste.
- Herb swap: Use another dried herb blend in place of Herbes de Provence.
- Extra lemon: Add finely grated lemon zest to the breadcrumbs for a citrus note.
- Coarser crunch: Use panko-style breadcrumbs in the same quantity.
- Serve with a dip: Offer a favourite dip on the side rather than adding it to the coating.
Common mistakes to avoid
- Wet chicken: Pat the tenders dry first so the flour can coat them evenly.
- Patchy breading: Coat each tender fully in flour, buttermilk and breadcrumbs in that order.
- Crowded pan: Fry in batches so the tenders have room and the oil stays hot.
- Oil too cool: Heat it to about 175°C (350°F) before frying.
- Turning too soon: Wait until the first side is golden so the crust has time to set.
- Relying only on colour: Check that the thickest part is cooked through, as golden breading alone does not confirm doneness.
How to store
Refrigerate leftover chicken fingers in a covered container for up to 3 days. Reheat in an oven or air fryer until hot throughout; microwaving is convenient but can soften the coating.
Frequently asked questions
Can I prepare the tenders ahead?
You can bread them shortly before cooking and keep them covered in the refrigerator. For the crispest result, fry them close to serving time.
How can I tell when the chicken is cooked?
Check the thickest tender to make sure the centre is cooked through. If you have a food thermometer, use it to check the centre rather than judging by the crust colour alone.
Can I use chicken breast instead of tenders?
Yes. Cut boneless chicken breast into strips of similar thickness so the pieces cook at a similar rate.
What if I do not have a thermometer for the oil?
The method suggests adding a small cube of bread or a little oil and checking for a sizzle. A thermometer is more precise, but keep a close eye on the pan either way.
Can I bake these instead of frying?
This method is written for frying, so baking will give a different texture and needs a separate baking time and temperature. For the stated result, follow the frying method.
What can I use instead of buttermilk?
The recipe specifies buttermilk for the middle coating. A substitute may change how the coating adheres and its flavour.
Cook it from the original
This recipe comes from miakouppa.com. Their page has the author’s own photos, notes and tips — the best place to cook it from.
Open the recipe on miakouppa.com