
Ligurian Focaccia | Homemade recipe
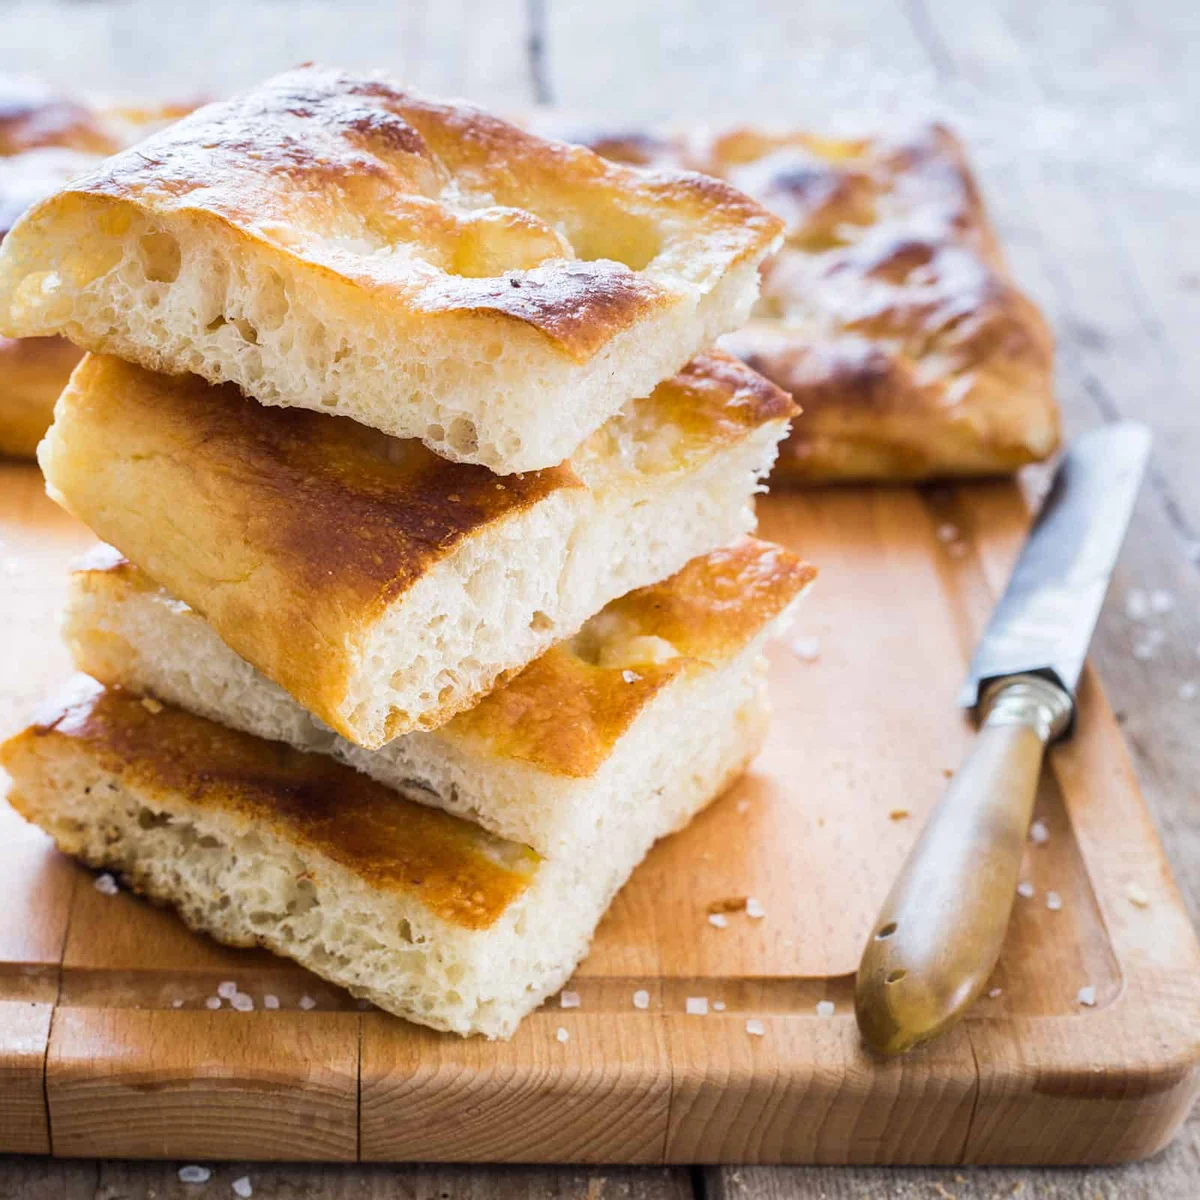
Ligurian focaccia has a crisp, golden base, a fragrant olive-oil finish and a soft, airy crumb. A biga and several rests build flavour and texture, making this a rewarding bake even for a first-time focaccia maker.
Ingredients
- 500 g (3⅓ cups)bread flour (Manitoba flour, if available)
- 300 ml (1¼ cups), at room temperaturewater
- 20 g (1 tbsp)extra-virgin olive oil
- 1 tspdried yeast
- 1 tspmalt or honey
- 10 g (1½ tsp)salt
- 180 ml (¾ cup), at room temperaturewater
- 2 tbspextra-virgin olive oil
- 1 tspsalt
- To tasteextra-virgin olive oil
- To tastecoarse salt
Instructions
- 1
Mix the biga
Put 150 g (1 cup) of the flour, the yeast, malt and 85 ml of the water in a medium bowl. Knead until combined, shape into a ball and cut a cross into the top. Leave to rise for about 2 hours, or until doubled in size.
- 2
Knead the dough
Put the remaining flour in the bowl of an electric mixer. Add the biga and the rest of the water, then knead on low speed until combined into a compact dough. With the mixer running, add the olive oil gradually and knead until absorbed. Add the salt and knead for 1 minute, until the dough is soft and elastic.
- 3
Let it rise
Shape the dough into a ball, cover the bowl with a clean, damp tea towel and leave it in a warm place until it has tripled in volume.
- 4
Shape the dough
Lightly flour the worktop and ease the dough out onto it. Slowly roll and shape it into a rectangle, using your hands as needed. Grease a 35 × 40 cm (14 × 17 in) baking tray and place the dough in it, shaping it to nearly fill the tray. Cover with cling film and leave to rise for about 50 minutes.
- 5
Proof in the tray
Once the dough has expanded to cover almost all the tray, gently draw it towards any uncovered corners if needed. Cover it again and leave to rise for 30–40 minutes.
- 6
Dimple the dough
Oil your hands and press your fingertips into the dough, spreading them slightly as they reach the bottom to make dimples.
- 7
Mix the brine
In a bowl, mix the 180 ml of water, 2 tablespoons of olive oil and 1 teaspoon of salt.
- 8
Add the brine
Pour the brine evenly over the focaccia. It may look like a lot of liquid; it will evaporate as the bread bakes.
- 9
Give it a final rise
Leave the focaccia to rest for about 1 hour while the oven heats. After the hour, drizzle over a little more olive oil and scatter with coarse salt.
- 10
Bake on the base
Preheat the oven to 250°C (482°F). Put the tray in direct contact with the bottom of the oven and bake for 8–10 minutes.
- 11
Finish the bake
Move the tray to the middle rack and bake for another 8–10 minutes. Lift one corner carefully with a knife to check the base: it should be dry and crisp. If it still looks wet, bake for a couple more minutes; the top should be a deep golden colour.
- 12
Cool and serve
Leave the focaccia in the tray for 5 minutes, then transfer it to a cooling rack. Brush with a little olive oil and let it cool slightly before cutting and serving.
What is Ligurian focaccia?
Focaccia is a leavened Italian flatbread, and Liguria is especially associated with versions finished generously with olive oil and salt. This one gets its character from a crisp base, a soft centre and dimples that catch the brine.
Biga: This small, firm pre-ferment is mixed ahead of the main dough and given time to rise. It adds an extra stage to the process, but the method remains straightforward.
Nutrition and macros by portion
The nutrition label shows one serving as written: 2075 calories, 0g protein, 0g carbs, 0g fat.
| Portion | Adjustment | kcal | Protein | Carbs | Fat |
|---|---|---|---|---|---|
| Lighter | Smaller focaccia portion | 1453 kcal | 0g | 0g | 0g |
| This serving | As written | 2075 kcal | 0g | 0g | 0g |
| Hungry | Larger focaccia portion | 3113 kcal | 0g | 0g | 0g |
The flour supplies most of the carbohydrates, while olive oil contributes most of the fat; the bread flour also provides some protein. Serve a piece with a generous salad or vegetables and a protein-rich accompaniment to make a more balanced plate.
Flour, water and the biga
Strong flour: Bread flour, such as Manitoba, helps the dough develop the elasticity needed to hold its shape through the long rise.
Measured water: The recipe divides water between the biga, main dough and brine. Follow those separate amounts as written; the dough becomes soft and elastic as it is kneaded.
The long rise
Biga: Leave it for about 2 hours, until doubled. The visual cue matters more than the clock, as room warmth can affect how quickly it rises.
Main dough: Let it rise until tripled in volume, then allow the shaped dough its two tray rests and final hour. These stages give the dough time to expand before baking.
Dimples and brine
Dimples: Press oiled fingertips down into the dough, spreading them slightly as they reach the bottom. This creates the characteristic uneven surface.
Brine: Pour it over the dough even if it looks like an unusually generous amount. The recipe allows it to soak in during the final rest and bake away in the oven.
Getting a crisp base
Two oven positions: The tray starts directly on the oven bottom for 8–10 minutes, then moves to the middle rack for another 8–10 minutes. Keep an eye on the colour as it finishes.
Doneness: Lift a corner carefully with a knife. The base should look dry and feel crisp, while the top should be a deep golden colour; give it a couple more minutes if the underside is still wet.
Serve and enjoy
Cooling: Leave the bread in the tray for 5 minutes, then move it to a rack so the base can stay crisp as it cools. A final brush of olive oil adds fragrance.
Serving: Cut it into pieces for a snack, or serve alongside soup, salad or antipasti for a more substantial meal.
Recipe notes & tips
- Use the rise cues as well as the stated timings, since dough can proof at different speeds.
- Keep the tea towel damp while the dough rises so its surface does not dry out.
- Oil your fingertips before dimpling to help press into the dough without sticking.
- Use a tray measuring 35 × 40 cm for the shaping and baking described here.
- Check the base before taking the focaccia out; give it a couple more minutes if it still looks wet.
- Let the baked focaccia cool on a rack after its 5-minute rest in the tray.
Variations
- Honey instead of malt: Use honey for the biga as the recipe allows.
- Manitoba flour: Use this strong flour if you have it, or choose another bread flour.
- Olive-oil finish: Add the final drizzle and brush as directed for a more pronounced olive-oil aroma.
- Coarse salt topping: Adjust the amount scattered over the top to suit your taste.
- Serve with soup: Pair a piece with soup to make a simple meal.
Common mistakes to avoid
- Rushing the biga: Leave it for about 2 hours or until doubled rather than moving on before it has risen.
- Adding the oil too quickly: Pour it in gradually while the mixer kneads so it can be absorbed.
- Skipping the tray rests: Give the dough both the 50-minute rise and the further 30–40 minutes to expand.
- Dimpling with dry hands: Oil your hands first to help press the dough without it sticking.
- Worrying about the brine: Pour it over as directed; the liquid will evaporate during baking.
- Removing it with a wet base: Check under a corner and bake for a couple more minutes if the base is not dry.
How to store
Once cool, store the focaccia in an airtight container at room temperature and eat within 2 days. Reheat briefly in a hot oven to refresh the crust; avoid sealing it away while still warm.
Frequently asked questions
How can I tell when the biga is ready?
It should have doubled in size after about 2 hours. If it has not yet doubled, give it more time rather than relying on the clock alone.
Why does the brine look like so much liquid?
That is expected in this method. The focaccia rests with the brine on top, and much of the liquid evaporates during baking.
Can I use honey instead of malt?
Yes. The recipe lists malt or honey for the biga, so use either one in the stated quantity.
How do I know the focaccia is baked through?
The top should be a deep golden colour and the underside should be dry and crisp. Lift a corner carefully with a knife to check the base.
Why does the dough need several rests?
The method gives the biga and main dough time to rise, then allows the shaped dough to expand in the tray and absorb some of the brine. Follow the sequence and use the stated volume cues.
Can I make the focaccia without a stand mixer?
The recipe uses an electric mixer for the main dough but does not give a hand-kneading alternative. If mixing by hand, aim for the same soft, elastic dough and add the oil gradually.
Cook it from the original
This recipe comes from maricruzavalos.com. Their page has the author’s own photos, notes and tips — the best place to cook it from.
Open the recipe on maricruzavalos.com