
BEST Canadian Butter Tarts
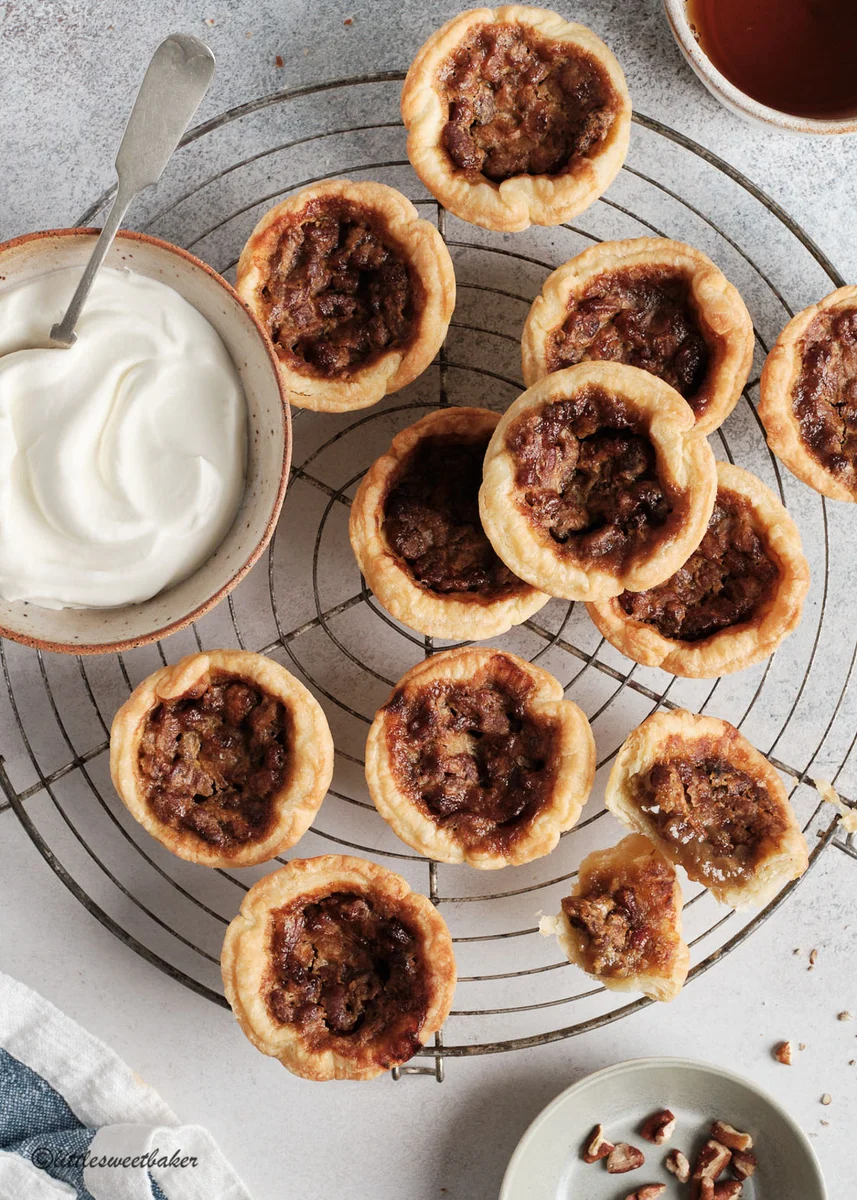
Canadian butter tarts have crisp, flaky pastry shells filled with a rich, buttery caramel mixture. This version makes 12 tarts and gives you an extra portion of pastry dough to freeze for another bake.
Ingredients
- 3 cups (375 g), plus more for dustingplain flour
- 1/2 tspbaking powder
- 1/2 tspsalt
- 1/2 cup (114 g), at room temperaturelard
- 1/2 cup (114 g), at room temperatureunsalted butter
- 1 largeegg
- 1 tspwhite vinegar
- about 1 cup (250 ml)cold water
- 3/4 cup (165 g), packedbrown sugar
- 1/3 cup (75 g)unsalted butter
- 1 tbsptable or whipping cream
- 1 tspvanilla extract
- 1 largeegg
- 1/2 cup, choppedpecans, walnuts, raisins or chocolate chips
Instructions
- 1
Mix dry ingredients
In a large bowl, toss together the flour, baking powder and salt.
- 2
Cut in fats
Use a pastry blender or two knives to cut the lard and 114 g butter into the flour mixture until it resembles coarse oatmeal.
- 3
Measure liquid
In a measuring jug, combine the first egg with the vinegar, then add enough cold water to bring the total volume to 250 ml.
- 4
Bring dough together
Gradually stir the liquid into the flour mixture, adding only enough for the dough to cling together.
- 5
Divide the dough
Turn the dough onto a lightly floured surface, gather it into a ball and divide it into two equal portions.
- 6
Chill the portions
Wrap both portions tightly. Freeze one for later and refrigerate the other for 1 hour.
- 7
Cut pastry circles
On a floured surface, roll the chilled dough to about 3 mm thick. Cut out as many 10 cm circles as possible, reroll the scraps and continue until you have 12.
- 8
Line the tin
Fit the pastry circles into a muffin tin and return it to the fridge until you are ready to fill the shells.
- 9
Heat the oven
Preheat the oven to 190°C and place a rack in the lower third.
- 10
Melt butter and sugar
In a small saucepan, melt the remaining 75 g butter with the brown sugar.
- 11
Finish the filling
Take the pan off the heat and stir in the cream and vanilla. Leave the mixture to cool until just warm, about 5 minutes, then whisk in the second egg.
- 12
Fill the shells
If using pecans, divide them among the pastry shells. Pour in the filling until each shell is half full.
- 13
Bake the tarts
Bake for 13–15 minutes, until the pastry edges are lightly golden and the filling is bubbling.
- 14
Cool and turn out
Cool the tarts completely in the tin. To release them, place a cooling rack upside down over the tin and flip it over, then turn each tart right side up individually.
What are Canadian butter tarts?
Butter tarts are a Canadian pastry: small pastry shells filled with a sweet, buttery centre that sets as it cools. This version pairs a flaky shell made with both lard and butter with a brown-sugar filling.
The method makes two equal portions of pastry dough, but uses one for these 12 tarts and saves the other in the freezer. Choose pecans, walnuts, raisins or chocolate chips for the filling, or leave the shells plain.
Nutrition and macros by portion
The nutrition label shows one serving as written: 370 calories, 4g protein, 38g carbs, 23g fat.
| Portion | Adjustment | kcal | Protein | Carbs | Fat |
|---|---|---|---|---|---|
| Lighter | Smaller tart portion | 259 kcal | 3g | 27g | 16g |
| This serving | As written | 370 kcal | 4g | 38g | 23g |
| Hungry | Larger tart portion | 555 kcal | 6g | 57g | 35g |
The brown sugar and pastry flour provide most of the carbohydrates, while the lard and butter contribute much of the fat. The egg and flour supply some protein. For a more balanced plate, serve one tart with fresh fruit.
Why use both lard and butter?
Pastry fats: the lard and butter are cut into the flour until the mixture looks like coarse oatmeal. Keeping them at room temperature, as specified, helps them combine with the dry ingredients.
Cold water: add it a little at a time rather than pouring in the full amount automatically. Stop once the dough holds together when gathered.
How to handle the pastry
Chilling: refrigerate the portion for 1 hour before rolling, and keep the lined muffin tin chilled until filling. This gives you a firmer pastry to work with.
Rolling: use a lightly floured surface and aim for an even thickness of about 3 mm. Reroll the scraps as needed to cut out 12 circles.
Getting the filling right
Warm mixture: melt the butter and brown sugar together, then take the pan off the heat before stirring in the cream and vanilla. Let it cool for about 5 minutes before adding the egg.
Egg: whisk it into the warm mixture only after it has cooled to the touch. This helps the filling combine smoothly without cooking the egg in the pan.
Filling and baking cues
Room to rise: fill each pastry shell only halfway, since the filling bubbles as it bakes. Add the chosen nuts, fruit or chocolate chips to the shells before pouring in the filling.
Doneness: bake at 190°C for 13–15 minutes on the lower-third rack. Look for lightly golden pastry edges and bubbling filling.
Serving and pairing
Cooling: let the tarts cool completely in the muffin tin before removing them. The filling needs time to settle, and the recipe’s rack-and-flip method can help release the tarts.
For a simple dessert plate, serve a tart with fresh berries or sliced fruit. Their freshness offers a contrast to the sweet, rich filling.
Recipe notes & tips
- Measure the cold water into the egg-and-vinegar mixture until the total reaches 250 ml.
- Add the liquid gradually and stop as soon as the dough holds together.
- Keep the pastry circles and lined muffin tin chilled while you prepare the filling.
- Let the melted butter and sugar mixture cool for about 5 minutes before whisking in the egg.
- Use the lower-third oven rack and check the tarts at 13 minutes.
- Cool the tarts completely before attempting to remove them from the tin.
Variations
- Pecan filling: divide chopped pecans between the shells before adding the filling.
- Walnut filling: use chopped walnuts in place of the pecans.
- Raisin filling: scatter raisins into the pastry shells for a fruitier centre.
- Chocolate filling: use chocolate chips in place of the nuts or raisins.
- Plain centres: leave out the optional add-ins for a smooth filling.
Common mistakes to avoid
- Adding all the water at once: stir it in gradually and stop when the dough clings together.
- Skipping the chill: refrigerate the dough for 1 hour so it is ready to roll.
- Overfilling the shells: fill only halfway to leave room for the filling to bubble.
- Adding the egg too soon: cool the butter mixture for about 5 minutes before whisking it in.
- Removing the tarts while hot: let them cool completely in the tin before turning them out.
How to store
Cool the tarts completely, then store them in an airtight container in the fridge for up to 4 days. Warm briefly in a low oven if you prefer them slightly warm, or serve at room temperature. The unused pastry portion can be kept tightly wrapped in the freezer for later use.
Frequently asked questions
Why does the recipe make extra pastry?
The dough is divided into two equal portions, and one is frozen for later. Use the refrigerated portion for the 12 tarts.
Can I use a different filling add-in?
Yes. The recipe lists pecans, walnuts, raisins or chocolate chips, and the add-in is optional.
How full should each pastry shell be?
Pour in filling until each shell is half full. It bubbles as the tarts bake, so leave space.
How do I know when the tarts are baked?
After 13–15 minutes at 190°C, the pastry should be lightly golden around the edges and the filling should be bubbling.
Why should the tarts cool in the tin?
The recipe calls for them to cool completely in the pan before removal. This also gives the filling time to settle.
Can I make the pastry ahead?
Yes. The method directs you to wrap one of the two dough portions tightly and freeze it for later use.
Cook it from the original
This recipe comes from littlesweetbaker.com. Their page has the author’s own photos, notes and tips — the best place to cook it from.
Open the recipe on littlesweetbaker.com