
Crusty Roasted Garlic and Rosemary Bread
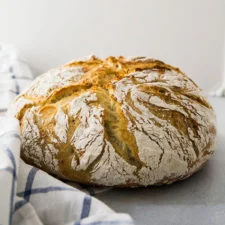
An easy homemade crusty bread recipe with roasted garlic and fresh rosemary!
Ingredients
- 1 head garlic
- 1 teaspoon olive oil
- salt to taste
- 2 1/4 teaspoons active dry yeast
- 1 teaspoon honey or sugar
- 1 1/4 cups warm water (about a hundred degrees Fahrenheit)
- 1 1/2 teaspoons Kosher salt
- 2 Tablespoons fresh chopped rosemary
- 8-10 roasted garlic cloves, roughly chopped
- 3 cups (360 grams) All-Purpose flour, plus extra for dusting
- 1 Tablespoon olive oil
Instructions
- 1
--- FOR THE ROASTED GARLIC: ---
- 2
Heat oven to 400 degrees F.
- 3
Trim the top off the head of garlic to expose the cloves inside.
- 4
Place garlic in a small lidded baking dish.
- 5
Drizzle garlic with olive oil and sprinkle with salt.
- 6
Cover garlic and roast for 30-45 minutes or until cloves are soft and lightly browned. Remove from oven and set aside to cool.
- 7
--- FOR THE BREAD: Make the dough & first rise (1 Hour) ---
- 8
Combine yeast, honey, and warm water in a large mixing bowl (you can also use a stand mixer fitted with a dough hook!) Let the yeast proof for about 5 minutes until the mixture is foamy.
- 9
Add salt, rosemary, and chopped roasted garlic to the bowl.
- 10
Add flour to bowl a bit at a time and stir with a wooden spoon or stiff spatula until all flour is incorporated and ingredients have just come together to form a slightly shaggy dough.
- 11
Drizzle dough with olive oil and turn the dough over to coat all sides. Cover with a clean tea towel and let rise on the counter for about 1 hour or until dough has doubled in size.
- 12
--- Shape the dough and final rise (30 minutes) ---
- 13
When dough has doubled in size, lightly flour a large cutting board.
- 14
Tip the dough out of the bowl and onto the cutting board. DON'T PUNCH THE DOUGH DOWN! We want to preserve all those nice air bubbles.
- 15
Pull each corner of the dough into the center of the loaf one at a time as if you're folding an envelope. Repeat this process 4-5 times until dough feels relatively stiff, then flip the dough over and lightly twist while pulling it towards you across the cutting board until you have a nice round loaf. (Watch our Easy Crusty French Bread video to see how we do this!)
- 16
Flour a proofing basket or a small mixing bowl and place your loaf into it seam-side down. Cover with a clean tea towel and let rise for 30 minutes.
- 17
--- Heat the oven ---
- 18
While your bread does its final rise, place an empty Dutch oven into your oven and heat to 450 degrees F.
- 19
--- Bake! ---
- 20
When the oven is hot, you're ready to go! Use oven mitts to pull the Dutch oven out and remove the lid.
- 21
Tip your bread dough gently out of the proofing basket back onto your floured cutting board. The seam side should face UP this time - that's what gives it a nice crackly look on top! You can tip the bread onto a piece of parchment paper here to make it easier to lift the bread in and out of your Dutch oven if you like.
- 22
VERY CAREFULLY (no burning yourself!) place the bread seam side up into your hot Dutch oven.
- 23
Put your oven mitts back on, place the lid onto your Dutch oven, and slide the whole thing back into your hot oven.
- 24
Cook bread for 30 minutes.
- 25
After 30 minutes, remove the lid from your Dutch oven. The bread should be crusty and lightly browned. Continue cooking, uncovered, for 10-20 minutes more until the bread has deepened in color and you have a beautiful browned crust.
- 26
When the bread is done, use oven mitts to pull the pot out of your oven.
- 27
Use a long spatula to lift the bread out of the Dutch oven and onto a cooling rack. Let cool for at least 20 minutes before cutting into it.
- 28
Slice, slather with butter, and enjoy!
Cook it from the original
This recipe comes from lifeasastrawberry.com. Their page has the author’s own photos, notes and tips — the best place to cook it from.
Open the recipe on lifeasastrawberry.com