
Easy Vanilla Ice Cream Recipe
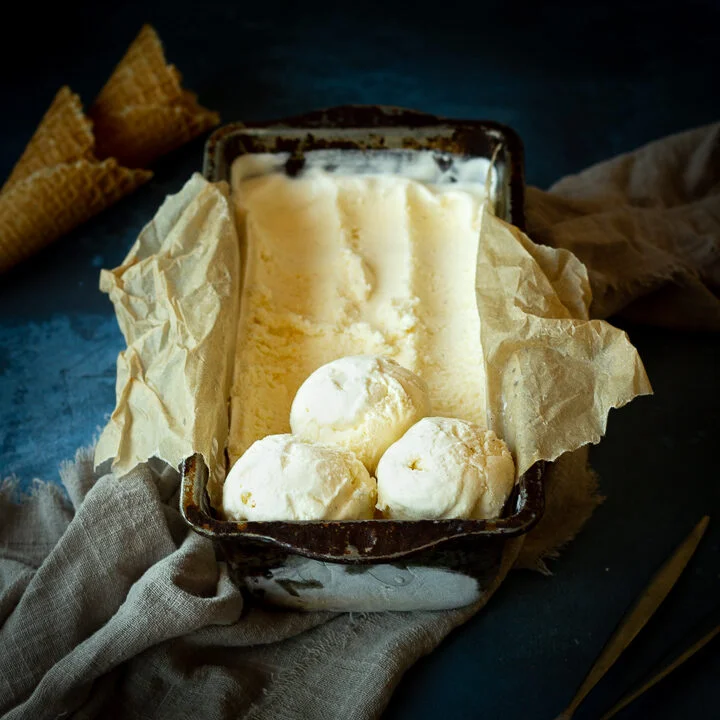
This churned vanilla ice cream combines double cream and whole milk for a rich, smooth dessert with a simple vanilla flavour. It takes about 30 minutes to churn, then needs time in the freezer to firm up before serving.
Ingredients
- 420 ml (1¾ cups)Double cream
- 300 ml (1¼ cups)Whole milk
- 100 g (¾ cup)Icing sugar
- ¼ tspSalt
- 1 tbspVanilla paste
Instructions
- 1
Prepare the equipment
If using a loaf tin, line it, and set up your ice cream churner. Mix the double cream and whole milk together in a jug.
- 2
Dissolve the sugar
Whisk the icing sugar and salt into the cream mixture until they have dissolved.
- 3
Add the vanilla
Whisk in the vanilla paste until it is evenly distributed through the mixture.
- 4
Churn the mixture
Pour the mixture into your ice cream churner and churn for 20–25 minutes, until it has thickened.
- 5
Freeze until firm
Transfer the ice cream to the prepared loaf tin or a plastic tub and wrap or cover it well. Freeze until completely firm before serving.
What is vanilla ice cream?
Vanilla ice cream is a familiar frozen dessert made here with cream, milk, sugar, salt and vanilla paste. This version uses an ice cream churner to incorporate air as the mixture thickens, helping create a creamy texture.
Its straightforward flavour makes it easy to serve on its own or alongside fruit and other desserts. The balance of double cream and whole milk gives it a rich finish.
Nutrition and macros by portion
The nutrition label shows one serving as written: 257 calories, 3g protein, 16g carbs, 20g fat.
| Portion | Adjustment | kcal | Protein | Carbs | Fat |
|---|---|---|---|---|---|
| Lighter | Smaller scoops | 180 kcal | 2g | 11g | 14g |
| This serving | As written | 257 kcal | 3g | 16g | 20g |
| Hungry | Larger scoop | 386 kcal | 5g | 24g | 30g |
The carbohydrate comes mainly from the icing sugar, while double cream contributes most of the fat and whole milk and cream provide some protein. Serve a scoop with fruit, or alongside a smaller portion of cake, for a more balanced dessert plate.
Why use these ingredients?
Double cream: its high fat content gives the churned ice cream a full, smooth texture. Whole milk loosens the mixture so it can be whisked and churned.
Vanilla paste: it gives the mixture an even vanilla flavour. Whisk it in thoroughly so it is distributed throughout.
Dissolve the sugar first
Sugar and salt: whisk them into the cream and milk until dissolved before adding the vanilla. This helps avoid a gritty texture in the finished ice cream.
Check the mixture as you whisk; if you can still feel sugar grains, keep whisking before moving on.
Watch the churn
Timing: churn for 20–25 minutes, as directed, and look for a noticeably thicker mixture. Churners can vary, so use the thickened texture as well as the clock.
The ice cream will still need to freeze completely in its container before serving. Churning thickens it; freezing firms it up.
Choosing a container
Loaf tin: line it before you start if you plan to use it, then transfer the churned ice cream into it. Wrap it well before freezing.
Plastic tub: use a freezer-safe tub and cover it securely. Either option works for the final freeze.
How to serve it
Serve scoops on their own or alongside fresh fruit, cake or a warm pudding. The mild vanilla flavour pairs well with desserts that have a stronger flavour or a different texture.
For neater scoops, let the ice cream soften briefly at room temperature before serving, rather than leaving it out until it melts.
Recipe notes & tips
- Set up the churner before mixing so the prepared base can be churned straight away.
- Whisk the sugar and salt until dissolved to help keep the texture smooth.
- Distribute the vanilla paste evenly through the mixture before churning.
- Use the thickened texture as your cue within the 20–25-minute churning time.
- Cover the container well before placing it in the freezer.
Variations
- Berry topping: serve each scoop with fresh berries for a fruity contrast.
- Chocolate pairing: add chocolate shavings when serving for a little crunch.
- Coffee flavour: serve with a small pour of cooled espresso for a coffee-vanilla dessert.
- Fruit ripple: swirl fruit purée through the churned ice cream before freezing.
- Biscuit pieces: fold crushed biscuits through the churned ice cream before transferring it to the container.
Common mistakes to avoid
- Undissolved sugar: whisk the mixture until the grains have dissolved before adding the vanilla.
- Uneven vanilla: whisk the paste through thoroughly so each scoop is flavoured consistently.
- Stopping too early: churn until the mixture has thickened, allowing 20–25 minutes.
- Serving too soon: freeze the churned mixture completely before scooping.
- Leaving it uncovered: wrap the loaf tin or cover the tub well before freezing.
How to store
Keep the ice cream covered in a freezer-safe container and serve it from frozen. For the best texture, use it within about 1–2 weeks; let it soften briefly at room temperature before scooping rather than reheating it.
Frequently asked questions
Do I need an ice cream churner?
This recipe is written for an ice cream churner, which thickens the mixture over 20–25 minutes. Without one, the method would need to be adapted.
How do I know when the ice cream is churned?
It should be noticeably thicker after 20–25 minutes. It will still need to freeze completely in the loaf tin or tub before serving.
Can I use a plastic tub instead of a loaf tin?
Yes. Transfer the churned ice cream to a plastic tub and cover it securely before freezing.
Why does the mixture need to be whisked before churning?
Whisking dissolves the icing sugar and salt and spreads the vanilla paste evenly through the dairy mixture.
How long does the recipe take?
The listed total time is 30 minutes, including 20–25 minutes of churning. Freezing until completely firm takes additional time.
Cook it from the original
This recipe comes from kitchenmason.com. Their page has the author’s own photos, notes and tips — the best place to cook it from.
Open the recipe on kitchenmason.com