
Injeolmi (Korean Sweet Rice Cake)
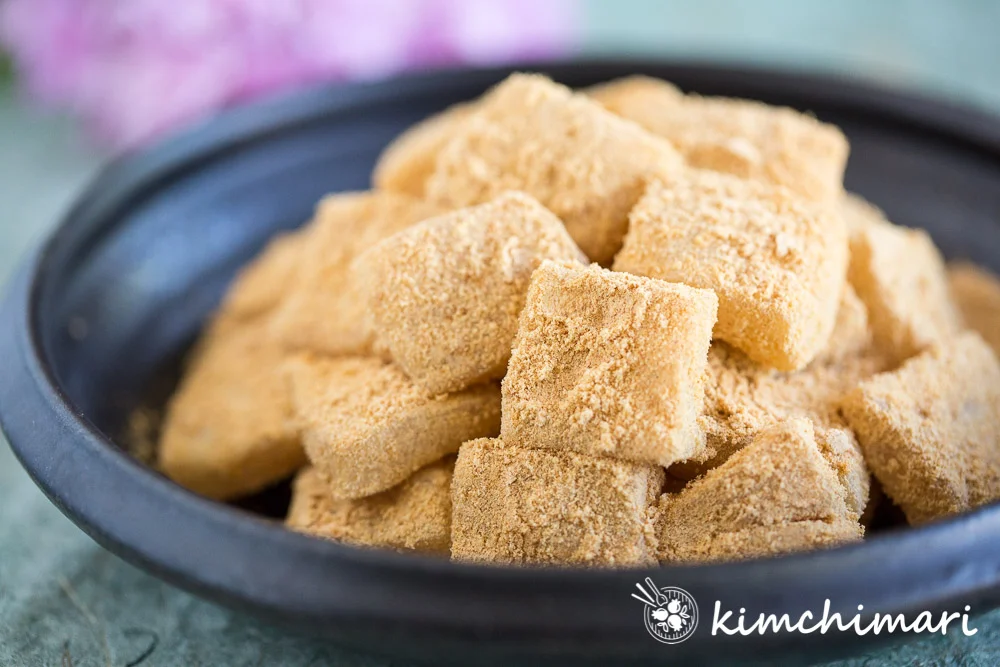
Injeolmi is a soft, chewy Korean rice cake coated in roasted soybean powder. This quick microwave version needs only a few ingredients and is ready in about 10 minutes.
Ingredients
- 300 g (2 cups)sweet rice flour (Mochiko flour)
- 25 g (2 tbsp)sugar
- 5 g (1 tsp)salt
- 310 ml (1¼ cups)water
- 60 g (½ cup)roasted soybean powder
- 2.5 g (½ tsp)sugar
- 0.6 g (⅛ tsp)salt
Instructions
- 1
Prepare the coating
Spread the roasted soybean powder over the bottom of a sheet pan or brownie pan, covering roughly a 23 × 20 cm area for this quantity. Sprinkle about 1 tsp sugar and a light scattering of salt over the powder, then set the pan aside.
- 2
Mix the dry ingredients
Put the sweet rice flour, salt and sugar in a microwave-safe bowl and whisk them together.
- 3
Add the water
Pour the water into the flour mixture and stir with a spatula until no dry flour remains, scraping the bottom of the bowl as you mix. Smooth the surface and cover the bowl with cling film.
- 4
Microwave the mixture
Microwave on HIGH for 2 minutes. Carefully remove the bowl and peel back the cling film, watching out for hot steam. Stir the mixture so the cooked layer on top moves to the bottom and the uncooked mixture comes up; cover it again.
- 5
Cook it again
Microwave on HIGH for another 2 minutes. Uncover the bowl, stir the mixture, then cover it again.
- 6
Finish the dough
Microwave on HIGH for 1 minute more. Uncover the bowl, dip the spatula in cold water and mix a couple of times; repeat this 2–3 times. Alternatively, knead the dough in a stand mixer for 1–2 minutes, sprinkling in about ½–1 tbsp water as you work.
- 7
Spread the rice cake
Have the soybean-coated pan and a bowl of cold water ready. Put on disposable gloves if you like, then use a spatula to gather the hot rice cake into one ball and transfer it to the centre of the pan. Wet your gloved hands with cold water and press the dough out quickly, re-wetting them if it feels too hot or sticky. Continue until it covers most of the soybean powder or reaches your preferred thickness.
- 8
Cut and coat
Cover the top with more soybean powder. Use scissors to cut the rice cake into strips, then cut the strips into squares or rectangles. Coat the cut sides of each piece in soybean powder.
- 9
Serve the injeolmi
Enjoy the rice cakes with tea and honey for dipping.
What is injeolmi?
Injeolmi is a Korean tteok, or rice cake, made from glutinous rice and commonly finished with roasted soybean powder. It is known for its pleasantly chewy texture and nutty coating.
This quick version uses sweet rice flour and a microwave rather than steaming whole rice and pounding it. Short bursts of cooking with stirring in between help the mixture cook through evenly.
Nutrition and macros by portion
The nutrition label shows one serving as written: 388 calories, 10g protein, 71g carbs, 5g fat.
| Portion | Adjustment | kcal | Protein | Carbs | Fat |
|---|---|---|---|---|---|
| Lighter | Smaller pieces, less honey | 272 kcal | 7g | 50g | 4g |
| This serving | As written | 388 kcal | 10g | 71g | 5g |
| Hungry | Larger portion | 582 kcal | 15g | 107g | 8g |
The sweet rice flour supplies most of the carbohydrates, while the soybean powder contributes protein and some fat. For a more balanced plate, serve a smaller portion alongside fruit or another savoury snack.
Choosing the flour
Sweet rice flour: Look for glutinous rice flour, often sold as Mochiko. Despite the name, it is not wheat flour and is what gives the cake its characteristic stretch and chew.
Soybean powder: Use roasted soybean powder for the coating. Its toasted flavour complements the mild rice cake, and a generous layer helps keep the pieces from sticking together.
Why the cooking is staged
Microwave in bursts: The recipe cooks the mixture for 2 minutes, stirs it, cooks for another 2 minutes, stirs again, then gives it a final 1 minute. The stirring moves the more-cooked outer layer through the mixture so it can cook more uniformly.
Handle steam carefully: Lift the cling film away from you when uncovering the bowl. The trapped steam can be very hot.
Getting the texture right
Cooked dough: The rice cake should come together as a cohesive, sticky mass after the final microwave burst and mixing. If using the stand-mixer alternative, knead for 1–2 minutes and sprinkle in the stated water as needed.
Even thickness: Press the dough out over the soybean powder while it is still warm. Wetting your gloved hands helps limit sticking and makes the hot dough easier to spread.
Cutting and coating
Scissors: Cut the spread rice cake into strips, then snip those into squares or rectangles. This sticky dough is easier to cut with scissors than with a knife.
Cut sides: Roll or press each freshly cut edge into soybean powder so no sticky surface is left exposed. Keep extra powder nearby as you portion the pieces.
Serving ideas
Tea and honey: The recipe suggests serving the pieces with tea and honey for dipping. The honey is a serving suggestion rather than part of the measured ingredients.
On a snack plate: Serve the injeolmi soon after making it, while it is soft and chewy. Keep the pieces lightly separated or well coated so they do not cling to one another.
Recipe notes & tips
- Use a bowl large enough to stir the mixture without spilling.
- Scrape the bottom of the bowl when mixing in the water so no dry flour is left behind.
- Uncover the bowl carefully after each microwave burst to avoid hot steam.
- Keep the cold water and soybean-coated pan ready before handling the hot dough.
- Wet your hands or spatula again if the dough begins to stick.
- Coat the cut edges promptly so they do not stick to the board or to each other.
Variations
- Tea-time serving: Offer the pieces with tea and honey for dipping, as suggested in the recipe.
- Different shapes: Cut the cake into bite-sized squares or longer rectangles.
- Thicker pieces: Spread the dough over a smaller area of the pan for a thicker cut.
- More coating: Add extra roasted soybean powder to the pan if you want a heavier dusting.
- Mixer method: Knead the cooked dough in a stand mixer for 1–2 minutes instead of mixing it by hand.
Common mistakes to avoid
- Dry flour at the bottom: Scrape the bowl thoroughly while stirring in the water.
- Uneven cooking: Stir between microwave bursts, bringing the cooked top layer down into the mixture.
- Steam burns: Peel the cling film back carefully and keep your face away from the escaping steam.
- Sticky hands: Wet your gloves with cold water before pressing and spreading the dough.
- Bare cut edges: Coat each cut side in soybean powder so the pieces do not stick together.
- Leaving it uncovered: Keep the rice cake coated with soybean powder, which helps prevent it from drying out.
How to store
Injeolmi is best eaten fresh, while soft and chewy. Keep leftovers in an airtight container at room temperature and eat them as soon as possible; refrigeration can make rice cake firm. If reheating, warm briefly until softened.
Frequently asked questions
Can I make injeolmi without a microwave?
This recipe gives a microwave method and a stand mixer as an alternative for kneading the cooked dough, not for cooking it. The stated method relies on microwave cooking in three bursts.
What is sweet rice flour?
It is glutinous rice flour, also called Mochiko in the recipe. It gives the rice cake its chewy texture.
Why do I need to stir the mixture between microwave bursts?
The top layer cooks first, so stirring moves it through the rest of the mixture. This helps the dough cook more evenly.
Why is the rice cake so sticky?
Sticky dough is expected with glutinous rice flour. Wetting the spatula and your gloved hands with cold water helps you mix and spread it.
Can I cut it with a knife?
The recipe uses scissors to portion the sticky dough into strips and then smaller pieces. Coat the freshly cut sides with soybean powder.
How should I serve injeolmi?
The recipe suggests serving it with tea and honey for dipping. The honey is optional and is not included in the measured ingredients.
Cook it from the original
This recipe comes from kimchimari.com. Their page has the author’s own photos, notes and tips — the best place to cook it from.
Open the recipe on kimchimari.com