
Masala Chips
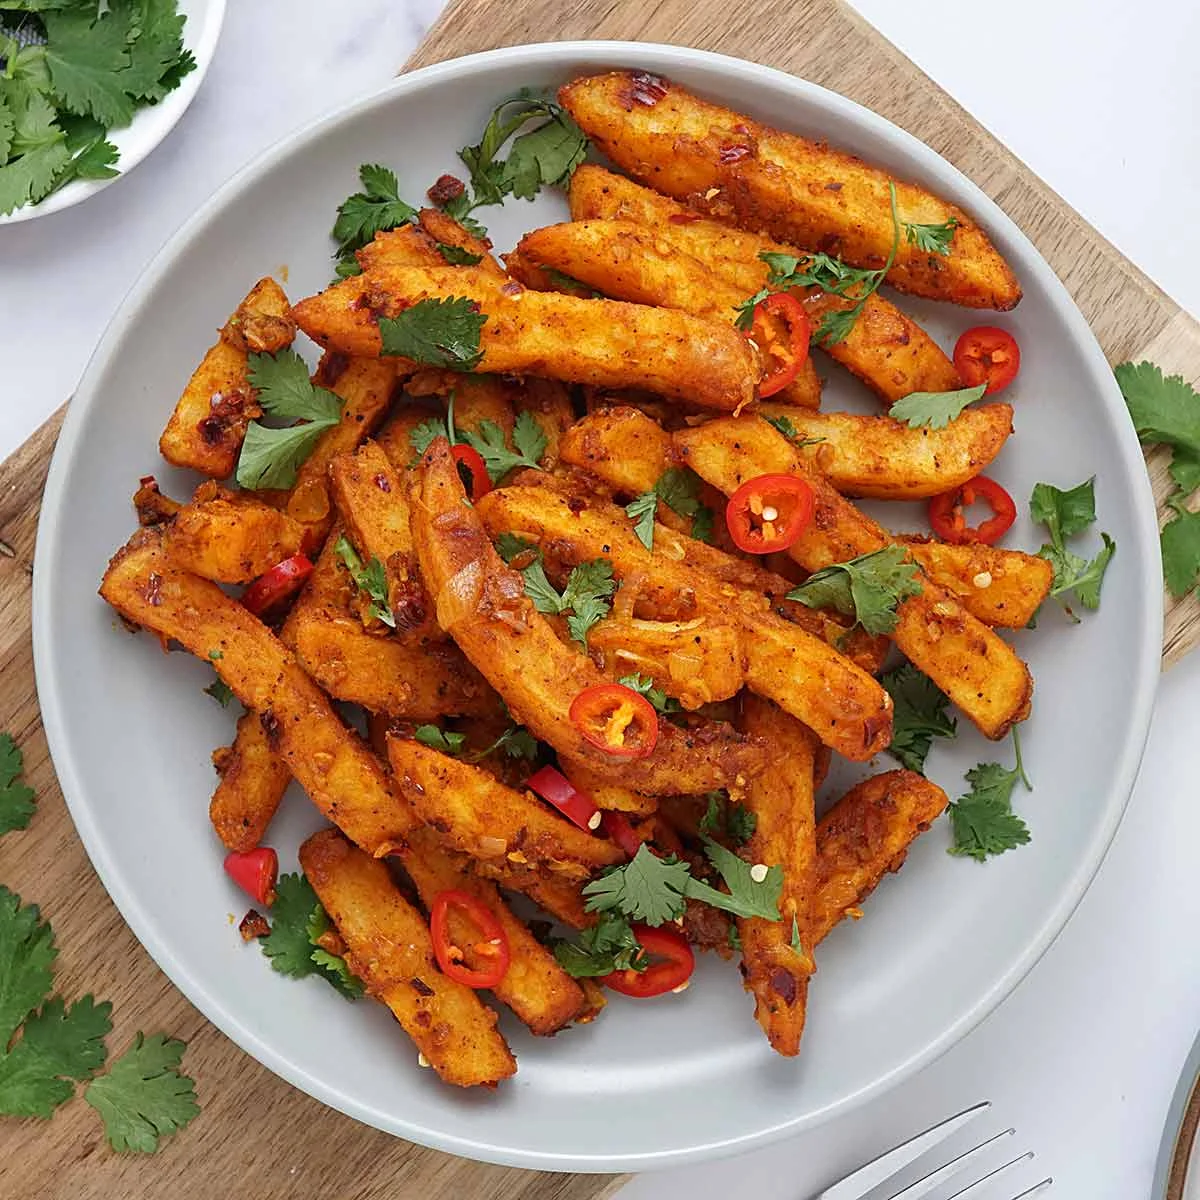
Masala chips are crisp chips coated in a quick, savoury sauce of onion, garlic, curry spices and ketchup. They make an easy British Indian takeaway-style snack or side, ready in about 15 minutes.
Ingredients
- 350 gChips (oven chips or fresh or frozen chips of your choice)
- as neededOil for frying, or bake in the oven according to packet instructions
- 1 tbspGarlic, finely chopped
- 1 mediumOnion, finely chopped
- 2 tbspTomato ketchup
- ½ tspTurmeric
- 1 tspCurry powder
- ½ tspSalt
- ½ tspCrushed chilli, or paprika or chilli powder
- ½ tspBlack pepper
- 1 tbspVegetable or other neutral-flavoured oil
- 2 tbspWater
- to tasteChilli pepper or green chilli, thinly sliced
- to tasteCoriander, roughly chopped
Instructions
- 1
Cook the chips
Bake, deep-fry or air-fry the chips according to the packet instructions, until crisp and golden.
- 2
Fry the aromatics
Set a pan over low-medium heat and add 1 tablespoon of oil. Stir-fry the onion for a few seconds, then add the garlic and cook until lightly browned.
- 3
Make the sauce
Add the turmeric, curry powder, crushed chilli and black pepper, and stir-fry for a few seconds until fragrant. Mix in the ketchup, salt and 2 tablespoons of water; add a little more water if needed.
- 4
Toss the chips
Stir until the sauce begins to thicken, then add the cooked chips. Toss to coat them evenly and cook together for 1 minute.
- 5
Garnish and serve
Turn off the heat and scatter over the chopped coriander and chilli slices. Transfer to a serving plate and serve immediately.
What are masala chips?
Masala chips are a British Indian takeaway-style dish: cooked chips tossed with a warmly spiced, savoury sauce. This version uses onion, garlic, curry powder and ketchup for a quick coating that is easy to make at home.
The contrast is the appeal: crisp chips meet a glossy, tangy sauce, with fresh coriander and sliced chilli added at the end.
Nutrition and macros by portion
The nutrition label shows one serving as written: 379 calories, 4g protein, 43g carbs, 22g fat.
| Portion | Adjustment | kcal | Protein | Carbs | Fat |
|---|---|---|---|---|---|
| Lighter | Bake the chips | 265 kcal | 3g | 30g | 15g |
| This serving | As written | 379 kcal | 4g | 43g | 22g |
| Hungry | Add a larger portion | 569 kcal | 6g | 65g | 33g |
Most of the carbohydrates come from the potatoes, while the frying oil and added oil provide most of the fat; the dish contains relatively little protein. Pair a portion with a protein-rich dish and vegetables for a more balanced plate.
Choosing the chips
Oven chips: follow the packet instructions and cook them until properly crisp before adding them to the sauce.
Fresh or frozen chips: either can be used, as long as they are cooked through and golden. Keeping the chips separate from the sauce until the final toss helps them hold their texture.
Building the flavour
Onion and garlic: give the sauce its savoury base. Cook them over low-medium heat so the garlic turns lightly golden rather than scorching.
Spices and ketchup: a brief stir in the pan releases the spices' aroma, while ketchup brings a sweet-tangy note. Add the water to help the mixture become a sauce rather than a dry coating.
Getting the texture right
Thickening: stir the sauce until it starts to thicken, then add the chips. If it looks too thick to coat them, add a small splash of water.
Final toss: one minute is enough to coat the chips while keeping some crispness. Serve straight away, as the sauce gradually softens them.
Serving the chips
Coriander and chilli: add these after turning off the heat so the herbs stay fresh and the chilli retains its bite. Adjust the amount of chilli to suit your preference.
On the plate: serve as a snack or alongside a curry, grilled vegetables or a simple salad. A cooling dip can also temper the spice.
Recipe notes & tips
- Cook the chips until crisp before tossing them with the sauce.
- Keep the pan at low-medium heat while cooking the onion and garlic.
- Stir the spices briefly so they become fragrant without burning.
- Add water a little at a time if the sauce needs loosening.
- Toss the chips for just 1 minute to help them keep some crispness.
- Serve as soon as the coriander and chilli have been added.
Variations
- Adjust the heat: use paprika instead of crushed chilli for a milder finish.
- Use green chilli: slice it thinly and add it as the recipe's fresh garnish.
- Try a different curry powder: use your preferred blend, keeping the stated amount.
- Add extra coriander: scatter more over the chips just before serving.
- Choose your cooking method: bake, deep-fry or air-fry the chips according to their packet instructions.
Common mistakes to avoid
- Soft chips: cook them until crisp and golden before tossing with the sauce.
- Burnt garlic: add it after the onion and cook over low-medium heat until only lightly browned.
- Scorched spices: stir them for just a few seconds, until fragrant.
- Thick, claggy sauce: loosen it with a little more water as needed.
- Soggy chips: coat them at the end and serve immediately.
- Uneven coating: toss the chips thoroughly in the pan for the full 1 minute.
How to store
These chips are best eaten immediately, as the sauce softens them as they stand. If needed, refrigerate leftovers in a covered container and reheat in an oven or air fryer until hot; they will be less crisp than freshly made.
Frequently asked questions
Can I use frozen chips?
Yes. Cook them according to the packet instructions until crisp and golden before tossing them with the sauce.
Can I bake the chips instead of frying them?
Yes. Bake them according to the packet instructions, as the recipe allows, and make the sauce separately in the pan.
How can I make the sauce less spicy?
Use paprika instead of crushed chilli, or reduce the chilli and leave off the fresh chilli garnish.
Why add water to the sauce?
It helps the ketchup and seasonings form a coating. Add a little more if the sauce thickens too much before the chips go in.
Can I prepare masala chips ahead?
You can cook the chips and prepare the sauce separately, but combine them just before serving to preserve as much crispness as possible.
Cook it from the original
This recipe comes from khinskitchen.com. Their page has the author’s own photos, notes and tips — the best place to cook it from.
Open the recipe on khinskitchen.com