
Gluten Free & Keto Bread With Yeast
Nutrition per Serving
174
Calories
5g
Protein
6g
Carbs
14g
Fat
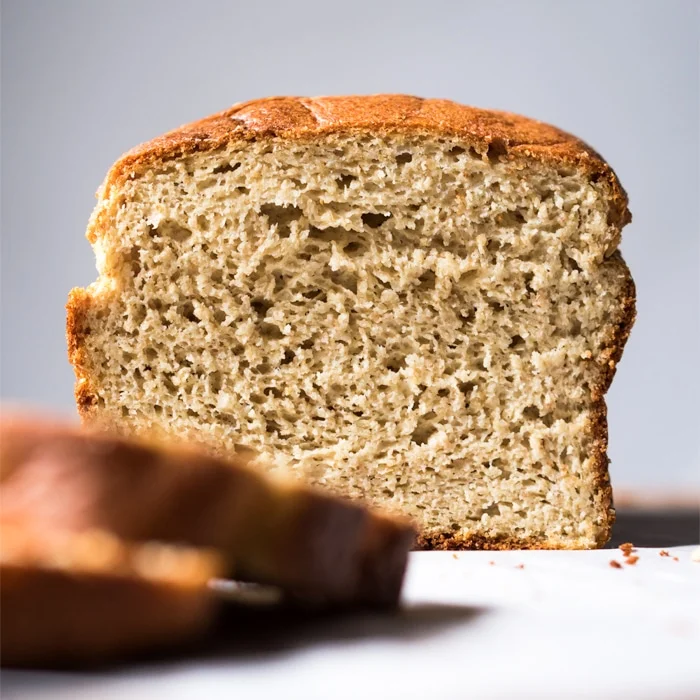
Count on this gluten free and keto bread with yeast to be soft, fluffy, absolutely delicious and with a killer crumb. Plus, with less than half the amount of eggs as your usual low carb bread recipe, this non-eggy sandwich bread will surely become a staple!Oh, and if baking with cups rather than grams is your thing, just click on US Cups for an instant conversion. Though for best results we (highly!!) suggest you weight your ingredients here.
📝 Ingredients
- 2 teaspoons active dry yeast
- 2 teaspoons inulin (or maple sirup, honey, to feed the yeast*)
- 120 ml water (lukewarm between 105-110°F)
- 168 g almond flour (**)
- 83 g golden flaxseed meal (finely ground)
- 15 g whey protein isolate
- 18 g psyllium husk (finely ground)
- 2 teaspoons xanthan gum (or 4 teaspoons ground flaxseed meal**)
- 2 teaspoons baking powder
- 1 teaspoon kosher salt
- 1/4 teaspoon cream of tartar
- 1/8 teaspoon ground ginger
- 1 egg (at room temperature)
- 110 g egg whites (about 3, at room temperature)
- 56 g grass-fed unsalted butter (or ghee, melted and cooled)
- 1 tablespoon apple cider vinegar
- 58 g sour cream (or coconut cream + 2 tsp apple cider vinegar)
👨🍳 Instructions
- 1--- For the paleo & keto bread ---
- 2See recipe video for guidance on keto yeast breads. And be sure to check out the post for full deets, tips and possible subs!
- 3Line a 8.5 x 4.5 inch loaf pan with parchment paper (an absolute must!). Set aside.
- 4Add yeast and maple syrup (to feed the yeast, see notes) to a large bowl. Heat up water to 105-110°F, and if you don't have a thermometer it should only feel lightly warm to touch. Pour water over yeast mixture, cover bowl with a kitchen towel and allow to rest for 7 minutes. The mixture should be bubbly, if it isn't start again (too cold water won't activate the yeast and too hot will kill it).
- 5Mix your flours while the yeast is proofing. Add almond flour, flaxseed meal, whey protein powder, psyllium husk, xanthan gum, baking powder, salt, cream of tartar and ginger to a medium bowl and whisk until thoroughly mixed. Set aside.
- 6Once your yeast is proofed, add in the egg, egg whites, lightly cooled melted butter (you don't want to scramble the eggs or kill the yeast!) and vinegar. Mix with an electric mixer for a couple minutes until light and frothy. Add the flour mixture in two batches, alternating with the sour cream, and mixing until thoroughly incorporated. You want to mix thoroughly and quickly to activate the xanthan gum, though the dough will become thick as the flours absorb the moisture.
- 7Transfer bread dough to prepared loaf pan, using a wet spatula to even out the top. Cover with a kitchen towel and place in a warm draft-free space for 50-60 minutes until the dough has risen just past the top of the loaf pan. How long it takes depends on your altitude, temperature and humidity- so keep an eye out for it every 15 minutes or so. And keep in mind that if you use a larger loaf pan it won't rise past the top.
- 8Preheat oven to 350°F/180°C while the dough is proofing. And if you're baking at high altitude, you'll want to bake it at 375°F/190°C.
- 9Place the loaf pan over a baking tray and transfer gently into the oven. Bake for 45-55 minutes until deep golden, covering with a lose foil dome at minute 10-15 (just as it begins to brown). Just be sure that the foil isn't resting directly on the bread.
- 10Allow the bread to rest in the loaf pan for 5 minutes and transfer it to a cooling rack. Allow to cool completely for best texture- this is an absolute must, as your keto loaf will continue to cook while cooling! Also keep in mind that some slight deflating is normal, don't sweat it!
- 11Keep stored in an airtight container (or tightly wrapped in cling film) at room temperature for 4-5 days, giving it a light toast before serving. Though you'll find that this keto bread is surprisingly good even without toasting!
About the Chef & Original Recipe
This recipe was published by gnom-gnom.com. Visit the original source for step-by-step photos, chef notes and additional details.
Source: gnom-gnom.com