
Gluten-Free Vegan Cannoli’s
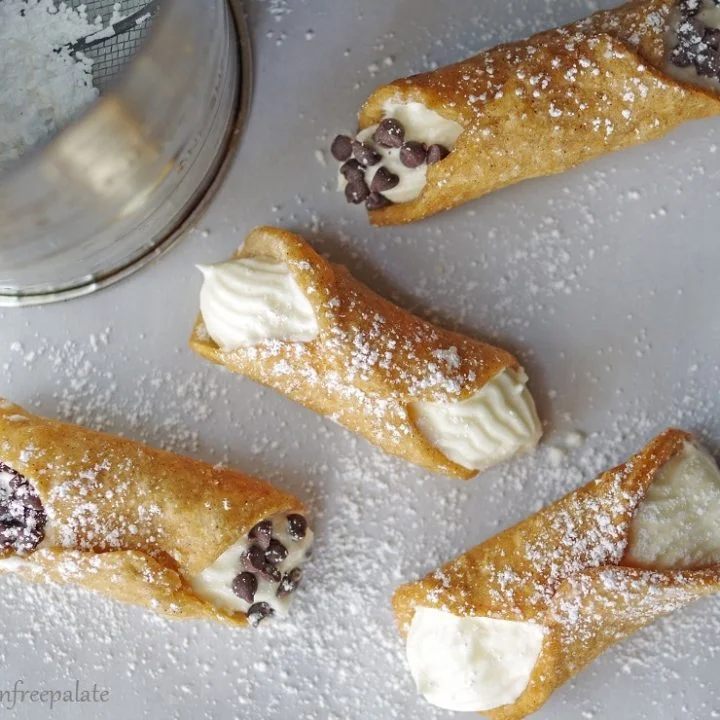
These gluten-free vegan cannoli have crisp fried shells and a smooth, creamy filling. They make a festive dessert when you want a dairy-free and allergen-conscious take on a classic pastry.
Ingredients
- 1 boxEnjoy Life Foods pizza crust mix
- 25 g (2 tablespoons)granulated sugar
- 1½ teaspoonsground cinnamon
- 30 ml (2 tablespoons)oil
- 315 ml (1⅓ cups)water
- 113 g (½ cup)dairy-free butter, at room temperature
- 95 g (½ cup)palm shortening
- 60 ml (¼ cup)vegan sour cream or unsweetened dairy-free yoghurt
- 360 g (3 cups)icing sugar
- As neededvegetable oil, for frying
- To taste, optionalicing sugar, for dusting
- To taste, optionalEnjoy Life Mini Chips
Instructions
- 1
Mix the dry ingredients
In a large mixing bowl, whisk together the pizza crust mix, granulated sugar and cinnamon.
- 2
Form the dough
Add the oil and water, then mix until combined. Work the mixture with your hands to bring it together into a ball of dough.
- 3
Chill the dough
Cover the bowl and refrigerate the dough for 30 minutes.
- 4
Make the filling
While the dough chills, beat the dairy-free butter, palm shortening, vegan sour cream and icing sugar in a medium bowl until smooth and creamy. Refrigerate the filling until you are ready to use it.
- 5
Roll the dough
Knead the dough a couple of times, then divide it into two balls. Roll each ball out on a large piece of baking parchment until 3–6 mm (⅛–¼ inch) thick.
- 6
Cut the circles
Use a 10 cm (4-inch) biscuit cutter to cut circles. Gather and reroll the scraps as needed, repeating until all the dough is used.
- 7
Shape the shells
Wrap one dough circle around each cannoli tube, pressing the dough together at the top to seal it.
- 8
Fry the shells
Pour vegetable oil into a large pot or saucepan and heat over medium heat to 175°C (350°F). Carefully lower 2–3 dough-wrapped cannoli tubes into the oil and fry for 3–4 minutes, turning them for even cooking. Lift them out with a slotted spoon onto paper towels, then repeat with the remaining shells.
- 9
Fill the cannoli
Once the shells have cooled, remove the cannoli tubes and fill each shell with the cream. Pipe into one end, then insert the nozzle into the other end to finish filling.
- 10
Add the topping
If you like, dust the cannoli with icing sugar or sprinkle them with Enjoy Life Mini Chips.
What are cannoli?
Cannoli are Italian pastries traditionally made from fried pastry tubes filled with a sweet, creamy mixture. This American-style version adapts the idea with a gluten-free pizza crust mix for the shells and a dairy-free filling.
The contrast between crisp shells and soft filling is what makes them enjoyable. Chilling the dough and filling helps make both parts easier to handle.
Nutrition and macros by portion
The nutrition label shows one serving as written: 234 calories, 3g protein, 31g carbs, 11g fat.
| Portion | Adjustment | kcal | Protein | Carbs | Fat |
|---|---|---|---|---|---|
| Lighter | Serve one cannolo | 164 kcal | 2g | 22g | 8g |
| This serving | As written | 234 kcal | 3g | 31g | 11g |
| Hungry | Add another cannolo | 351 kcal | 5g | 47g | 17g |
Per serving, the recipe provides 31 g of carbohydrate, mainly from the crust mix, sugars and filling, while the dairy-free butter, palm shortening and frying oil contribute most of the 11 g of fat. The mix and filling contribute some of the 3 g of protein. Try serving a cannolo with fresh fruit as part of a plate that also includes a savoury meal.
The shell dough
Mix choice: The recipe uses a boxed pizza crust mix as its gluten-free base. Since mixes can vary, bring the dough together by hand as directed rather than expecting it to behave exactly like wheat pastry dough.
Rolling: Roll the dough between or on sheets of baking parchment to make it easier to handle. Aim for an even thickness so the shells cook at a similar rate.
Getting a neat seal
Shaping: Wrap each circle around a cannoli tube and press the joined edges together firmly at the top. A secure seam helps the shell hold its shape while frying.
Filling: Wait until the shells are cool before removing the tubes and piping in the cream. Filling through both ends helps distribute it along the length of each shell.
Frying and doneness
Oil temperature: Bring the frying oil to 175°C (350°F) before adding the shells, and cook just 2–3 at a time. Keep the temperature steady between batches for more even results.
Visual cue: Turn the shells during their 3–4 minutes in the oil so they cook evenly. Lift them out with a slotted spoon and let excess oil drain onto paper towels.
The creamy filling
Texture: Beat the dairy-free butter, palm shortening, vegan sour cream and icing sugar until the mixture is smooth and creamy. If the filling softens while you work, keep it chilled until you are ready to pipe.
Flavour: Cinnamon adds warmth to the shells, while the sweet filling provides the creamy contrast. The optional icing sugar or mini chips finish the cannoli without changing the main method.
Serving ideas
Serve the cannoli soon after filling, when the shells are at their crispest. They work well as a dessert after a meal or as a sweet addition to a party platter.
For a balanced plate, pair one cannolo with fresh fruit and serve it after a meal that includes vegetables and a source of protein.
Recipe notes & tips
- Measure the frying oil temperature with a thermometer before adding the first shells.
- Fry only 2–3 shells at a time so they have room to cook evenly.
- Use baking parchment to make rolling and lifting the dough circles easier.
- Let the shells cool completely before sliding them off the tubes.
- Pipe a little filling into each end to help fill the centre of the shell.
- Fill the shells close to serving time to help them stay crisp.
Variations
- Chocolate finish: Sprinkle the filled cannoli with Enjoy Life Mini Chips.
- Icing sugar topping: Dust the finished shells lightly with icing sugar.
- Cinnamon boost: Add a little extra cinnamon to the dough for a warmer flavour.
- Yoghurt filling: Use unsweetened dairy-free yoghurt in place of the vegan sour cream.
- Smaller shells: Cut smaller circles and adjust the frying time, checking for even cooking.
Common mistakes to avoid
- Loose seam: Press the dough edges together firmly around each tube so the shell stays closed.
- Uneven dough: Roll to a consistent thickness so the shells fry at a similar rate.
- Oil too cool: Wait until the oil reaches 175°C (350°F) before frying the first batch.
- Crowded pot: Fry only 2–3 tubes at once to give the shells room to cook.
- Filling warm shells: Cool the shells before removing the tubes and piping in the cream.
- Filling too early: Pipe the cream in near serving time to help preserve the shells' crunch.
How to store
Keep leftover filled cannoli covered in the refrigerator and eat within 2 days; the shells will soften as they sit. For the crispest result, store cooled, unfilled shells separately at room temperature in an airtight container and fill them just before serving. These shells are best enjoyed without reheating.
Frequently asked questions
Can I make the filling ahead?
Yes. Prepare it while the dough chills, then keep it refrigerated until you are ready to pipe it into the cooled shells.
How thick should I roll the dough?
Roll it to about 3–6 mm (⅛–¼ inch), as specified in the method. Keeping the thickness even helps the shells cook consistently.
How can I tell when the oil is ready?
Use a thermometer and wait until it reaches 175°C (350°F). Keep an eye on the temperature as you fry the batches.
Can I fill the shells in advance?
You can, but the shells are crispest when filled shortly before serving. Filled leftovers can be refrigerated, though the shells will gradually soften.
What can I use instead of vegan sour cream?
The recipe gives unsweetened dairy-free yoghurt as an alternative. Use the same 60 ml (¼ cup) amount.
Cook it from the original
This recipe comes from glutenfreepalate.com. Their page has the author’s own photos, notes and tips — the best place to cook it from.
Open the recipe on glutenfreepalate.com