
Puerto Rican Pan Sobao
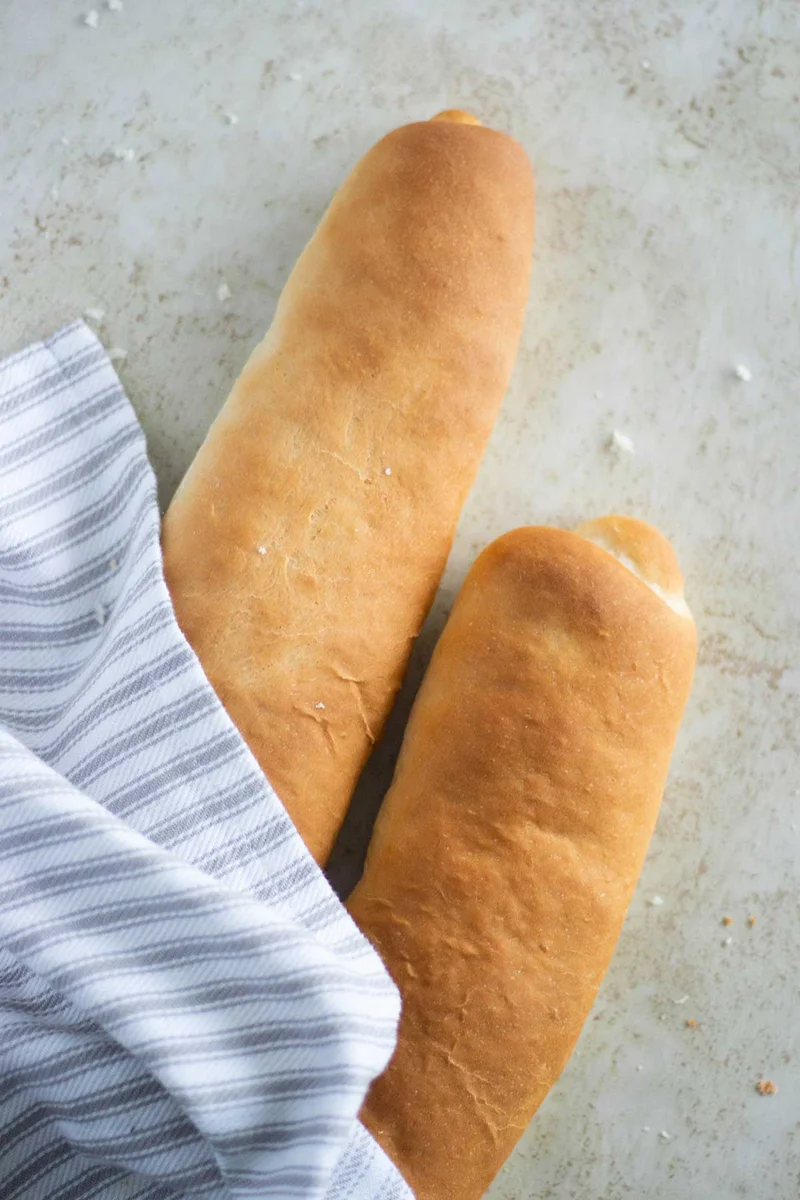
Puerto Rican pan sobao is a soft, slightly sweet bread with a chewy crumb and a tender crust. Shape it into two slim loaves for sandwiches, or serve a slice with morning coffee.
Ingredients
- 21 g (1 1/2 tablespoons)shortening
- 170 g (6 ounces), at 43°C (110°F)water
- 52 g (3 1/2 tablespoons)sugar
- 6 g (1 1/2 teaspoons)instant yeast
- 280 g (2 cups)bread flour
- 4 g (1/2 teaspoon)salt
Instructions
- 1
Mix the wet ingredients
In a large bowl, combine the shortening, water, sugar and yeast. Stir until the sugar has dissolved.
- 2
Add the flour
Stir the salt into the flour, then add all the flour to the wet mixture. Mix for about 3–5 minutes, until no water is visible.
- 3
Knead the dough
Move the dough to a flat surface and knead for 15 minutes. It will be sticky at first; keep kneading without adding flour.
- 4
Shape the loaves
Cut the dough into 2 pieces. Use a rolling pin to flatten each into a rectangle about 10 inches long and 6 inches wide, then roll each piece into a slim cylinder. Place the rolls on a baking sheet lined with parchment paper.
- 5
Proof and bake
Put the bread on the middle rack of the oven with the light on and proof for 2 hours. Remove the loaves, then preheat the oven to 177°C (350°F). Bake for 22 minutes, remove from the oven and enjoy.
What is pan sobao?
Pan sobao is a soft, lightly sweet Puerto Rican bread. Its name is often associated with the kneading that develops its smooth, chewy texture.
This version uses a small amount of shortening and sugar, then shapes the dough into two narrow loaves. That makes it easy to slice for sandwiches or serve alongside coffee.
Nutrition and macros by portion
The nutrition label shows one serving as written: 162 calories, 5g protein, 29g carbs, 3g fat.
| Portion | Adjustment | kcal | Protein | Carbs | Fat |
|---|---|---|---|---|---|
| Lighter | Smaller bread portion | 113 kcal | 4g | 20g | 2g |
| This serving | As written | 162 kcal | 5g | 29g | 3g |
| Hungry | Larger bread portion | 243 kcal | 8g | 44g | 5g |
The flour and sugar provide most of the carbohydrates, while the shortening supplies much of the fat. Flour also contributes some protein; pair a slice with an egg or another protein-rich filling and fruit or vegetables for a more balanced plate.
The dough ingredients
Warm water: at 43°C, it helps the yeast disperse through the mixture. Stir until the sugar dissolves before adding the dry ingredients.
Bread flour: its higher protein content helps the dough develop a springy structure when kneaded. Salt goes into the flour so it is distributed throughout the dough.
Shortening: it contributes to the bread’s tender, soft texture. Measure it carefully so the dough keeps the intended balance.
Why kneading matters
Sticky start: the dough may cling to your hands and work surface at first. Resist the urge to add flour, which can make the finished bread denser.
Steady kneading: work the dough for the full 15 minutes, using a consistent push-and-fold motion. It should become smoother and more cohesive as you go.
Shape even loaves
Rectangles: flatten each half to roughly 10 inches by 6 inches so the rolls are similar in size. This helps them bake at a similar rate.
Cylinders: roll each rectangle into a slim, even shape and set it seam-side down on the lined tray. Leave some room between the loaves.
Proofing and doneness
Proofing: the recipe calls for 2 hours in the oven with the light on. The light provides a warm place for the dough to rise without switching the oven on.
Baking: remove the dough before preheating to 177°C (350°F), then bake for 22 minutes. The loaves should look set and lightly coloured; avoid leaving them in longer than needed.
Serving ideas
For breakfast, serve slices plain or with butter alongside coffee. The gentle sweetness also works well with savoury sandwich fillings.
Let the loaves cool enough to slice cleanly. Use a serrated knife and a gentle sawing motion to preserve the soft crumb.
Recipe notes & tips
- Use water close to 43°C (110°F) so it is warm without being too hot for the yeast.
- Mix the salt into the flour before adding it to the wet ingredients.
- Keep kneading even if the dough feels sticky at the beginning.
- Use a ruler or the rolling pin as a guide to make the two rectangles similar in size.
- Line the baking sheet with parchment so the loaves are easy to lift off.
- Remove the dough from the oven before turning the oven on to preheat.
Variations
- Toast the slices: lightly toast them for a crisp outside and soft centre.
- Make sandwich rolls: divide the dough into smaller portions and shape them evenly, allowing for a different bake time.
- Add a savoury filling: use slices for a sandwich with cheese, egg or cooked vegetables.
- Serve it sweet: spread a little butter or jam on a slice.
- Make one loaf: shape all the dough into a single roll, keeping in mind that its baking time may differ.
Common mistakes to avoid
- Adding flour too soon: the dough is meant to start sticky, so knead it as directed before considering any adjustment.
- Using very hot water: measure the water at 43°C (110°F) so it is warm rather than scalding.
- Under-kneading: give the dough the full 15 minutes to develop a smoother, more elastic texture.
- Uneven shaping: make the two rectangles and cylinders similar in size so the loaves bake more evenly.
- Preheating with the dough inside: remove the loaves after proofing before setting the oven to 177°C (350°F).
How to store
Once completely cool, keep the bread in an airtight bag or container at room temperature for up to 2 days. Rewarm slices briefly in a toaster or warm oven; freeze well-wrapped bread for longer storage.
Frequently asked questions
Can I use all-purpose flour instead of bread flour?
Bread flour is specified for this recipe and helps give the dough its chewy structure. All-purpose flour may produce a softer, less chewy result.
Why is the dough sticky?
It is sticky at first, and the method specifically says not to add flour. Continue kneading for the full 15 minutes as it becomes more cohesive.
How can I proof the dough without an oven light?
Use a warm, draft-free place and allow the dough to proof for the stated 2 hours. Keep it covered so the surface does not dry out.
Can I prepare the dough ahead?
This method does not include an overnight rise. For best results, follow its mixing, kneading and 2-hour proofing sequence.
How do I know when the bread is baked?
Bake at 177°C (350°F) for 22 minutes as directed. The loaves should look set and lightly coloured.
Can I freeze pan sobao?
Yes. Cool it completely, wrap it well and freeze it. Thaw at room temperature, then warm it briefly before serving.
Cook it from the original
This recipe comes from foodmetamorphosis.com. Their page has the author’s own photos, notes and tips — the best place to cook it from.
Open the recipe on foodmetamorphosis.com