
Garlic Butter Rice
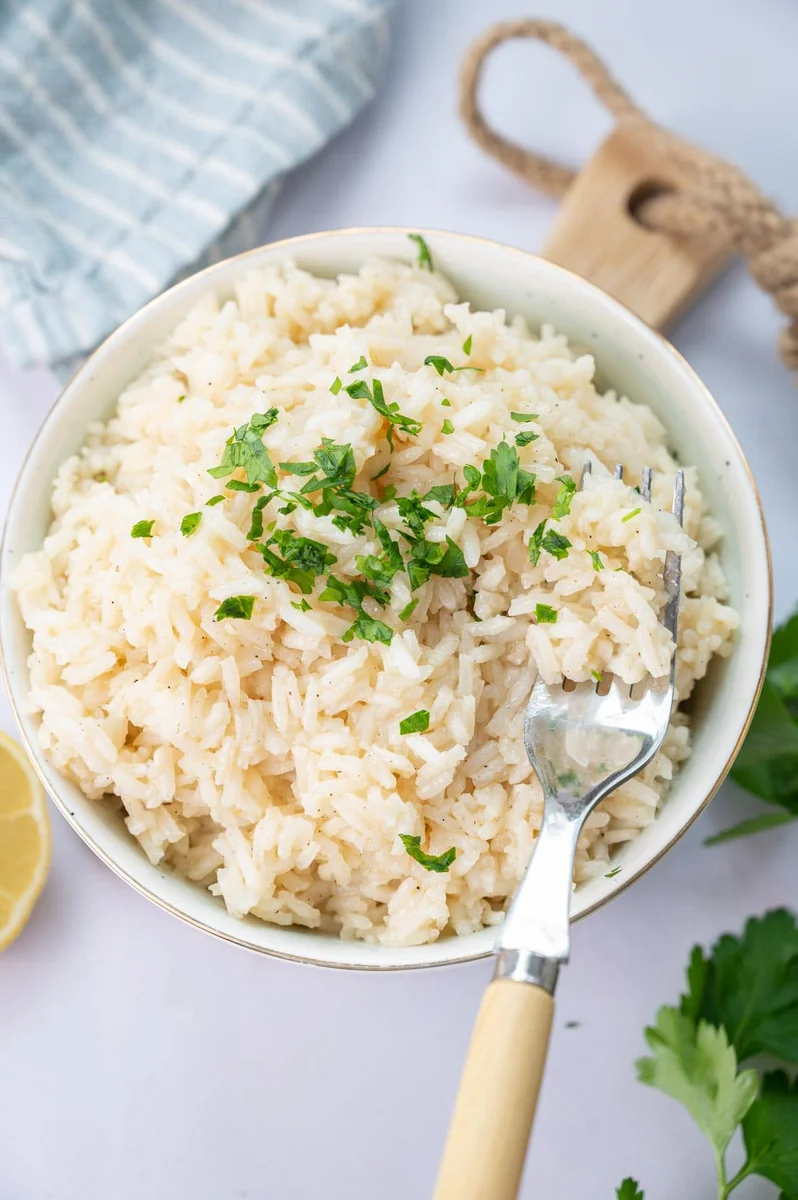
Garlic butter rice is a simple stovetop side with buttery grains, fragrant garlic and a little lemon for brightness. It pairs easily with a wide range of meals and comes together in about 29 minutes.
Ingredients
- 45 g (3 tablespoons)butter
- 4 clovesgarlic
- 190 g (1 cup)long-grain rice
- 360 ml (1½ cups; 360 g)chicken broth or water
- 5 ml (1 teaspoon)lemon juice
- to tastesalt and pepper
- to servechopped parsley
Instructions
- 1
Chop the garlic
Finely chop the garlic with a knife, preferably rather than using a garlic press.
- 2
Cook the garlic
Melt the butter in a medium pot. Once hot, add the garlic and cook for 30 seconds, until fragrant.
- 3
Coat the rice
Add the rice and stir for about 30–60 seconds, until every grain is coated with butter.
- 4
Simmer the rice
Pour in the broth, cover the pot, bring it to a boil, then turn the heat to low and cook for 14 minutes.
- 5
Rest the rice
Remove the pot from the heat and leave it covered to rest for 10 minutes.
- 6
Fluff and season
Fluff the rice with a fork, then season with salt, pepper and lemon juice.
- 7
Add the parsley
Serve the rice topped with chopped parsley.
- 8
Enjoy the rice
Enjoy!
What is garlic butter rice?
Garlic butter rice is a straightforward American-style side dish: rice is cooked with garlic and butter, then finished with lemon juice and parsley. Its appeal is in the familiar, savoury flavours and the light citrus lift.
This version builds flavour in the pot before the liquid goes in. Coating the grains in garlic butter helps distribute the flavour, while a covered rest gives the rice time to finish steaming.
Nutrition and macros by portion
The nutrition label shows one serving as written: 269 calories, 0g protein, 0g carbs, 0g fat.
| Portion | Adjustment | kcal | Protein | Carbs | Fat |
|---|---|---|---|---|---|
| Lighter | Use less butter | 188 kcal | 0g | 0g | 0g |
| This serving | As written | 269 kcal | 0g | 0g | 0g |
| Hungry | Serve a larger portion | 404 kcal | 0g | 0g | 0g |
Most of the carbohydrates come from the rice, while the butter supplies most of the fat. The broth may contribute some protein and sodium, depending on the product; balance the plate with a protein-rich main and vegetables.
Start with the garlic
Fresh garlic: finely chopping it with a knife gives you small pieces that cook quickly in the butter. Keep an eye on the pot; the garlic needs only 30 seconds to become fragrant.
Butter: melt it before adding the garlic so the pieces cook gently and their flavour spreads through the rice.
Coat the grains
Rice: stir the long-grain rice in the butter for 30–60 seconds, just until the grains look glossy and coated. This brief step gives the dish an even buttery flavour.
Liquid: use chicken broth for a savoury result or water for a simpler flavour. Measure it carefully and keep the pot covered while the rice cooks.
Let it steam undisturbed
Low heat: once the liquid boils, reduce the heat to low and cook the rice for 14 minutes with the lid on. Avoid lifting the lid during this time, as the trapped steam is part of the cooking process.
Rest: take the pot off the heat and leave it covered for 10 minutes. The grains should be tender and the liquid absorbed before you fluff them.
Finish with lemon and parsley
Lemon juice: stir it in after cooking so its fresh, tangy flavour remains distinct from the rich butter and garlic.
Parsley: scatter chopped parsley over the rice just before serving for a fresh finish. Season with salt and pepper to taste.
What to serve it with
This rice works alongside roasted or pan-cooked meat, fish, or vegetables. Its buttery garlic flavour can sit comfortably beside simply seasoned mains.
For a more rounded plate, pair it with a protein and a vegetable side, such as greens or a crisp salad.
Recipe notes & tips
- Chop the garlic finely so it cooks quickly and spreads through the rice.
- Stir continuously while coating the rice to keep the garlic from catching on the pot.
- Keep the lid on during the 14-minute simmer so steam stays inside.
- Let the rice rest covered for the full 10 minutes before fluffing.
- Taste before adding salt, especially if you are using salted chicken broth.
Variations
- Use water: choose water instead of chicken broth for a more neutral flavour.
- Add extra herbs: stir in another soft herb alongside the parsley just before serving.
- Make it peppery: add extra black pepper at the table for a sharper finish.
- Increase the citrus: add a little more lemon juice to taste after cooking.
- Add vegetables: serve with cooked peas or greens for a more substantial side.
Common mistakes to avoid
- Pressing the garlic: a press can make it very fine; chop it with a knife as directed.
- Browning the garlic: it can turn bitter; cook it only until fragrant, about 30 seconds.
- Skipping the coating step: stir the rice in the butter for 30–60 seconds so the grains are evenly coated.
- Lifting the lid: heat and steam escape; keep the pot covered while the rice simmers.
- Fluffing too soon: the rice needs its covered 10-minute rest off the heat before you fluff it.
How to store
Cool leftovers promptly, transfer them to an airtight container and refrigerate for up to 3 days. Reheat until steaming hot, adding a small splash of water if the rice seems dry.
Frequently asked questions
Can I use water instead of chicken broth?
Yes. The recipe allows either; water gives a simpler flavour, while chicken broth makes the rice more savoury.
Why does the pot need to stay covered?
The rice cooks in the heat and steam trapped inside the pot. Keeping the lid on also helps the liquid absorb evenly.
How do I know when the rice is done?
After the 14-minute simmer and 10-minute covered rest, the grains should be tender and the liquid absorbed. Fluff gently with a fork.
Can I make it without lemon juice?
Yes, but the lemon adds a refreshing tang to balance the butter. You can leave it out or add it to taste.
Can I make this ahead?
You can cook it ahead and refrigerate it in an airtight container for up to 3 days. Reheat until steaming hot, loosening it with a little water if needed.
Cook it from the original
This recipe comes from everyday-delicious.com. Their page has the author’s own photos, notes and tips — the best place to cook it from.
Open the recipe on everyday-delicious.com