
Nut roll with chocolate
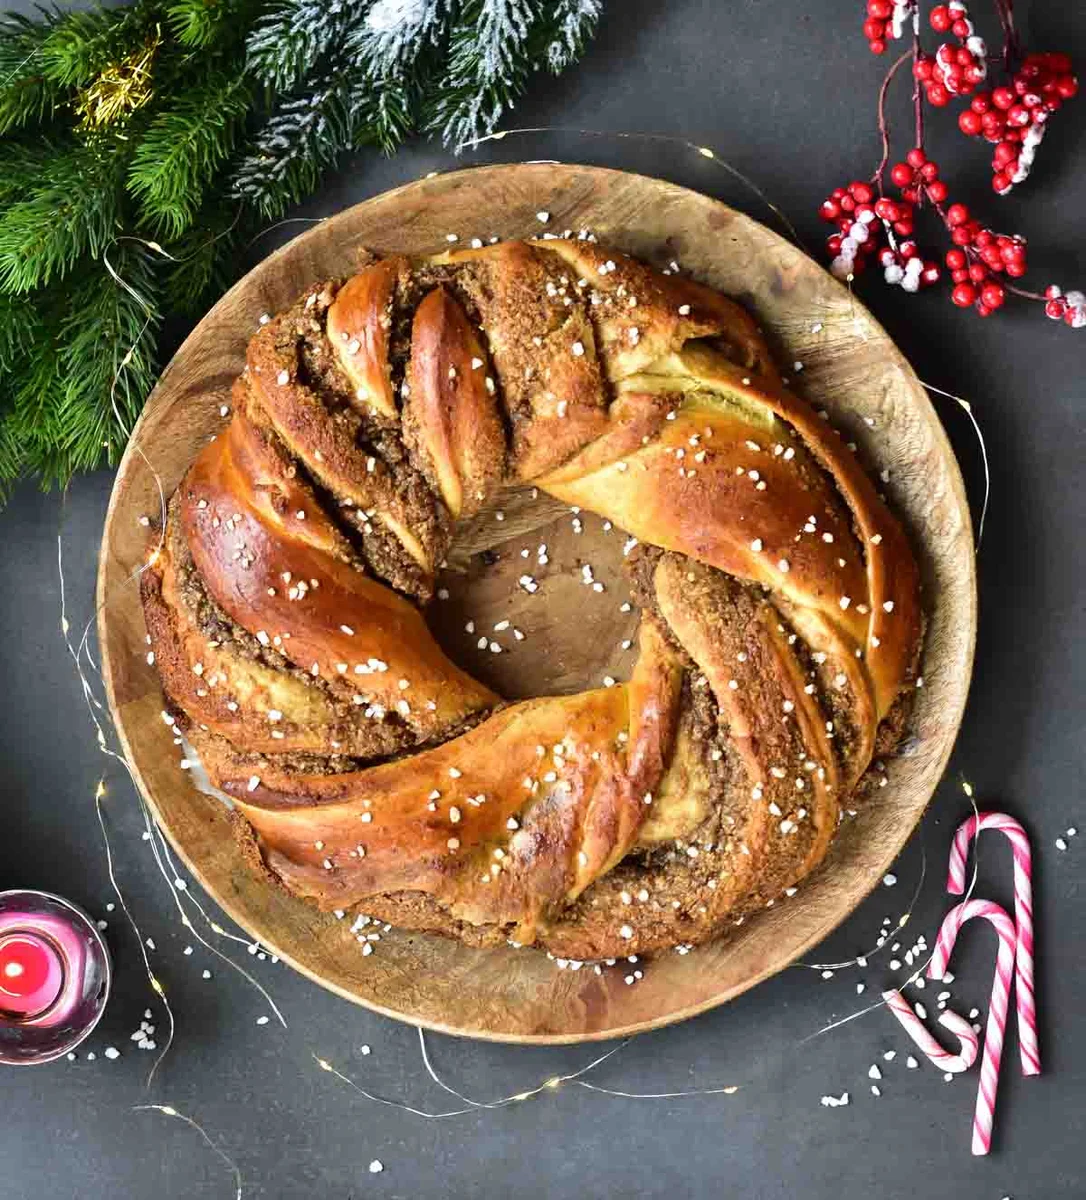
Very buttery and tender yeast cake with a lot of nut and chocolate filling.
Ingredients
- 1.4 oz fresh yeast (40g) (or 2 packets instant dry yeast, fast acting (0.5oz/14g))
- 1/3 cup + 4 ts warm milk ((100ml/100g/3.5oz))
- 4 cups flour (17.6oz/500g, spoon and leveled)
- 1/2 teaspoon salt
- 2 large eggs (at room temperature)
- 2 large egg yolks (or 1 whole small egg, at room temperature)
- 1/2 cup granulated sugar (3.5oz/100g)
- 1 teaspoon vanilla extract
- 1/2 cup soft butter (4oz/115g)
- 1 cup ground almonds (3.5oz/100g, or hazelnuts)
- 2 cups ground walnuts (7oz/200g, or hazelnuts)
- 1/3 cup light brown sugar (2.1oz/60g)
- 1/4 cup honey (3oz/85g)
- 1/2 cup butter (4oz/115g)
- 1 large apple (peeled and grated)
- 1 teaspoon cinnamon
- zest grated from 2 large oranges (preferably organic)
- 4 oz milk chocolate (115g, finely chopped)
- large pinch of salt
- 1 egg
- 1 tablespoon milk
- pearl sugar (optional, for sprinkling)
Instructions
- 1
Make the dough: Fresh yeast: crumble the yeast in the mixing bowl, add 1 Tbsp of sugar (take it from the measured 1/2 cup sugar), pour in warm milk (temperature should be about 110°F to 115°F / 43°C - 46°C, it should be pleasantly warm, can’t be too warm or it will kill the yeast or too cold because they won’t work). Stir everything together and set aside for 10-15 minutes. There should be foam on top of the mixture. If there is no foam, you need to start over (the yeast were dead).Dry yeast: pour the warm milk into the mixing bowl (temperature should be about 104°F/40°C, it should be pleasantly warm, can’t be too warm or it will kill the yeast or too cold because they won’t work). Sprinkle the yeast over the milk and add 1 Tbsp of sugar (take it from the measured 1/2 cup sugar). Stir everything together and set aside for 5-10 minutes. There should be foam on top of the mixture. If there is no foam, you need to start over (the yeast were dead).Add all the other ingredients to the bowl (flour, salt, eggs, egg yolks, sugar, vanilla extract, very soft butter). Knead until a smooth dough forms, it should be elastic and not stick to your hands, but it will be rather loose. When using a stand mixer fitted with a hook attachment, it should take about 5 minutes, if you make it by hand it will definitely be longer.
- 2
The first rise: Cover the bowl with a kitchen cloth and set aside in a warm place, until it doubles its volume. It can take about 2-3h.
- 3
Prepare the filling: Melt the butter, peel, core and grate the apple (on the big holes of a box grater), chop the chocolate. Mix all the ingredients for the filling together until combined.
- 4
Shape the wreath: Roll out the dough into a long rectangle. Sprinkle the dough with flour or use a silicone rolling mat – the dough won’t stick to it and additional flour won't be necessary. Spread the filling over the dough. Roll up the dough, starting from the long side that is closest to you, into a tube. Cut the roll in half lengthwise, all the way through. Gently wrap each part over the other, like a two-strand braid, then form a wreath. Transfer into a baking tray lined with baking paper. The wreath should be as large as possible so that the dough with so much filling can properly bake on the inside. You can still stretch the wreath a little on the baking paper. It will increase its volume significantly during baking.
- 5
The second rise: Set aside for a second rise for 30 minutes (the dough will now only slightly increase its volume).
- 6
Egg brush: In a small bowl, beat an egg with a tablespoon of milk, brush the dough with the egg wash. Optionally, sprinkle the wreath with pearl sugar.
- 7
In the meantime, set the oven to 180°C / 350°F, Gas Mark 4, no fan. Bake for about 35 minutes. After about 20-25 minutes of baking time, check if the cake doesn’t brown too much, if so, cover it loosely with a piece of aluminum foil.
- 8
Remove from the oven and leave to cool on a wire rack, allow to cool before cutting into portions!
- 9
Enjoy!
Cook it from the original
This recipe comes from everyday-delicious.com. Their page has the author’s own photos, notes and tips — the best place to cook it from.
Open the recipe on everyday-delicious.com