
Coxinha
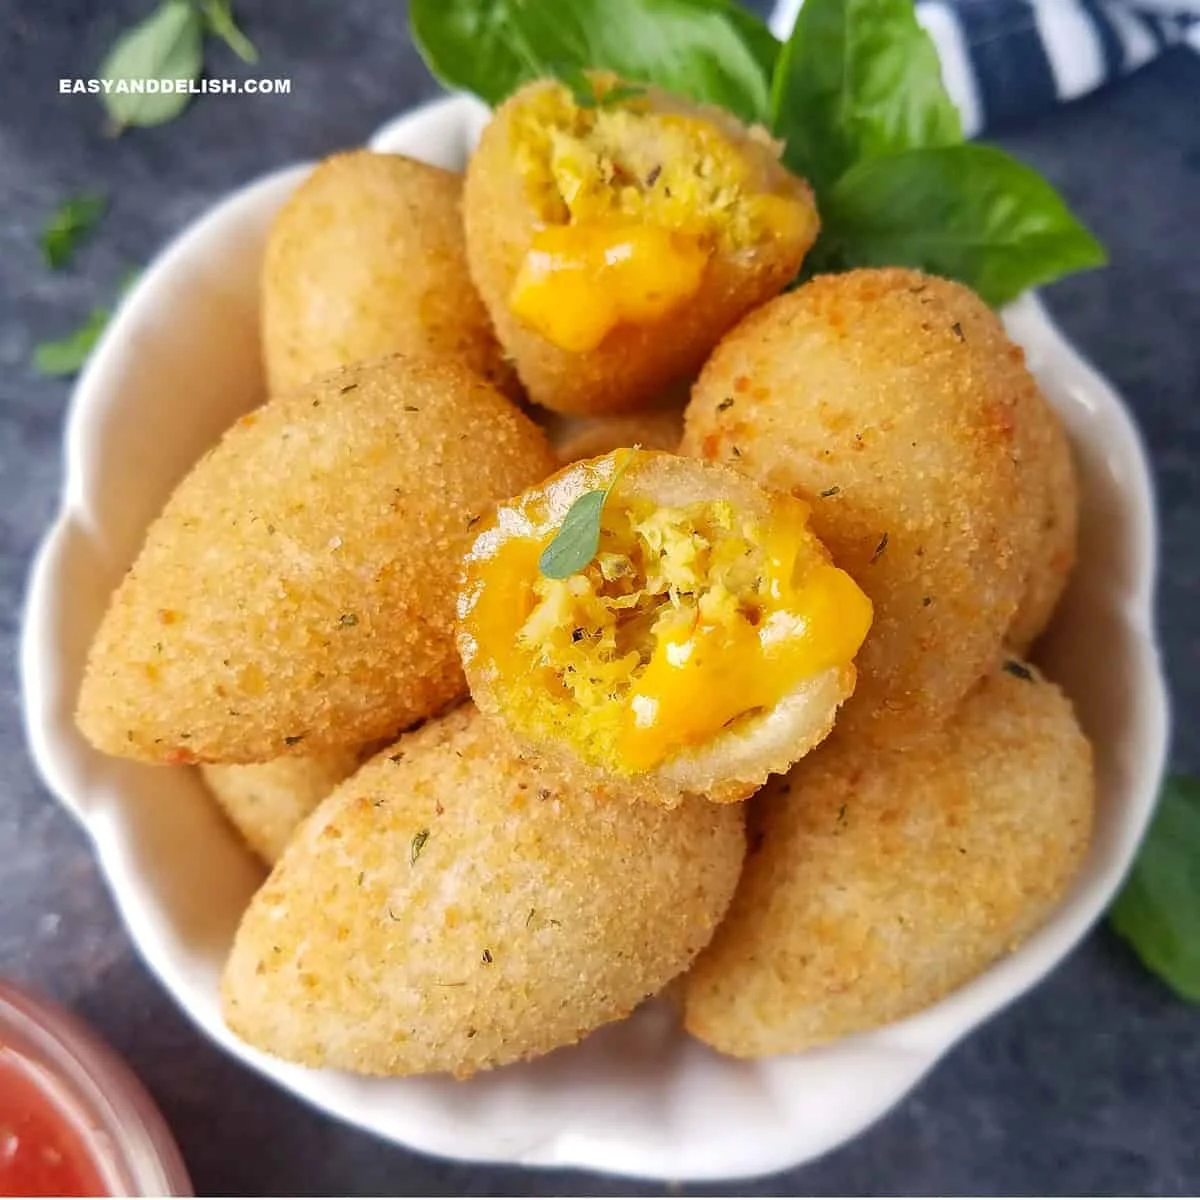
Coxinha is a Brazilian snack of savoury shredded chicken wrapped in soft wheat-flour dough, coated in breadcrumbs and fried until crisp. Make it for a party or a substantial snack; the shaping takes patience, but the filling and dough can be prepared ahead.
Ingredients
- 30 ml (2 tablespoons)olive oil
- 80 g (½ cup)yellow onion, very finely chopped
- 2 clovesgarlic, very finely chopped
- 420 g (3 cups)cooked chicken, finely shredded
- to tastesalt
- to tasteblack pepper
- 1 pinchred pepper flakes (optional)
- 45 g (3 tablespoons)mayonnaise or Catupiry cream cheese
- 3 tablespoonsspring onion, finely chopped
- 800 ml (3⅓ cups)chicken stock
- 1 pinchsalt
- 1 pinch (¼ teaspoon)annatto powder (optional)
- 10 ml (2 teaspoons)olive oil
- 375 g (3 cups)plain flour, sifted
- 250 g (2 cups)plain flour
- 8 large egg whites, dividedegg whites
- 330 g (3 cups), dividedbreadcrumbs
- enough to fully submerge the coxinhasvegetable oil, for deep-frying
Instructions
- 1
Cook the aromatics
Heat 30 ml olive oil in a large frying pan over medium heat. Add the onion and cook, stirring now and then, until soft and translucent, about 2–4 minutes. Add the garlic and cook for about 1 minute.
- 2
Mix the filling
In a large bowl, combine the shredded chicken with salt, black pepper, optional pepper flakes, mayonnaise or Catupiry, and spring onion. Stir in the cooked onion and garlic and set aside. The filling can be made 1–2 days ahead and kept in a sealed container in the fridge.
- 3
Heat the stock
Put the chicken stock, a pinch of salt, optional annatto and 10 ml olive oil in a large non-stick saucepan. Warm over medium-low heat.
- 4
Add the flour
Once the stock is hot, add the 375 g sifted flour all at once, stirring thoroughly. Keep stirring vigorously for about 1 minute or longer, until the mixture forms evenly lumpy dough.
- 5
Knead the dough
Take the pan off the heat and transfer the dough to a stand mixer fitted with a dough hook. Knead on speed 2 for about 5 minutes, or until smooth and soft. Alternatively, let it cool enough to handle and knead thoroughly by hand.
- 6
Rest the dough
Move the dough to a well-floured surface and knead it briefly by hand. Shape it into a flat disc and leave it to rest at room temperature for 5–8 minutes.
- 7
Cut the discs
With a floured rolling pin, roll the dough on a well-floured surface to about 0.3–0.5 cm thick. Cut out discs with a round cutter or the rim of a 7.5 cm glass, then place them on a baking tray lined with baking paper. A metal spatula can help lift them.
- 8
Reuse the scraps
Gather the leftover dough, roll it out again and cut more discs. At 0.3 cm thick, the dough should yield about 34 discs.
- 9
Fill the discs
Put about 1 tablespoon of chicken filling in the centre of each dough disc.
- 10
Start shaping
Lightly grease your hands. Fold the dough up and around the filling to make a U shape.
- 11
Close the sides
Bring the dough up along both open sides of the filling, enclosing it like a small pouch.
- 12
Form the neck
Shape the narrow top of the coxinha between your index finger and thumb, gently nudging the filling towards the centre as you close the dough.
- 13
Seal the coxinhas
Pinch the edges closed. Draw the dough at the top slightly upwards to make the shape resemble a pear or teardrop, like a boneless chicken drumstick.
- 14
Check for cracks
Wipe your fingers with a damp cloth whenever they touch the filling. Make sure the dough has no cracks; if one appears, wet your fingers with water and pinch the dough together to seal it.
- 15
Set on a tray
Very gently flatten the rounded base of each coxinha with your palm, just enough to let it stand upright. Arrange them on a baking-paper-lined tray.
- 16
Set up the coating
Put the 250 g flour in one bowl. In a second bowl, mix half the egg whites—4 egg whites—with 1 teaspoon water. Put half the breadcrumbs, about 165 g (1½ cups), in a third bowl.
- 17
Coat the coxinhas
Roll each coxinha in flour, then egg white, then breadcrumbs, shaking off the excess at each stage.
- 18
Refresh the coating
The egg-white bowl will collect excess flour and the breadcrumbs will collect excess egg white. Replace both with the reserved portions as needed to keep the coating clean.
- 19
Heat the oil
Pour enough vegetable oil into a deep-fat fryer or heavy-based pan to submerge the coxinhas. Heat to 180°C. If you do not have a thermometer, drop in a small piece of dough; the oil is ready when it sizzles.
- 20
Fry in batches
Fry the coxinhas until golden, turning them so they brown evenly on all sides. Do not add too many at once, as this lowers the oil temperature and can make them greasy.
- 21
Drain the coxinhas
Transfer the fried coxinhas to a baking tray lined with a double layer of kitchen paper to absorb excess oil.
- 22
Serve while crisp
Serve on their own or with ketchup, lemon slices, rosé sauce or chimichurri.
What is coxinha?
Coxinha is a Brazilian savoury snack, traditionally shaped to suggest a chicken drumstick and filled with seasoned shredded chicken. The name means “little thigh” in Portuguese, referring to its distinctive shape.
This version wraps the filling in a cooked wheat-flour dough, then coats and deep-fries each piece. A creamy spoonful of mayonnaise or Catupiry helps bind the chicken, while the crisp breadcrumb shell contrasts with the soft centre.
Nutrition and macros by portion
The nutrition label shows one serving as written: 108 calories, 6g protein, 14g carbs, 3g fat.
| Portion | Adjustment | kcal | Protein | Carbs | Fat |
|---|---|---|---|---|---|
| Lighter | Smaller coxinhas, less oil | 76 kcal | 4g | 10g | 2g |
| This serving | As written | 108 kcal | 6g | 14g | 3g |
| Hungry | Serve a larger portion | 162 kcal | 9g | 21g | 5g |
The dough and breadcrumbs provide most of the carbohydrate, while the frying oil and creamy filling contribute fat; the chicken is the main source of protein. Pair a few coxinhas with a generous salad or vegetables for a more balanced plate.
Build flavour into the filling
Aromatics: Cook the onion until soft before adding the garlic briefly; this gives the filling a savoury base without letting the garlic burn.
Creaminess: Mayonnaise or Catupiry brings the finely shredded chicken together. Add salt and pepper to taste, and use the optional chilli flakes if you want a little heat.
Make the dough in the pan
Hot stock: Warm the stock with salt, annatto if using, and olive oil before adding the sifted flour in one go. Stir with purpose as the dough thickens; it will become harder to move as it comes together.
Smooth texture: Kneading the cooked dough for about 5 minutes in a mixer, or thoroughly by hand once cool enough, helps make it pliable for rolling and shaping. Let it rest for 5–8 minutes before rolling.
Roll and shape without cracks
Even discs: Roll the dough to 0.3–0.5 cm thick and cut 7.5 cm rounds. Keep the surface and rolling pin lightly floured so the discs lift cleanly.
Sealed filling: Use about 1 tablespoon of filling per disc and pinch the dough closed carefully. If a crack forms, moisten your fingers and press the dough together before coating.
Keep the coating crisp
Three bowls: Coat each piece in flour, egg white and breadcrumbs, in that order, shaking away the extra at every stage. The recipe divides the egg whites and crumbs because they gradually pick up flour and moisture as you work.
Hot oil: Fry at 180°C and work in batches. Turning the coxinhas helps them colour evenly, while avoiding an overcrowded pan helps the oil stay hot enough for a crisp coating.
Serving ideas
Coxinhas are good on their own as a snack, or served with ketchup, lemon slices, rosé sauce or chimichurri. A crisp salad or crunchy vegetables can add freshness alongside a batch.
The recipe makes 34 small pieces, so they suit a sharing platter. Serve them soon after frying for the best contrast between the crunchy coating and tender centre.
Recipe notes & tips
- Prepare the filling 1–2 days ahead and refrigerate it in a sealed container.
- Shred the cooked chicken finely so it is easier to portion and enclose.
- Flour the rolling pin and work surface to help the dough release cleanly.
- Keep a damp cloth nearby to wipe filling from your fingers while shaping.
- Use a thermometer to hold the frying oil at 180°C.
- Replace the reserved egg whites and breadcrumbs when the coating bowls become too contaminated to coat neatly.
Variations
- Use Catupiry: Swap the mayonnaise for Catupiry cream cheese for a richer, creamier filling.
- Add gentle heat: Include the optional pinch of red pepper flakes in the chicken mixture.
- Add annatto: Use the optional annatto in the dough for a deeper colour.
- Serve with chimichurri: Offer the herb sauce alongside the freshly fried coxinhas.
- Offer lemon: Add lemon slices to the serving platter for a bright accompaniment.
Common mistakes to avoid
- Adding flour gradually: Add the sifted dough flour all at once to the hot stock and stir vigorously so it forms evenly.
- Rolling too thin: Keep the dough 0.3–0.5 cm thick so it can enclose the filling without tearing.
- Leaving cracks: Check each shaped piece and dampen your fingers to pinch any split dough closed.
- Overfilling the discs: Use about 1 tablespoon of chicken mixture per disc so the edges can seal.
- Crowding the pan: Fry in batches so the oil temperature does not drop and the coating does not turn greasy.
- Skipping the turning: Turn the coxinhas as they fry so the sides brown evenly.
How to store
The uncooked chicken filling can be prepared up to 1–2 days ahead and stored in a sealed container in the fridge. Once fried, refrigerate leftovers in an airtight container and use within 2 days; reheat in an oven until hot and crisp. The coating will soften during storage.
Frequently asked questions
Can I make the filling ahead?
Yes. The recipe allows the filling to be made 1–2 days ahead and kept refrigerated in a sealed container.
What can I use instead of mayonnaise?
Use Catupiry cream cheese, as suggested in the ingredient list, for a creamier filling.
How do I know when the oil is ready?
Heat it to 180°C if you have a thermometer. Otherwise, drop in a small piece of dough; a clear sizzle indicates the oil is ready.
Why are my coxinhas greasy?
The oil may have cooled, especially if the pan was crowded. Fry fewer pieces at a time and let the oil return to 180°C between batches.
Can I shape the coxinhas without a stand mixer?
Yes. Let the dough cool until it is safe to handle, then knead it thoroughly by hand until smooth and soft.
What should I serve with coxinha?
Serve them plain or with ketchup, lemon slices, rosé sauce or chimichurri. A fresh salad or vegetables also work well alongside them.
Cook it from the original
This recipe comes from easyanddelish.com. Their page has the author’s own photos, notes and tips — the best place to cook it from.
Open the recipe on easyanddelish.com