
Mini Chocolate Stuffed Vanilla Bean Brioche À Tête
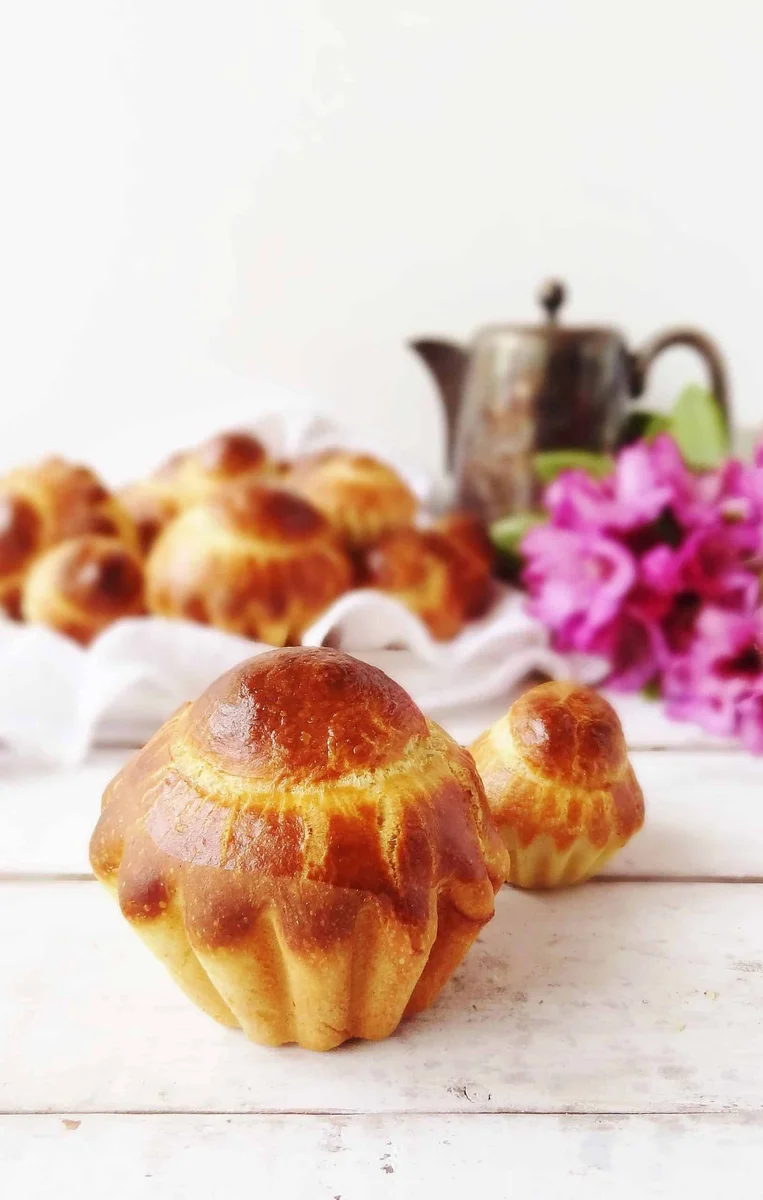
These mini chocolate-stuffed vanilla brioche à tête are rich, buttery buns with a small rounded top and a soft, sweet centre. The dough is made the day before, so it has time to chill and becomes easier to shape.
Ingredients
- 500 gstrong white bread flour
- 7 gsalt
- 50 gcaster sugar
- 10 gfast-action yeast
- 120 mlfull-fat milk, lukewarm
- 5eggs
- seeds from 1vanilla pod
- 1 tbspvanilla extract
- 250 gbutter, softened
- about 200 gdark chocolate, chopped
- for greasingmelted butter
- 1egg, beaten, for glazing
Instructions
- 1
Start the day before
Begin preparing the dough the day before you plan to bake the brioche.
- 2
Mix the dough
Put the flour, salt, sugar and yeast in a large bowl or the bowl of a stand mixer fitted with a dough hook. Add the milk, eggs, vanilla seeds and vanilla extract.
- 3
Knead until elastic
Mix on low speed for 2 minutes, then on medium for 6–8 minutes, until the dough is soft, glossy and elastic. By hand, knead for at least 10 minutes, and up to 15: lift and stretch the sticky dough, slap it back down, fold and turn it, using a dough scraper to lift it from the work surface. Do not add extra flour.
- 4
Work in butter
Add the softened butter and mix for a further 4–5 minutes by machine or 8–10 minutes by hand, scraping down the bowl periodically so the butter is fully incorporated. The dough will be very soft.
- 5
Chill overnight
Transfer the dough to a large bowl, cover it and refrigerate overnight. This gives it time to rise and makes it firm enough to handle.
- 6
Prepare the moulds
The next day, brush the moulds with melted butter. Remove the dough from the fridge.
- 7
Fill the larger buns
For 10–11 moulds measuring 10 cm, divide the dough into portions of about 115 g. Split each portion into 100 g for the base and 15 g for the top. Shape the base into a ball, then roll it into a disc on a lightly floured surface without making it too thin. Put about 20 g chopped chocolate in the centre, bring the edges over it and pinch tightly to seal. Reshape into a ball and place seam-side down in a mould. Roll the 15 g portion into a ball, then pinch one side to make a rounded, tapered shape.
- 8
Add the brioche tops
With a lightly floured finger, make a deep impression in the centre of each base without pushing through to the bottom. Place the narrow end of the top into the impression and press gently around the edges to secure it. Work fairly quickly, as the warming dough becomes sticky when its butter softens. Set the moulds on a baking sheet.
- 9
Adapt smaller moulds
For moulds measuring 6 cm, use 25 g dough for each base, 5 g for each top and 5 g chopped chocolate; this makes about 40 very small buns. For a deep muffin tin, use 65 g dough for the base, 10 g for the top and 15 g chocolate.
- 10
Proof the dough
Put the baking sheet inside a large, clean plastic bag, making sure the bag does not touch the dough. Leave the buns to rise until almost doubled in size: about 1½ hours for the larger buns or 45 minutes for the tiny 6 cm buns.
- 11
Heat the oven
Heat the oven to 190°C.
- 12
Glaze and bake
Gently brush the risen brioche with beaten egg, taking care not to let it drip between the dough and the mould. Bake larger buns for 20 minutes and small ones for 15 minutes, until golden. Check for an internal temperature of 90°C, or insert a skewer; it should come out clean apart from the chocolate.
- 13
Cool and serve
Remove the brioche from the oven and turn them out onto a wire rack. Let them cool a little and serve warm.
- 14
Store and reheat
The rolls are best fresh. Once completely cool, keep them in an airtight container for up to 3 days, then reheat in a warm oven at 160–180°C.
What is brioche à tête?
Brioche is a French enriched bread, made with butter and eggs for a tender, rich crumb. À tête means “with a head”: the small piece of dough set into the larger base gives each bun its familiar shape.
Here, the dough is flavoured with vanilla and wrapped around chopped dark chocolate. Chilling it overnight makes the buttery dough firmer and more manageable to shape.
Nutrition and macros by portion
The nutrition label shows one serving as written: 1340 calories, 28g protein, 131g carbs, 76g fat.
| Portion | Adjustment | kcal | Protein | Carbs | Fat |
|---|---|---|---|---|---|
| Lighter | Use less chocolate | 938 kcal | 20g | 92g | 53g |
| This serving | As written | 1340 kcal | 28g | 131g | 76g |
| Hungry | Serve an extra bun | 2010 kcal | 42g | 197g | 114g |
The flour and sugar provide most of the carbohydrate, while butter and dark chocolate contribute much of the fat; eggs, flour and chocolate provide some protein. The rich dough makes this a substantial serving, so fresh fruit alongside it is a practical way to balance the plate.
Why chill the dough overnight?
Butter makes this dough soft, so it can be difficult to handle at room temperature. Refrigerating it overnight allows it to rise while firming up enough to divide and shape.
Keep the dough chilled as you work, and shape the buns fairly promptly. If it becomes sticky, return it to the fridge briefly rather than adding flour.
Kneading a sticky dough
Machine kneading: begin slowly, then increase to medium speed until the dough looks glossy and stretches easily. Add the softened butter only after the dough has developed elasticity.
Hand kneading: lift and stretch the dough, slap it back down, then fold and turn it. A dough scraper helps release it from the work surface; extra flour can make the finished bread tough.
Sealing in the chocolate
Chocolate: place it in the centre of the dough disc, then bring the edges together and pinch firmly. A secure seam helps keep the filling inside as the buns rise and bake.
Shape: set each filled base seam-side down in its mould. Make a deep central impression for the tapered top, but stop short of the bottom so the base remains intact.
Proofing and doneness
Proof: cover the tray with a clean plastic bag that does not touch the dough. The larger buns take about 1½ hours to rise; the tiny ones take about 45 minutes.
Bake: look for a golden surface and check the centre reaches 90°C. A skewer should come out clean apart from melted chocolate, which can cling to it.
Choosing a mould size
Larger moulds: the method gives portions for about 10–11 buns in 10 cm moulds, with 100 g for each base and 15 g for each top. It specifies about 20 g chocolate per bun.
Smaller moulds: 6 cm moulds use 25 g for the base, 5 g for the top and 5 g chocolate per bun. A deep muffin tin uses 65 g for the base, 10 g for the top and 15 g chocolate.
Serving the brioche
These buns are at their best slightly warm, when the crumb is soft and the chocolate is still yielding. Serve them on their own or alongside fresh fruit and plain yoghurt.
The recipe lists four servings, although its mould instructions make a larger number of individual buns. For portioning, use the stated serving count as a guide and divide the finished batch accordingly.
Recipe notes & tips
- Measure the portions carefully so the bases and tops bake at a similar rate.
- Use a dough scraper rather than adding flour when the dough sticks during hand kneading.
- Pinch the chocolate-filled seams closed firmly before placing the bases in their moulds.
- Keep the proofing bag clear of the dough so it does not catch on the risen buns.
- Brush on the egg glaze gently and keep it away from the gaps between dough and mould.
- Cool the buns briefly on a wire rack before serving so the crumb has a chance to settle.
Variations
- Use milk chocolate: swap it for the dark chocolate for a sweeter filling.
- Add orange zest: mix finely grated zest into the dough for a citrus note.
- Try another extract: replace the vanilla extract with almond extract for a different aroma.
- Make muffin-tin brioche: follow the listed 65 g base, 10 g top and 15 g chocolate portions.
- Make tiny buns: use the 6 cm mould quantities for small, bite-sized brioche.
Common mistakes to avoid
- Adding extra flour: this can make the brioche tough; use a scraper to manage the sticky dough.
- Adding butter too early: wait until the dough is elastic so it can incorporate the butter properly.
- Leaving seams loose: pinch the dough closed tightly to help stop the chocolate escaping.
- Making the discs too thin: keep enough dough around the filling to avoid splits during baking.
- Letting the bag touch the dough: leave space around the buns so the cover does not stick to them.
- Letting egg glaze run into the mould: brush carefully so the buns are easier to remove after baking.
How to store
Serve the buns warm, ideally soon after baking. Once completely cool, store them in an airtight container for up to 3 days and reheat in a 160–180°C oven.
Frequently asked questions
Can I make the dough by hand?
Yes. Knead it for at least 10 minutes, and up to 15, using a lift, stretch, slap, fold and turn motion. Work in the butter afterwards for 8–10 minutes.
Can I make the dough on the same day?
The method calls for starting the day before and chilling the dough overnight. That chilling period also makes the soft dough easier to shape.
How do I know when the brioche is baked?
The buns should be golden and reach 90°C in the centre. A skewer should come out clean apart from any chocolate.
What if I do not have brioche moulds?
The method also gives quantities for a deep muffin tin: 65 g dough for the base, 10 g for the top and 15 g chocolate.
How many buns does this recipe make?
The recipe lists four servings, but its shaping instructions describe about 10–11 larger buns, about 40 tiny buns, or a batch using a deep muffin tin. The final number depends on the mould and portion size you choose.
Can I reheat leftover brioche?
Yes. Once cool, store it in an airtight container for up to 3 days and warm it in an oven at 160–180°C.
Cook it from the original
This recipe comes from domesticgothess.com. Their page has the author’s own photos, notes and tips — the best place to cook it from.
Open the recipe on domesticgothess.com