
Baked Sweet & Sour Chicken
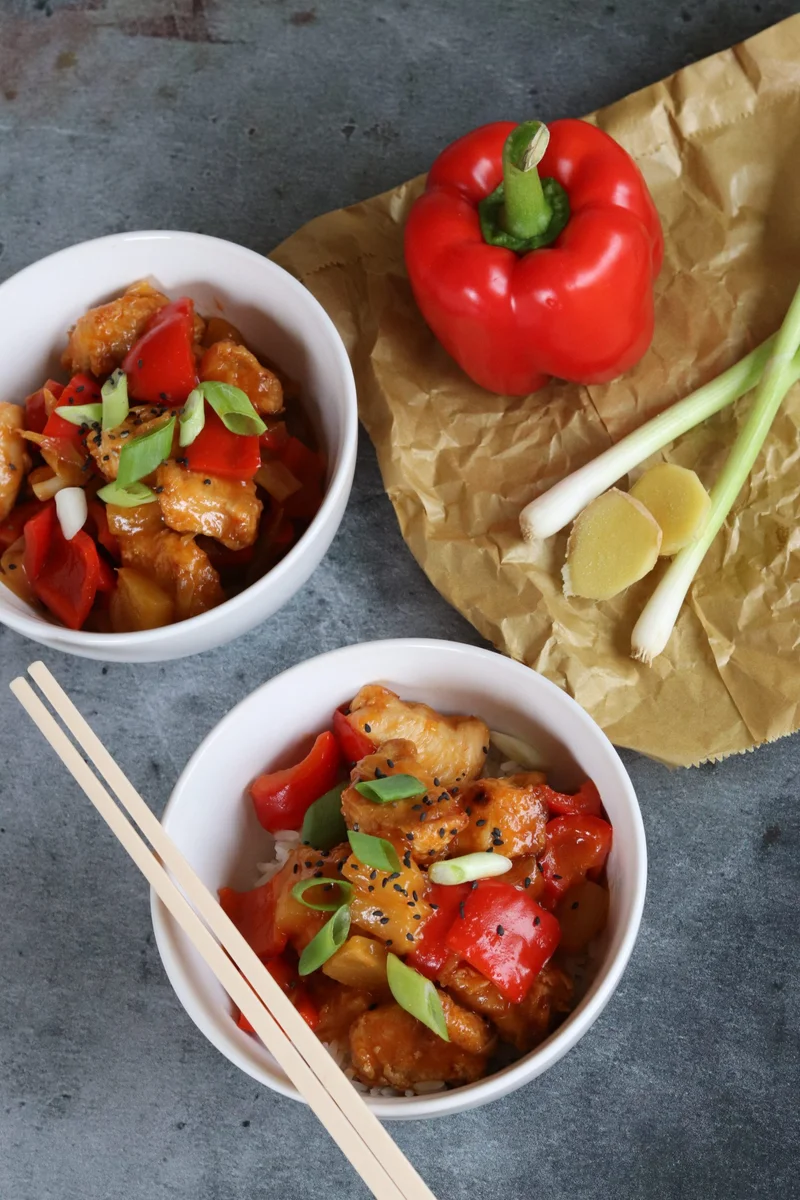
This baked sweet and sour chicken pairs tender chicken with a glossy sauce made from pineapple, peppers, soy, ginger and ketchup. It is a handy alternative to jarred sauce, with most of its flavour coming from familiar cupboard ingredients.
Ingredients
- 450 g (3 breasts)chicken breasts
- 1 tbsplight soy sauce
- 2 tbspShaoxing rice wine
- 1 clove, mincedgarlic
- 1 tbsp, gratedginger
- 50 gcornflour
- 2 tspsunflower oil
- 2 cloves, mincedgarlic
- 1 tbsp, gratedginger
- 2peppers
- 4spring onions
- 2 tbspketchup
- 4 tbspShaoxing rice wine
- 1 tspsesame oil
- 2 tbsplight soy sauce
- 1 tbsplight brown sugar
- 230 g (keep the juice)tinned pineapple chunks or slices
- 2 tbsp (from the tin)pineapple juice
- 1 tbsp, mixed with 1 tbsp pineapple juice (optional)cornflour
- A sprinklesesame seeds
- 1, choppedspring onion
Instructions
- 1
Marinate chicken
Dice the chicken into chunks and put it in a bowl with the light soy sauce, Shaoxing rice wine, minced garlic and grated ginger. Leave to marinate for 15 minutes.
- 2
Drain chicken
Once the chicken has marinated, drain off any excess liquid.
- 3
Heat the oven
Preheat the oven to 180°C fan or 200°C conventional. Line a baking tray with a silicone mat or baking paper.
- 4
Coat chicken
Put the cornflour in a shallow dish and coat each piece of chicken thoroughly, tapping off any excess. Arrange the coated pieces on the prepared tray.
- 5
Bake chicken
Bake for 10 minutes, turn the chicken pieces, then bake for another 10 minutes.
- 6
Prepare vegetables
While the chicken bakes, cut the peppers into large dice, slice the spring onions, and mince the garlic and ginger.
- 7
Soften vegetables
Heat the sunflower oil in a pan over a medium heat. Add the peppers, spring onions, garlic and ginger, and cook for around 10 minutes, stirring often, before adding the remaining sauce ingredients.
- 8
Thicken sauce
Cook over a medium heat until the sauce thickens and looks glossy. For a thicker sauce, mix the optional cornflour with 1 tablespoon of pineapple juice and stir it in.
- 9
Coat chicken
When the chicken is cooked, add it to the sauce just before serving. Stir so every piece is coated.
- 10
Garnish and serve
Serve with rice and finish with a sprinkle of sesame seeds and chopped spring onion.
What is sweet and sour chicken?
Sweet and sour chicken is a familiar Chinese-style takeaway dish, combining tangy and sweet flavours with chicken and vegetables. This home version uses pineapple, soy sauce, Shaoxing rice wine and ketchup for its sauce.
Baking the coated chicken keeps the method straightforward, while the sauce is made separately on the hob. The chicken is stirred through at the end so it gets a fresh coating without simmering for long.
Nutrition and macros by portion
The nutrition label shows one serving as written: 316 calories, 26g protein, 24g carbs, 7g fat.
| Portion | Adjustment | kcal | Protein | Carbs | Fat |
|---|---|---|---|---|---|
| Lighter | Use less rice | 221 kcal | 18g | 17g | 5g |
| This serving | As written | 316 kcal | 26g | 24g | 7g |
| Hungry | Add a larger rice portion | 474 kcal | 39g | 36g | 11g |
The chicken provides most of the protein, while pineapple, ketchup and brown sugar contribute carbohydrates. The sunflower and sesame oils account for much of the fat; serve with vegetables alongside the rice for a more balanced plate.
Building the flavour
Pineapple: Use the juice from the tin as well as the fruit to bring sweetness and acidity to the sauce. Keep the specified 2 tablespoons of juice separate for the sauce, and reserve another tablespoon if you plan to use the optional thickener.
Aromatics: Garlic and ginger go into both the chicken marinade and the pan, giving the dish flavour at each stage. Shaoxing rice wine and light soy sauce add savoury depth.
Getting the coating right
Drain first: Removing excess marinade helps the cornflour cling to the chicken rather than turning into a wet paste. Coat each chunk on all sides, then tap away loose flour.
Leave space: Arrange the chicken in a single layer on the lined tray. Crowding can make it harder for the pieces to brown and cook evenly.
Checking the chicken
Turn the pieces after the first 10 minutes so they bake on both sides. The timings are a guide; check the largest chunk is thoroughly cooked in the centre before serving.
Add the cooked chicken to the sauce at the last moment and stir to coat. This keeps the coating from sitting in the sauce for longer than necessary.
Making the sauce glossy
Cook the peppers, spring onions, garlic and ginger for around 10 minutes, stirring often, until the vegetables have softened. Then add the rest of the sauce ingredients and let the mixture thicken over a medium heat.
Cornflour slurry: The extra cornflour is optional. Mix it with 1 tablespoon of pineapple juice before adding it to the pan to help it blend smoothly and thicken the sauce.
Serving and timing
Serve the chicken straight after coating it in the sauce, with rice as suggested in the method. Sesame seeds and chopped spring onion add a finishing touch.
The total time is 55 minutes, including a 15-minute marinade and the oven and sauce cooking. You can chop the sauce vegetables while the chicken bakes to make good use of that time.
Recipe notes & tips
- Cut the chicken into similarly sized chunks so they cook at a similar rate.
- Drain the chicken well before coating it in cornflour.
- Tap off excess cornflour to avoid a heavy, powdery coating.
- Stir the vegetables regularly as they soften so they do not catch on the pan.
- Mix the optional cornflour with pineapple juice before adding it to the sauce.
- Coat the chicken in the sauce just before serving for the best texture.
Variations
- Use red pepper: Swap one pepper for a red pepper for a sweeter flavour.
- Add chilli: Stir in chopped fresh chilli with the garlic and ginger for heat.
- Choose another oil: Use a neutral cooking oil in place of sunflower oil.
- Add extra vegetables: Include sliced onion in the pan with the peppers.
- Make it gluten-free: Use gluten-free soy sauce and check the labels on the other ingredients.
Common mistakes to avoid
- Skipping the drain: Excess marinade can make the coating wet; drain the chicken before adding cornflour.
- Leaving thick flour patches: Tap off excess cornflour so the coating is even.
- Crowding the tray: Overlapping pieces may cook unevenly; arrange them in one layer.
- Adding chicken too early: It can lose its coating texture; stir it into the sauce just before serving.
- Adding dry cornflour: It can form lumps; mix it with pineapple juice first.
- Cooking on high heat: The sauce may catch before it thickens; keep it over a medium heat and stir.
How to store
Refrigerate leftovers promptly in an airtight container and use within 3 days. Reheat until piping hot throughout, either in a pan over a medium heat or in the microwave, stirring partway through.
Frequently asked questions
Can I use chicken thighs instead of breasts?
Yes, boneless chicken thighs can be cut into chunks and used in their place. Check that the largest pieces are cooked through before serving.
Can I make the sauce thicker?
Yes. Mix the optional tablespoon of cornflour with 1 tablespoon of pineapple juice, then stir it into the sauce as it cooks.
Do I need to use the pineapple juice?
The juice adds sweetness and flavour to the sauce. The recipe also uses a little juice to mix the optional cornflour thickener.
Can I prepare any of this in advance?
You can cut the vegetables and prepare the sauce ingredients ahead. For the best coating, bake the chicken and combine it with the sauce shortly before serving.
What should I serve with it?
The method suggests serving it with rice. Add extra vegetables on the side if you would like them.
Cook it from the original
This recipe comes from curlyscooking.co.uk. Their page has the author’s own photos, notes and tips — the best place to cook it from.
Open the recipe on curlyscooking.co.uk