
Paleo Chocolate Ice Cream
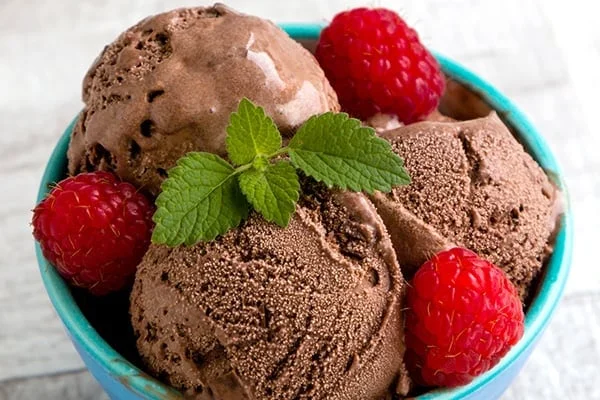
This dairy-free chocolate ice cream combines coconut milk, cocoa and egg yolks in a rich custard, then churns in an ice cream maker. Make it when you want a deeply chocolatey frozen dessert that can be served soft or frozen until firmer.
Ingredients
- 45 g (½ cup)unsweetened cocoa powder
- 960 ml (4 cups)canned coconut milk
- 8 largeegg yolks (from pasteurised eggs if you like)
- 200 g (1 cup)coconut sugar (or another natural sweetener)
- 10 ml (2 teaspoons)pure vanilla extract
Instructions
- 1
Mix the cocoa
In a medium saucepan over medium heat, whisk the cocoa powder continuously with 240 ml (1 cup) of the canned coconut milk.
- 2
Heat the milk
After a few minutes, add the remaining coconut milk and bring the mixture to a simmer, stirring occasionally. After a few more minutes, take the pan off the heat and set it aside.
- 3
Whisk the yolks
Whisk the egg yolks in a medium mixing bowl. Gradually whisk in the coconut sugar, then slowly pour in the warm coconut mixture. Once about half has been added, pour the egg mixture back into the saucepan.
- 4
Thicken the custard
Stir the mixture over low heat, stirring often, until it thickens slightly. Check that it reaches 75–80°C (170–175°F).
- 5
Cool the mixture
Turn off the hob and transfer the chocolate mixture to a bowl or container. Leave it for about 30 minutes, stir in the vanilla extract, then transfer it to the fridge.
- 6
Chill overnight
After a couple of hours, cover the container with an airtight lid and leave the mixture in the fridge overnight.
- 7
Churn the ice cream
Pour the chilled mixture into an ice cream maker and churn until it reaches your preferred thickness, usually 15–30 minutes.
- 8
Serve or freeze
Serve straight away for a soft-serve texture, or freeze it to make it firmer.
What is paleo chocolate ice cream?
This is a coconut-milk chocolate ice cream thickened with egg yolks rather than dairy cream. Chocolate frozen desserts have a long place in Italian gelato culture, though this dairy-free version is a home-style adaptation rather than a traditional gelato.
Cocoa gives it a rounded chocolate flavour, while coconut sugar sweetens the custard. Chilling the base before churning helps it freeze evenly in the ice cream maker.
Nutrition and macros by portion
The nutrition label shows one serving as written: 358 calories, 6g protein, 24g carbs, 29g fat.
| Portion | Adjustment | kcal | Protein | Carbs | Fat |
|---|---|---|---|---|---|
| Lighter | Serve a smaller scoop | 251 kcal | 4g | 17g | 20g |
| This serving | As written | 358 kcal | 6g | 24g | 29g |
| Hungry | Add a larger scoop | 537 kcal | 9g | 36g | 44g |
The coconut sugar supplies most of the carbohydrates, while the coconut milk contributes much of the fat. Egg yolks provide protein as well as some fat. Serve a scoop with fresh fruit for a simple way to add freshness and balance the plate.
Choosing the ingredients
Coconut milk: Use canned coconut milk, as specified, and stir it well if the contents have separated. Its richness is what gives the finished ice cream its creamy body.
Cocoa: Unsweetened cocoa keeps the chocolate flavour prominent and lets you control the sweetness with the coconut sugar.
Egg yolks: These enrich and help thicken the custard. Use large yolks, and pasteurised eggs if you prefer.
Tempering the yolks
Slow addition: Pour the warm coconut mixture into the yolks gradually while whisking. This raises their temperature gently and helps prevent lumps or scrambled bits.
Return to the pan: Once about half the mixture has been incorporated, pour the egg mixture back into the saucepan and continue stirring over low heat.
Getting the custard right
Low heat: Keep the mixture over low heat and stir often as it thickens. The recipe gives a target of 75–80°C (170–175°F); use a thermometer to check it if you have one.
Texture cue: The custard should thicken slightly, not become stiff. Take it off the heat once it reaches that point.
Allowing time to chill
Cooling: Let the mixture stand for about 30 minutes before adding the vanilla and moving it to the fridge. The recipe then calls for a couple of hours before covering the container and chilling the base overnight.
Planning ahead: The stated 40-minute total time does not include the overnight chilling period, so make the base the day before you want to serve the ice cream.
Churning and serving
Churning: Process the cold base in an ice cream maker for 15–30 minutes, stopping when it reaches the thickness you like. The exact time depends on the texture you want.
Serving: Eat it straight from the machine for a soft-serve consistency, or put it in the freezer to harden further.
What to serve with it
Fruit: Pair a scoop with fresh berries or sliced banana for a fresh contrast to the rich cocoa and coconut.
Crunch: Chopped toasted nuts can add texture alongside the smooth ice cream. Add them at serving so they keep their crunch.
Recipe notes & tips
- Whisk the cocoa continuously into the first portion of coconut milk to help it blend smoothly.
- Add the warm coconut mixture to the yolks gradually while whisking.
- Keep the custard over low heat and stir frequently as it thickens.
- Chill the base overnight before churning, as directed.
- Stop the ice cream maker when the mixture reaches your preferred thickness.
Variations
- Change the sweetener: Use another natural sweetener in place of the coconut sugar.
- Add nuts: Fold chopped nuts into the churned ice cream for a crunchy contrast.
- Serve with berries: Add fresh berries alongside a scoop for a fruity contrast.
- Make it softer: Serve the ice cream as soon as churning is finished.
- Freeze it firmer: Transfer the churned ice cream to the freezer before serving.
Common mistakes to avoid
- Adding the hot mixture too quickly: The yolks can turn lumpy; pour slowly while whisking.
- Using high heat: The custard may overcook; keep it over low heat and stir often.
- Skipping the thermometer check: It is harder to judge the custard; check for 75–80°C if you have a thermometer.
- Churning a warm base: It may not reach the intended thickness; chill the mixture overnight first.
- Leaving it in the machine too long: It may become firmer than you want; stop when it reaches your preferred consistency.
How to store
Keep the ice cream in a tightly covered, freezer-safe container in the freezer. For the best texture, serve it soon after churning or allow it to firm in the freezer; if it becomes very hard, leave it out briefly before scooping.
Frequently asked questions
Do I need an ice cream maker?
Yes. The recipe calls for churning the chilled mixture in an ice cream maker for 15–30 minutes.
Can I use a different sweetener?
Yes. The recipe says another natural sweetener can be used in place of the coconut sugar.
How long should I chill the base?
After cooling it for about 30 minutes and adding the vanilla, refrigerate it. The method says to cover it after a couple of hours and leave it overnight.
How can I tell when the custard is thick enough?
It should thicken slightly over low heat. The recipe recommends checking for a temperature of 75–80°C (170–175°F).
Can I serve it straight from the ice cream maker?
Yes. It will have a soft-serve texture; freeze it if you prefer it firmer.
Can I use pasteurised eggs?
Yes. The recipe notes that pasteurised eggs can be used if you like.
Cook it from the original
This recipe comes from cookedandloved.com. Their page has the author’s own photos, notes and tips — the best place to cook it from.
Open the recipe on cookedandloved.com