
Chocolate, Espresso, and Rye Babka
Nutrition per Serving
—
Calories
—
Protein
—
Carbs
—
Fat
A super easy, rich chocolate and espresso babka made with a rye brioche. The brioche dough is super soft and fluffy, made with rye flour for a toasty finish, and is filled with an espresso chocolate filling and finished with a simple syrup to give it shine and lock in moisture
📝 Ingredients
- 250 g whole milk, lukewarm
- 2 1/4 tsp active dry yeast
- 4 Tbsp sugar
- 85 g rye flour
- 480 g all-purpose flour
- 1 tsp salt
- 2 eggs, at room temperature
- 1 tsp vanilla bean paste
- 115 g unsalted butter, at room temperature
- 350 g dark chocolate (I used 70%)
- 150 g unsalted butter (cold from the fridge is fine)
- 1 tsp kosher salt
- 1/2 tsp vanilla bean paste
- 4 tsp espresso powder (or finely ground instant coffee powder)
- 120 g powdered sugar, sifted
- 60 g water
- 50 g sugar
- 1/4 tsp vanilla bean paste
👨🍳 Instructions
- 1--- BABKA DOUGH ---
- 2In a small bowl, combine the yeast, milk and 2 Tbsp of the sugar. Mix well, and leave to sit for 10-15 minutes, or until foamy.
- 3In the bowl of a stand mixer fitted with the dough hook, combine the remaining 2 Tbsp sugar, rye flour, all-purpose flour, and salt. Mix briefly to combine. Add the eggs, vanilla, and foamy yeast mixture to the bowl. Mix on low for 2-3 minutes, until the dough is starting to come together. It may look slightly dry but do not worry - it will mix together nicely in the next steps. Increase the mixer speed to medium, and mix for another 10 minutes, until the dough is soft and smooth.
- 4Reduce the mixer speed to low, and add the butter a little at a time, waiting until it is fully incorporated into the dough before adding the next piece. This process should take 3-4 minutes.
- 5Once the butter is fully incorporated, increase the mixer speed to medium, and mix for a further 5 minutes, until the dough is very soft and smooth.
- 6Transfer to an oiled bowl, and cover tightly with plastic wrap. Place in the fridge to rise - at least 3 hours and up to overnight (see notes)
- 7--- CHOCOLATE ESPRESSO FILLING ---
- 8Place the chocolate and butter into a medium heat proof bowl. Set over a pot of simmering water, ensuring that the bowl does not touch the water, and heat, stirring often, until the butter and chocolate have melted and the mixture is smooth.
- 9Remove from the heat and add the salt, vanilla bean paste, espresso powder and powdered sugar, and whisk until smooth. Set aside to cool slightly, stirring occasionally.
- 10--- ASSEMBLY AND BAKING ---
- 11Lightly grease two loaf pans, and line with parchment paper.
- 12On a lightly floured surface, roll the dough out to a 16" x 25" rectangle (40x64cm). Spread the chocolate filling over the surface of the dough. Starting with the long side, roll up into a tight spiral. Measure the length of the sausage of dough, then cut in half so it is in two sausages.
- 13Place these pieces side by side on the lined baking sheet, cover with plastic wrap, and chill for an hour.
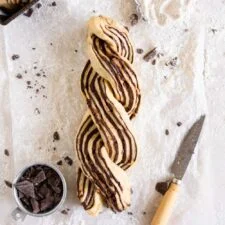
- 14Remove the dough from the fridge. Using a sharp knife, cut the first piece in half, lengthwise, and then cross the pieces over each other, and then cross over two more times to form a twist, as shown in the photos (See my IG highlight).
- 15Place into the loaf pan, tucking the ends under slightly if needed. Repeat with the second half of the dough.
- 16Lightly cover the loaf pans in plastic wrap, and place in a warm place to rise for 45 minutes to an hour, or until the dough springs back lightly when pressed. While the loaves are proofing, preheat the oven to 350˚f / 180˚c.
- 17Bake for 40-45 minutes, or until the loaves are golden brown and measure 190°f / 90°c on an instant read thermometer. While the loaves are baking prepare the sugar syrup - combine all the ingredients in a small saucepan and bring to the boil, then boil for 1-2 minutes. Leave to stand.
- 18Remove from the oven and brush both loaves with the sugar syrup while hot. Allow to cool in pans for 15 minutes then remove and transfer to a wire rack and allow to cool completely before slicing.
- 19Store leftovers in an airtight container, or wrap tightly before freezing.
About the Chef & Original Recipe
This recipe was published by Erin Clarkson on cloudykitchen.com. Visit the original source for step-by-step photos, chef notes and additional details.
Source: cloudykitchen.com