
How to Cook Rice in a Rice Cooker ご飯の炊き方 炊飯器編
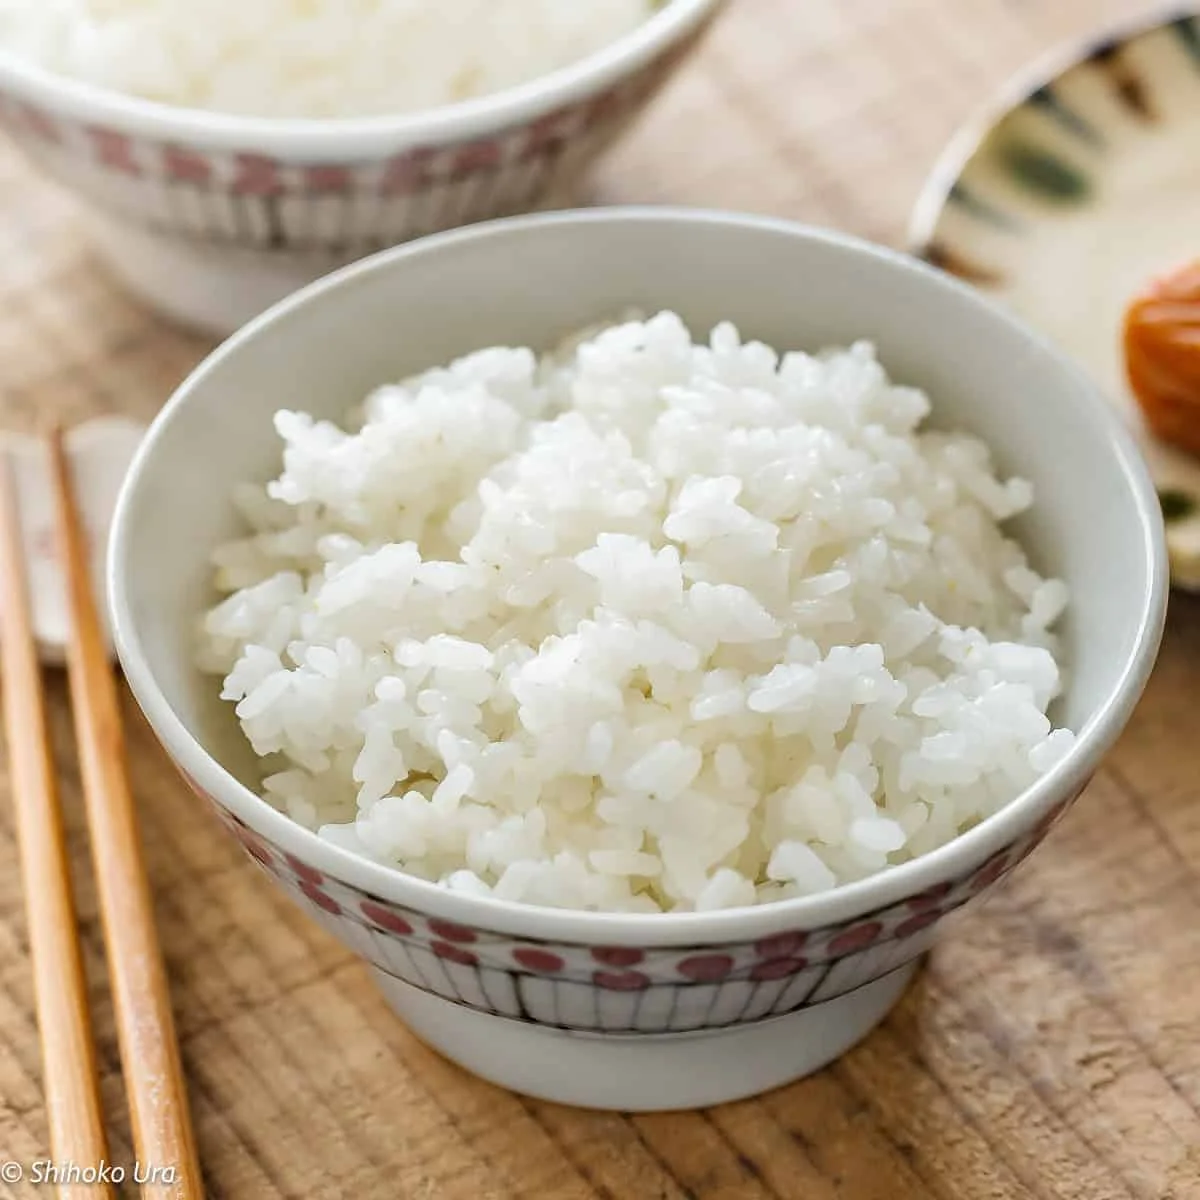
Japanese-style steamed rice made in a rice cooker, with rinsing and soaking to help the grains cook evenly. Use it as a simple base for a Japanese meal or serve it alongside your favourite mains.
Ingredients
- 360 ml (2 rice-cooker cups; 180 ml per cup)Japanese rice (*1)
- 360 ml (2 rice-cooker cups; 180 ml per cup)water
Instructions
- 1
Measure the rice
Using the cup supplied with your rice cooker, scoop up the uncooked rice. Set the cup on a flat surface in a mixing bowl and level the rice with the back of a knife. Repeat to measure two cups.
- 2
Rinse the rice
Put the measured rice in a fine-mesh strainer and rinse it with cold water in a mixing bowl, not in the rice cooker’s inner pot, to remove excess starch quickly. *2
- 3
Wash the grains
Drain the rice from the first rinse. In the bowl, gently squeeze and release the grains about 30 times without adding water. *3
- 4
Rinse again
Rinse the rice, changing the water only a few times. *4
- 5
Set the water level
Transfer the rinsed rice to the rice cooker’s inner pot and add the water. For most white rice, use a 1:1 ratio of water to rice.
- 6
Check the level
Check the water gauge inside the pot and adjust the water level if needed. Set the inner pot on a level kitchen bench and check both gauges at eye level for greater accuracy. *5
- 7
Soak the rice
Cover the inner pot with plastic wrap and leave the rice to soak in the refrigerator for about an hour.
- 8
Start cooking
Select the fast cooking mode and press the start button or switch. If you have not soaked the rice first, use the rice cooker’s standard mode.
- 9
Disable keep-warm
As soon as the rice is fully cooked, switch off the rice cooker’s keep-warm function. *6
- 10
Let it rest
If your rice cooker does not have a built-in steaming function, leave the rice undisturbed for 5–10 minutes. *7
- 11
Divide the rice
Once the rice has finished steaming, open the lid and cut through the rice crosswise to divide it into four sections.
- 12
Turn each section
Use a rice paddle to lift one section from the bottom and gently turn it over.
- 13
Loosen the grains
Carefully loosen the turned-over rice. Repeat with all four sections.
What is Japanese steamed rice?
Japanese steamed rice, or gohan, is a staple served with meals across Japan. Short-grain Japanese rice becomes tender and gently cohesive when cooked, making it easy to pick up with chopsticks.
This method uses a rice cooker and adds rinsing, washing and soaking before cooking. Those steps prepare the grains for a more even cook, while turning the rice after steaming helps separate it without crushing it.
Nutrition and macros by portion
The nutrition label shows one serving as written: 122 calories, 2g protein, 26g carbs, 0g fat.
| Portion | Adjustment | kcal | Protein | Carbs | Fat |
|---|---|---|---|---|---|
| Lighter | Serve a smaller rice portion | 85 kcal | 1g | 18g | 0g |
| This serving | As written | 122 kcal | 2g | 26g | 0g |
| Hungry | Make a larger batch | 183 kcal | 3g | 39g | 0g |
The rice supplies nearly all the carbohydrate in this serving, while the recipe contains no added fat and only a small amount of protein from the rice. Pair it with a protein-rich dish and vegetables to make the plate more balanced.
Choosing the rice and measuring it
Rice choice: Use Japanese rice, as specified, rather than assuming another variety will cook identically. Short-grain rice has the texture this method is designed for.
Rice-cooker cup: Measure with the cup supplied with your cooker and level each scoop. Rice-cooker cups are not necessarily the same size as a standard kitchen measuring cup.
Rinsing and washing the grains
First rinse: Use a fine-mesh strainer and a separate bowl, keeping the rice out of the cooker’s inner pot during rinsing. The recipe calls for cold water to remove excess starch quickly.
Gentle washing: After draining, squeeze and release the rice about 30 times without water, then rinse by changing the water only a few times. Handle the grains gently rather than rubbing them hard.
Getting the water level right
Starting ratio: The method gives a 1:1 ratio of water to rice for most white rice. Add the measured water to the rinsed rice in the inner pot.
Gauge check: Put the pot on a level surface and check its water gauges at eye level. This makes it easier to see whether the water sits at the intended mark.
Soaking and choosing a cooking mode
Soaking time: Cover the inner pot with plastic wrap and refrigerate the rice for about an hour. The stated total time is 110 minutes, so allow for this soaking period as well as cooking and finishing.
Cooking mode: After soaking, select fast cooking mode and start the cooker. If you skip the soak, the method says to use the standard mode instead.
Resting and fluffing the rice
Resting: When cooking is complete, switch off keep-warm straight away. If your cooker does not have a built-in steaming function, leave the rice undisturbed for 5–10 minutes.
Turning: Divide the rice crosswise into four sections, then lift and turn each section from the bottom with a rice paddle. Loosen the grains carefully to keep the cooked rice intact.
What to serve with it
Meal pairing: Serve the rice with miso soup, grilled fish, tofu or a vegetable side for a simple Japanese-style meal. Its mild flavour also works well with saucy dishes.
Serving: Keep the rice warm only if you are serving it straight away and your cooker’s instructions allow it. For this method, the keep-warm function is switched off as soon as cooking finishes.
Recipe notes & tips
- Use the measuring cup supplied with your rice cooker for both the rice and water.
- Level each scoop of uncooked rice on a flat surface for consistent measuring.
- Rinse the rice in a separate bowl rather than in the cooker’s inner pot.
- Check the water gauges with the inner pot resting on a level surface.
- Switch off keep-warm as soon as the rice is cooked, as directed.
- Use a rice paddle to lift and turn the rice gently before serving.
Variations
- Serve with miso soup: Pair the rice with a bowl of soup for a simple Japanese-style meal.
- Add grilled fish: Serve alongside grilled fish for a savoury main.
- Pair with tofu: Add tofu as a plant-based accompaniment.
- Add vegetables: Serve with a vegetable side to round out the meal.
Common mistakes to avoid
- Using a standard cup: The recipe specifies the rice cooker’s cup; use that measure for the rice and water.
- Rinsing in the inner pot: Use a separate bowl and a fine-mesh strainer instead.
- Washing too roughly: Squeeze and release gently about 30 times rather than crushing or scrubbing the grains.
- Guessing the water level: Check the pot’s gauges at eye level on a level surface.
- Leaving keep-warm on: Switch it off immediately after the rice is fully cooked, as the method directs.
- Fluffing aggressively: Lift and turn each section with a rice paddle, then loosen the grains carefully.
How to store
The recipe does not specify storage times. If you have leftovers, transfer them to an airtight container and refrigerate promptly; reheat until piping hot, adding a little water if the rice seems dry.
Frequently asked questions
Can I use a standard measuring cup?
The method specifies the measuring cup supplied with the rice cooker. Use that cup for both rice and water, as it may not match a standard kitchen cup.
Do I need to soak the rice?
This method soaks the rice in the refrigerator for about an hour. If you skip soaking, it directs you to use the cooker’s standard mode instead of fast cooking mode.
Why rinse the rice in a separate bowl?
The method says to rinse it in a mixing bowl, not in the rice cooker’s inner pot. A fine-mesh strainer helps keep the grains together while you rinse.
How much water should I use?
For most white rice, the method recommends a 1:1 ratio of water to rice. Check the cooker’s water gauge at eye level and adjust as needed.
Should I leave the keep-warm function on?
This method says to disable keep-warm immediately once the rice is fully cooked. Follow your cooker’s instructions if they differ.
How do I fluff the rice without mashing it?
Divide it into four sections, lift each section from the bottom with a rice paddle and turn it over gently. Loosen the grains carefully.
Cook it from the original
This recipe comes from chopstickchronicles.com. Their page has the author’s own photos, notes and tips — the best place to cook it from.
Open the recipe on chopstickchronicles.com