
Peanut Brownie Cookies (Chocolate Peanut Cookies)
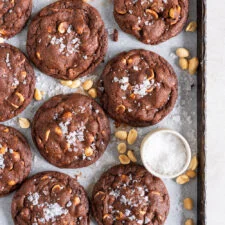
A revamp on the classic New Zealand Peanut Brownie biscuit. These cookies have a chocolate base, and are filled with roasted salted peanuts and milk chocolate chunks.
Ingredients
- 250 g unsalted butter, at room temperature
- 190 g granulated sugar
- 130 g dark brown sugar (light brown will work fine too)
- 1 egg, at room temperature
- 1 egg yolk, at room temperature
- 1 tsp vanilla bean paste or vanilla extract
- 220 g all-purpose flour
- 70 g dutch process cocoa
- 1/2 tsp baking powder
- 1/2 tsp baking soda
- 1 tsp salt
- 300 g roasted, salted peanuts
- 300 g milk chocolate, chopped
Instructions
- 1
Preheat the oven to 350°f / 180°c. Line 2-3 baking sheets with parchment paper (you may have to bake these in several batches depending on how many trays your oven can tolerate - I did four trays worth, baking one tray at a time).
- 2
In the bowl of a stand mixer fitted with the paddle attachment, cream together the butter and sugars on high speed until light and fluffy. Add the vanilla, egg and egg yolk and mix to combine. Sift together the flour, cocoa powder, baking powder, baking soda, and salt. Add the dry ingredients to the mixing bowl and mix on medium speed until just combined. Add the peanuts and chocolate and mix briefly to incorporate.
- 3
Using a 2 Tbsp scoop, scoop balls of dough out onto your prepared sheet pan. Roll into balls using your hands (the dough will be quite sticky, this is fine), and arrange on a sheet pan, leaving enough room for spreading. I did 6 balls per sheet pan just to make sure that they did not touch.
- 4
Bake the cookies for 11-12 minutes, or until set around the edges. Remove from the oven and, if desired, gently scoot the cookies into a round shape using a cookie cutter slightly larger than the cookie. Sprinkle with flaky sea salt soon after removing from the oven. Allow to cool for 10-15 minutes on the sheet pan then transfer to a wire rack to cool completely.
- 5
Store leftovers in an airtight container.
Cook it from the original
This recipe comes from cloudykitchen.com. Their page has the author’s own photos, notes and tips — the best place to cook it from.
Open the recipe on cloudykitchen.com