
Tamagoyaki 卵焼き
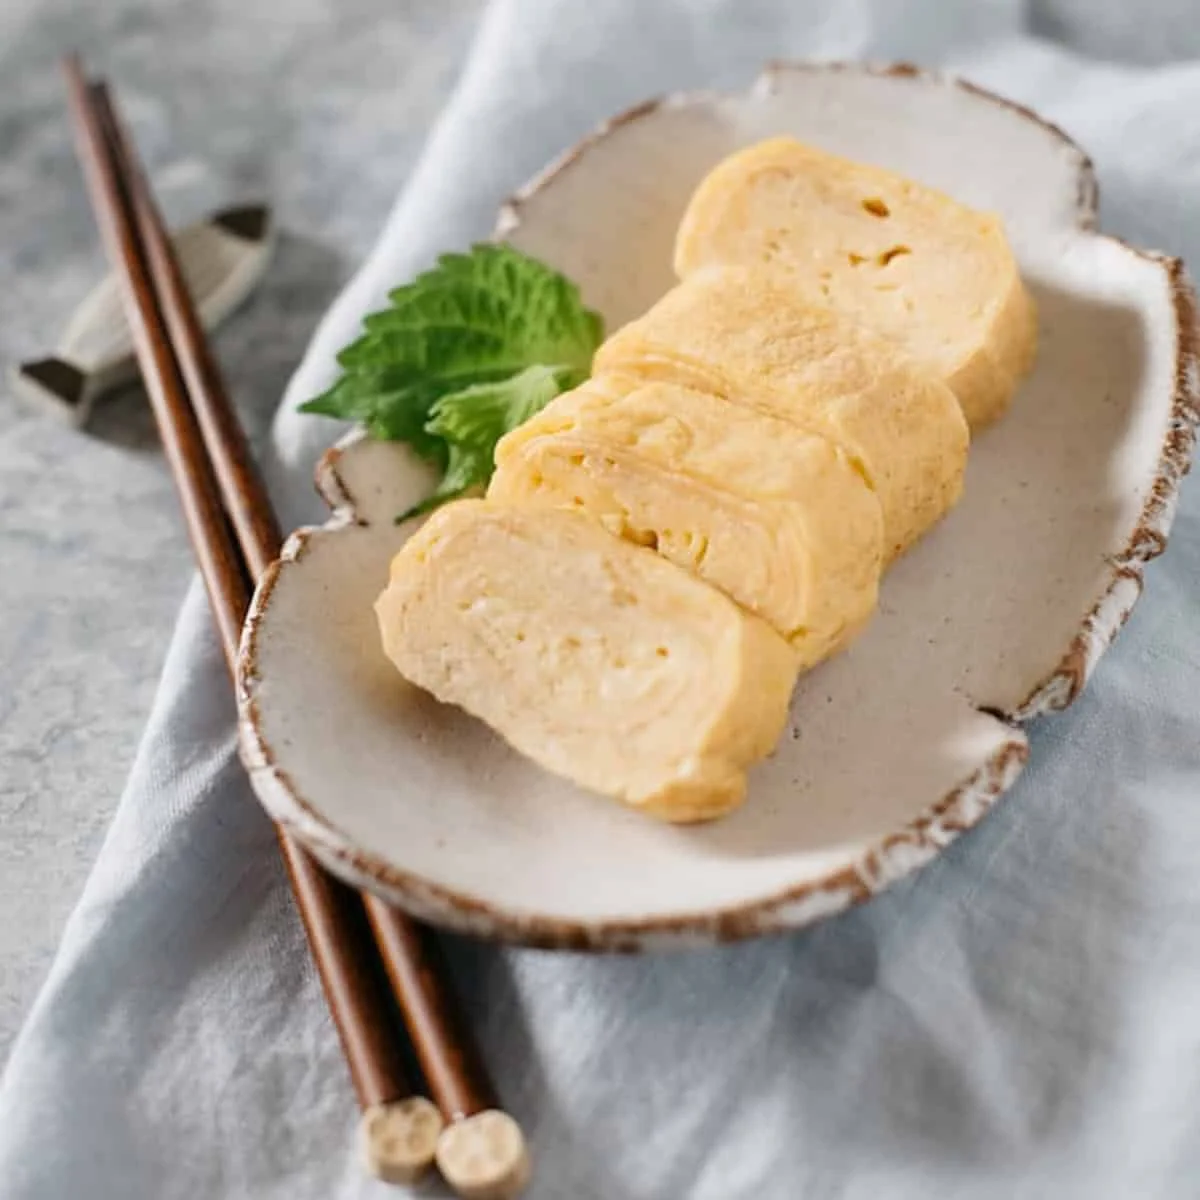
Tamagoyaki is a soft, rolled Japanese omelette cooked in thin layers. This recipe gives you a choice of savoury dashi-style seasoning or a sweeter, lightly salted version, with a gentle rolling method for a fluffy, bouncy result.
Ingredients
- 3eggs
- 2 tspshirodashi (*1)
- 2 tbspwater
- 1 tspolive oil
- 3eggs
- 2 tspsugar
- 1/2 tspsalt
- 2 tbspwater
- 1 tspolive oil
Instructions
- 1
Beat the eggs
Crack the eggs into a medium mixing bowl.
- 2
Season gently
For dashimaki, add the shirodashi and water; for atsumaki, add the sugar, salt and water. Mix gently so you do not create too many bubbles.
- 3
Strain the mixture
Pass the egg mixture through a sieve a few times.
- 4
Prepare the paper
Pour about 2 tbsp oil (not listed in the ingredients) into a small bowl. Soak kitchen paper in it and set it aside.
- 5
Heat the pan
Warm 2 tsp olive oil in a frying pan over medium heat, until you can feel the heat when holding your hand above the pan.
- 6
Add first layer
Pour about one-third of the egg mixture into the pan; you should hear it sizzle.
- 7
Break the bubbles
Use the edge of chopsticks to break any bubbles, then gently scramble the egg just a little.
- 8
Fold the egg
When the surface has partly set, use chopsticks to fold the egg and push it to one end of the pan (*2).
- 9
Oil the pan
Wipe the empty side of the pan with the oil-soaked kitchen paper, then pour another one-third of the egg mixture into that space.
- 10
Lift the roll
Lift the folded egg so the uncooked mixture can flow underneath it.
- 11
Roll another layer
Fold and roll the egg from one side of the pan, then wipe the empty space with the oil-soaked kitchen paper.
- 12
Add final layer
Pour in the last one-third of the egg mixture and repeat the folding and rolling.
- 13
Wrap the roll
Turn off the heat and wrap the rolled egg in a thin kitchen towel.
- 14
Shape and rest
Use a sushi mat to roll and shape the towel-wrapped egg, then leave it to cool (*3).
- 15
Slice and serve
Once cool, slice the roll into pieces 2 cm thick and serve.
What is tamagoyaki?
Tamagoyaki is a Japanese rolled omelette made by cooking beaten egg in successive thin layers and rolling them together. It is eaten in different settings, from home cooking and bento to street-food stalls; the description here also calls this style Kushidama.
Two seasoning options make this recipe flexible: shirodashi and water for a savoury dashimaki, or sugar, salt and water for a sweeter atsumaki. Straining and cooking gently help give the roll a smooth, tender texture.
Nutrition and macros by portion
The nutrition label shows one serving as written: 130 calories, 8g protein, 4g carbs, 8g fat.
| Portion | Adjustment | kcal | Protein | Carbs | Fat |
|---|---|---|---|---|---|
| Lighter | Use less oil | 91 kcal | 6g | 3g | 6g |
| This serving | As written | 130 kcal | 8g | 4g | 8g |
| Hungry | Serve with rice | 195 kcal | 12g | 6g | 12g |
The eggs provide most of the protein and fat, while the small amount of sugar in the atsumaki option contributes some carbohydrate; the savoury version gets seasoning from shirodashi. Pair a portion with rice and vegetables for a more complete plate.
Choose your seasoning
Dashi style: Use the shirodashi and water for a savoury, savoury-sweet egg with a dashi flavour. Shirodashi is a concentrated seasoning, so follow the stated quantity.
Atsumaki style: Use the sugar, salt and water for a sweeter, lightly seasoned version. The ingredient list presents these as separate options, rather than additions to the shirodashi mixture.
Strain for a smooth mixture
Gentle mixing: Combine the eggs and chosen seasonings without whisking vigorously, which can add lots of bubbles. Pass the mixture through a sieve a few times as directed for a more even consistency.
Small bubbles: If bubbles appear during cooking, break them with the edge of the chopsticks before folding. This also helps keep the layers neat.
Build the roll in layers
First layer: Pour in about one-third of the mixture and let it begin to set before folding it to one side. A slight scramble at this stage is part of the method.
Next layers: Oil the empty pan area, add another third and lift the roll so the egg can run underneath. Repeat with the final third, folding and rolling each layer around the growing omelette.
Watch the heat and texture
Medium heat: The pan should be hot enough for the egg to sizzle when it goes in, but the recipe does not call for high heat. If the egg browns too quickly, lower the heat so you have time to fold it.
Set surface: Fold when the surface is partly solidified, rather than waiting for the whole layer to become firm. The layers should still be flexible enough to roll together.
Shape before slicing
Resting: After turning off the heat, wrap the roll in a thin kitchen towel and shape it with a sushi mat. Let it cool before slicing so it is easier to handle.
Serving: Cut the cooled roll into 2 cm-thick pieces. It can be served as part of a Japanese-style meal or alongside rice and other small dishes.
Recipe notes & tips
- Keep the egg mixture covered between pours only if needed; the key is to mix it gently and strain it before cooking.
- Have the oil-soaked kitchen paper ready so you can wipe the empty pan area between layers.
- Pour the mixture in thirds to make the layers easier to manage.
- Use chopsticks to lift the roll and let fresh egg flow beneath it.
- Wait until the roll has cooled before cutting it into slices.
Variations
- Savoury dashimaki: Season the eggs with shirodashi and water instead of sugar and salt.
- Sweet atsumaki: Use sugar, salt and water for the lightly sweetened version.
- Rice side: Serve the slices with plain rice for a simple, filling meal.
- Bento filling: Let the roll cool fully before packing slices into a lunch box.
Common mistakes to avoid
- Whisking too vigorously: Too much air creates bubbles; mix gently and strain the egg.
- Adding a layer too late: If the first layer sets completely, it may be harder to roll; fold when the surface is only partly set.
- Skipping the pan wipe: Dry patches can make the next layer stick; wipe the empty area with oil-soaked kitchen paper.
- Pouring all the egg at once: The roll is built in layers; divide the mixture into thirds as directed.
- Slicing while hot: The roll is more difficult to handle warm; shape it and let it cool first.
How to store
Refrigerate leftovers in an airtight container and eat within 2 days. Reheat gently in a pan or microwave, or serve chilled; avoid overheating, which can make the egg firm.
Frequently asked questions
What is the difference between dashimaki and atsumaki here?
Dashimaki uses shirodashi and water for a savoury seasoning. Atsumaki uses sugar, salt and water for a sweeter version.
Do I use both sets of egg ingredients?
The method describes the shirodashi and sugar-seasoning mixtures as alternatives. Choose one seasoning set; the ingredient list gives 3 eggs for each version.
Why strain the egg mixture?
Straining helps remove uneven bits and gives the mixture a smoother consistency for layering.
How do I know when to fold a layer?
Fold when the surface has partly set but is still flexible. If it is completely firm, the layer may be harder to roll neatly.
Can I make tamagoyaki without a rectangular pan?
The method calls for a frying pan, so use a small one that lets you fold the egg towards one side. A rectangular pan is not specified.
Why does the recipe mention oil that is not in the ingredients?
The method calls for about 2 tbsp oil in a bowl to soak the kitchen paper, and 2 tsp olive oil to heat in the pan. The ingredient list does not include that extra oil for the paper.
Cook it from the original
This recipe comes from chopstickchronicles.com. Their page has the author’s own photos, notes and tips — the best place to cook it from.
Open the recipe on chopstickchronicles.com