
Rainbow Frosting Cupcakes
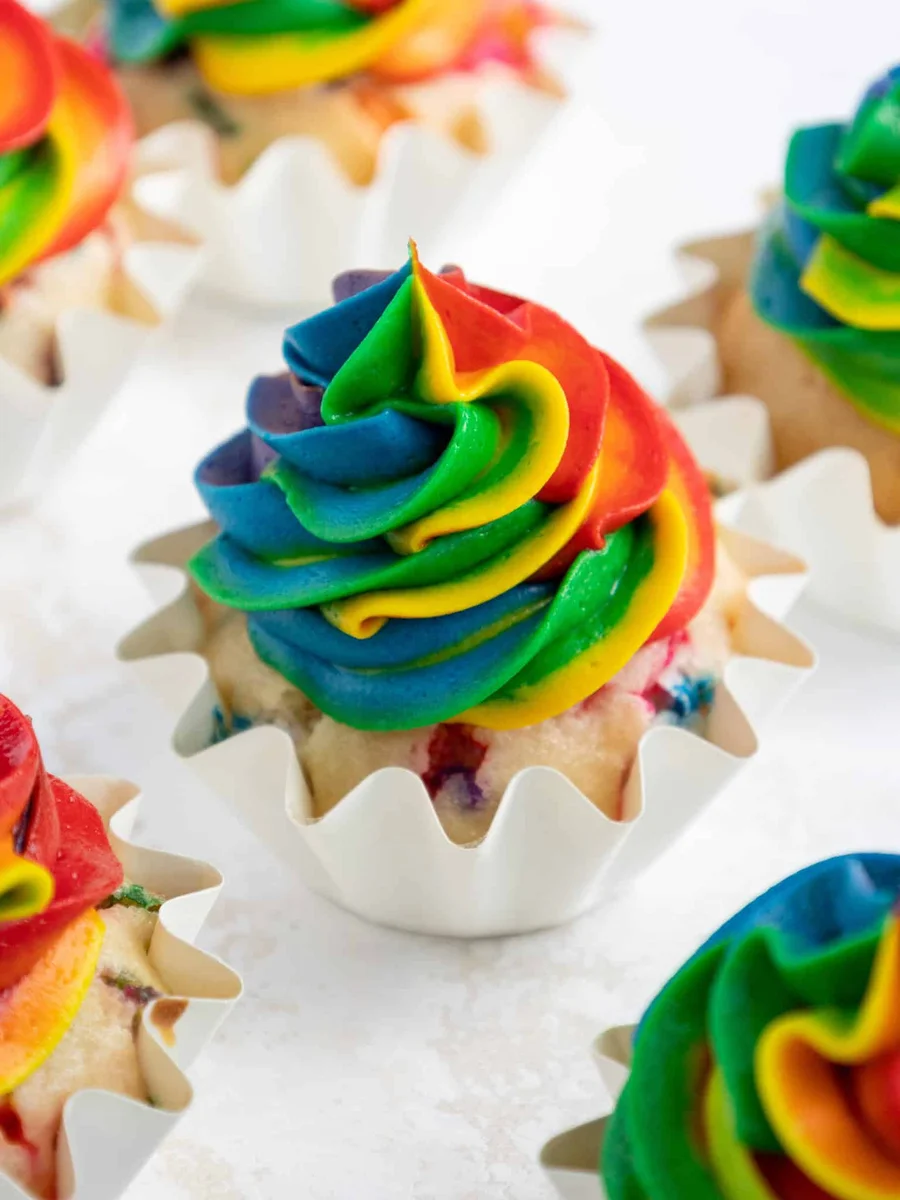
These rainbow frosting cupcakes are so stunning! They're made with tender funfetti cupcakes and are frosted with homemade buttercream frosting.
Ingredients
- 1 1/4 cups all-purpose flour (160g)
- 1 cup granulated sugar (200g)
- 1 1/2 tsp baking powder (6g)
- 1/2 tsp fine salt (3g)
- 1/2 cup water (120g)
- 1/2 cup full-fat sour cream, room temperature (120g)
- 1/4 cup vegetable or canola oil (56g)
- 1 large egg, room temperature (56g)
- 1 tsp vanilla extract or vanilla bean paste (4g)
- 1/2 tsp almond extract - optional (2g)
- 1/3 cup rainbow jimmies / long sprinkles (60g)
- 1 cup (2 sticks) unsalted butter, room temperature (226g)
- 2 tsp vanilla extract or vanilla bean paste (8g)
- 1/4 tsp fine salt (2g)
- 3 1/2 cups powdered sugar (454g or a 1 lb. box)
- 2 Tbsp heavy cream or milk, room temperature (30g)
- Red, orange, yellow, green, blue, and electric purple gel food coloring
- Muffin Pan
- Cupcake liners
- Plastic wrap like Saran wrap
- Large piping bag
- Open star piping tip like a Wilton 1M
Instructions
- 1
--- Funfetti Cupcakes ---
- 2
Begin by preheating the oven to 350°F/175°C. Place 12 cupcake liners in a muffin pan and set aside.
- 3
Add 1 1/4 cups all-purpose flour, 1 cup sugar, 1 1/2 tsp baking powder, and 1/2 tsp salt to a large bowl. Whisk together until combined.
- 4
Next, add 1/2 cup water, 1/2 cup sour cream, 1/4 cup vegetable oil, 1 egg, 1 tsp of vanilla extract, and 1/2 tsp of almond extract into the dry ingredients. Mix until the batter comes together and is smooth.
- 5
Gently fold in 1/3 cup of rainbow sprinkles with a rubber spatula.
- 6
Fill the cupcake liners about 3/4 of the way full. Bake for 19-22 minutes or until a toothpick comes out with a few moist crumbs. Rotate the pan halfway through to help the cupcakes bake evenly.
- 7
Let the cupcakes cool for 10 minutes in the pan, then move them to a wire rack to finish cooling. If you want to accelerate the cooling process, pop the cupcake pan into your freezer for about 30 minutes.
- 8
--- Rainbow Buttercream Frosting ---
- 9
Beat 1 cup of butter, 2 tsp vanilla extract, and 1/4 tsp fine salt on a medium speed for 30 seconds with a paddle attachment or hand mixer until smooth.
- 10
Slowly mix in 3 1/2 cups of powdered sugar and 2 Tbsp of heavy cream on a low speed. Beat on low until the ingredients are fully incorporated.
- 11
If the frosting seems too thick, add in additional cream (1 Tablespoon at a time). If the frosting seems too thin, add more powdered sugar (quarter of a cup at a time). Or, if you aren't sure what consistency you're after, check out my buttercream consistency guide.
- 12
You should have about 3 cups of frosting. Lay out a piece of plastic wrap that is about 1 foot long.
- 13
Scoop 1/2 cup of frosting into a separate bowl and color it red with a generous squirt of gel food coloring. Spread the red frosting in a thin, long line on the plastic wrap. I placed each color of frosting in its own small piping bag to pipe neat lines, but I think this step can be bypassed to make the process simpler and create less waste.
- 14
Repeat step 5 to make orange, yellow, green, blue, and purple frosting and spread each one out in lines on the plastic wrap like in the photo above. All 6 colors can be made in the same bowl. The remnants from the prior color will help give the color palette a cohesive look.
- 15
Carefully roll the plastic wrap to make a frosting log. Make sure you roll the plastic wrap in the same direction that the frosting lines are spread. Twist the plastic wrap at the ends of the frosting log, then cut off one of them.
- 16
Place the buttercream log cut end-first into a large piping bag fitted with an open star piping tip. Pipe large swirls onto the fully cooled cupcakes, then enjoy!
Cook it from the original
This recipe comes from chelsweets.com. Their page has the author’s own photos, notes and tips — the best place to cook it from.
Open the recipe on chelsweets.com