
Easy Soft Dinner Rolls
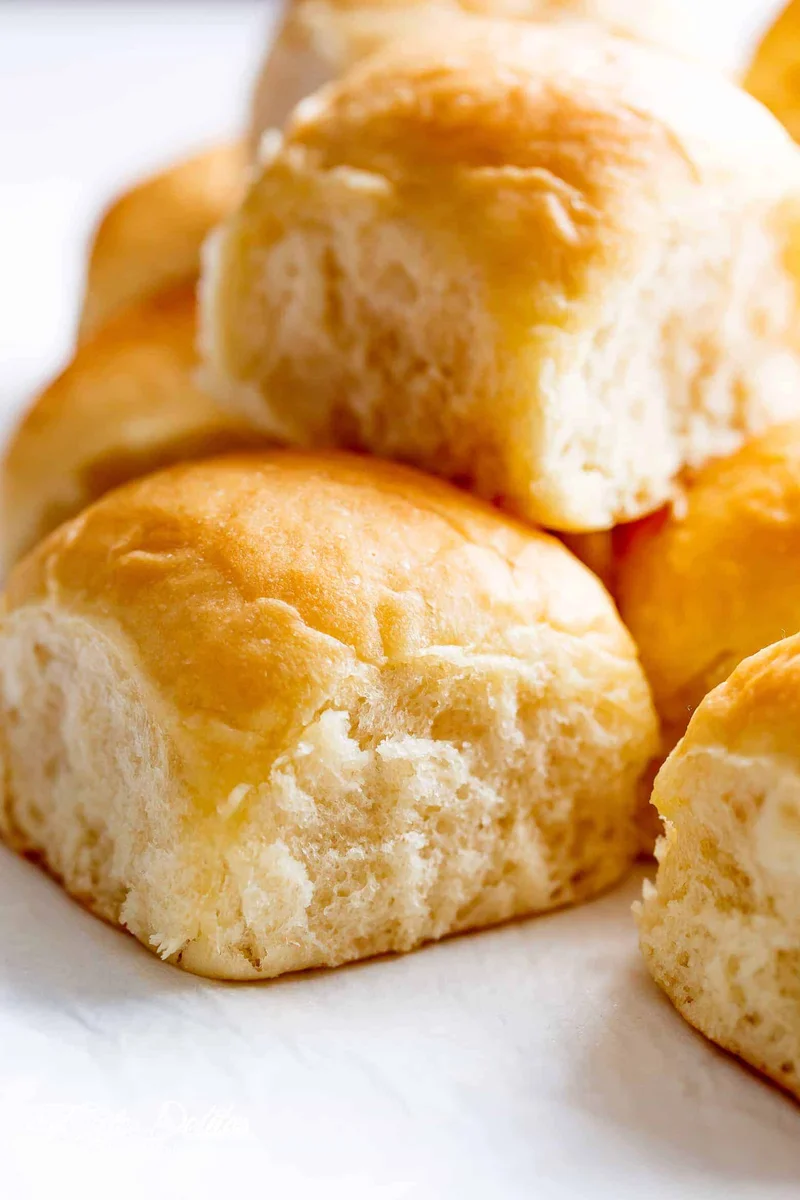
These soft American dinner rolls are made with a simple yeast dough that needs no mixer and very little kneading. Serve them warm with dinner, or use them for sliders and sandwiches.
Ingredients
- 1 tablespoonrapid-rise yeast
- 3 tablespoons, dividedwhite granulated sugar
- 120 ml (½ cup), warm to 43–46°C (110–115°F)water
- 240 ml (1 cup)milk
- 57 g (¼ cup), meltedbutter
- 1½ teaspoonssalt
- 4 cups (about 500 g), plus about ¼ cup (30 g) extra for dustingbread flour or plain flour
- 2 tablespoons (about 28 g), melted, for brushingbutter
Instructions
- 1
Warm the oven
If you plan to use the oven to prove the dough, heat it to 100°C (200°F).
- 2
Activate the yeast
In a large bowl, stir together the yeast, 1 tablespoon of the sugar and the warm water. Leave for 7–10 minutes, until foamy.
- 3
Warm the milk
While the yeast activates, put the milk and 57 g melted butter in a microwave-safe jug with a 2-cup capacity. Microwave on high for about 40–50 seconds, until the butter is half melted and the milk is lukewarm. Stir in the remaining sugar and the salt until the butter melts and the sugar dissolves, then add this mixture to the yeast.
- 4
Mix the dough
Stir in 2 cups of flour with a wooden spoon, then add the remaining 2 cups. Mix for about 1–2 minutes, until the dough starts to pull away from the sides of the bowl. Turn it onto a lightly floured surface and knead in the extra flour a tablespoon at a time for about 4–5 minutes, until smooth, elastic and slightly sticky. Lightly oil your hands if the dough is too sticky.
- 5
Prove the dough
Return the dough to the bowl and cover it with a warm, damp towel. Turn the oven off and put the bowl inside, leaving the door ajar for the first 10–15 minutes. Then close the door and leave the dough to double in size, about another 45 minutes.
- 6
Divide the dough
Turn the dough onto a lightly floured work surface. If needed, knead it gently for about 30–40 seconds to bring it together, then shape it into a loaf. Cut it in half, then cut each half into 6 equal pieces, making 12 pieces in total.
- 7
Shape the rolls
Working with one piece at a time, flatten it gently in your palm, bring all the edges up to a peak and pinch the seam closed. Turn it over so the smooth side faces up, checking for cracks. If there are any, turn it seam-side up, smooth them towards the peak, pinch the seam closed again and turn it back over. Dust your hands lightly with flour if needed.
- 8
Arrange and preheat
Place the rolls smooth-side up in a lightly greased 23 × 33 cm (9 × 13-inch) baking pan or dish; line it with baking parchment if you wish. Preheat the oven to 190°C (375°F), or 180°C (350°F) for a fan oven.
- 9
Prove once more
Lightly spray the rolls with cooking oil spray, cover with cling film and leave them to rise for about 30 minutes, until almost doubled in size.
- 10
Bake the rolls
Bake in the preheated oven for 20–25 minutes, until golden brown. Check them after 18 minutes.
- 11
Brush and cool
Brush the rolls lightly with some of the extra melted butter, then transfer them to a cooling rack.
What are soft dinner rolls?
Dinner rolls are small, soft bread rolls traditionally served alongside a meal. This American-style version uses a yeasted dough enriched with milk and butter, giving the rolls a tender crumb and a lightly rich flavour.
The method keeps things straightforward: there is no mixer, and the dough needs only a short hand-knead. Shaping each piece with its seam tucked underneath helps create a smooth top.
Nutrition and macros by portion
The nutrition label shows one serving as written: 226 calories, 6g protein, 34g carbs, 7g fat.
| Portion | Adjustment | kcal | Protein | Carbs | Fat |
|---|---|---|---|---|---|
| Lighter | Smaller roll | 158 kcal | 4g | 24g | 5g |
| This serving | As written | 226 kcal | 6g | 34g | 7g |
| Hungry | Two rolls | 339 kcal | 9g | 51g | 11g |
Most of the carbohydrates come from the flour, while the butter contributes most of the fat and the milk and flour provide some protein. Serve a roll alongside a source of protein and vegetables to make a more balanced plate.
Choosing the flour
Bread flour: its higher protein content helps give the rolls structure and a pleasantly springy texture.
Plain flour: it can be used instead, as the recipe allows. The dough may feel a little different, so add the extra flour gradually and stop when it is smooth, elastic and still slightly sticky.
Getting the yeast going
Warm water: aim for 43–46°C (110–115°F), as specified, and give the yeast 7–10 minutes to turn foamy. This visible foam is the cue to continue.
Milk mixture: warm the milk and butter only until the butter is partly melted and the milk is lukewarm. Stir in the sugar and salt before combining it with the yeast.
Kneading and proving
Kneading: work in the extra flour a tablespoon at a time rather than tipping it all in at once. The finished dough should be smooth and elastic, with a slight tackiness.
First rise: the warm, switched-off oven provides a sheltered place for the dough to rise. Leave the door ajar for the first 10–15 minutes, then close it and allow about 45 minutes more, or until doubled.
Shaping for a smooth top
Even pieces: divide the dough into 12 equal portions so the rolls bake at a similar rate. Each piece is gathered to a peak and pinched closed.
Sealed seams: place each roll smooth-side up in the pan and check for cracks. If you spot any, turn the roll over and pinch the seam closed again before arranging it.
Rising and baking cues
Second rise: cover the shaped rolls and leave them for about 30 minutes, until nearly doubled. The pan should hold them together as they rise and bake.
Colour: bake at 190°C (375°F), or 180°C (350°F) in a fan oven, for 20–25 minutes. Check at 18 minutes and look for golden-brown tops.
Serving the rolls
Warm rolls are an easy match for soups, stews and meals with gravy or sauce. Their soft texture also makes them useful for small sandwiches and sliders.
For a simple finish, brush the baked rolls with melted butter and let them cool on a rack. If you want a softer top, cover them loosely with a clean tea towel while they cool.
Recipe notes & tips
- Measure the extra flour separately and work it into the dough gradually.
- Use a lightly oiled hand if the dough sticks while kneading.
- Keep the seam pinched closed when shaping each roll.
- Leave enough space in the pan for the rolls to rise together.
- Check the rolls at 18 minutes, as ovens can bake at different rates.
- Brush with the melted butter while the rolls are still warm.
Variations
- Herb finish: brush the baked rolls with melted butter mixed with finely chopped herbs.
- Garlic butter: stir minced garlic into the melted butter before brushing the rolls.
- Seeded tops: sprinkle seeds over the rolls after spraying them and before the second rise.
- Wholemeal mix: replace part of the bread flour with wholemeal flour, keeping in mind the dough may need a different amount of extra flour.
- Slider size: divide the dough into smaller portions for smaller rolls and check them earlier as they bake.
Common mistakes to avoid
- Water too hot: use water at 43–46°C (110–115°F) so the yeast can foam as expected.
- Too much extra flour: add it a tablespoon at a time and stop when the dough is smooth, elastic and slightly sticky.
- Rushing the first rise: let the dough double in size before dividing it.
- Loose seams: pinch each roll closed and check that the smooth side has no cracks.
- Skipping the second rise: leave the shaped rolls until nearly doubled for the texture described by the method.
- Overbaking: check the rolls at 18 minutes and take them out when golden brown.
How to store
Once cool, store the rolls in an airtight container at room temperature for up to 2 days. Rewarm them briefly in a low oven, or microwave one roll for a few seconds until soft. Freeze for longer storage and thaw before reheating.
Frequently asked questions
Can I use plain flour instead of bread flour?
Yes. The recipe allows plain flour as an alternative. Add the extra flour gradually and judge the dough by its smooth, elastic, slightly sticky texture.
How do I know the yeast is ready?
After 7–10 minutes in the warm water and sugar, it should look foamy. If it does not, check that the water was at the specified temperature and that the yeast is still active.
Can I prove the dough without using the oven?
Yes. Cover the bowl with a warm, damp towel and leave it in a warm place until the dough has doubled. The oven is used as a proving spot only if you choose that method.
Why should I check the rolls before the full baking time?
The method recommends checking at 18 minutes because ovens can vary. Take the rolls out when they are golden brown, within the stated 20–25-minute baking time.
Can I prepare the rolls ahead?
The recipe does not give an overnight preparation method. For best results, follow its two rises and bake the rolls on the day you plan to serve them.
Can I freeze these dinner rolls?
Yes. Once completely cool, pack them in a freezer-safe container or bag. Thaw them and warm briefly before serving.
Cook it from the original
This recipe comes from cafedelites.com. Their page has the author’s own photos, notes and tips — the best place to cook it from.
Open the recipe on cafedelites.com