
Chocolate Chip Walnut Cookies
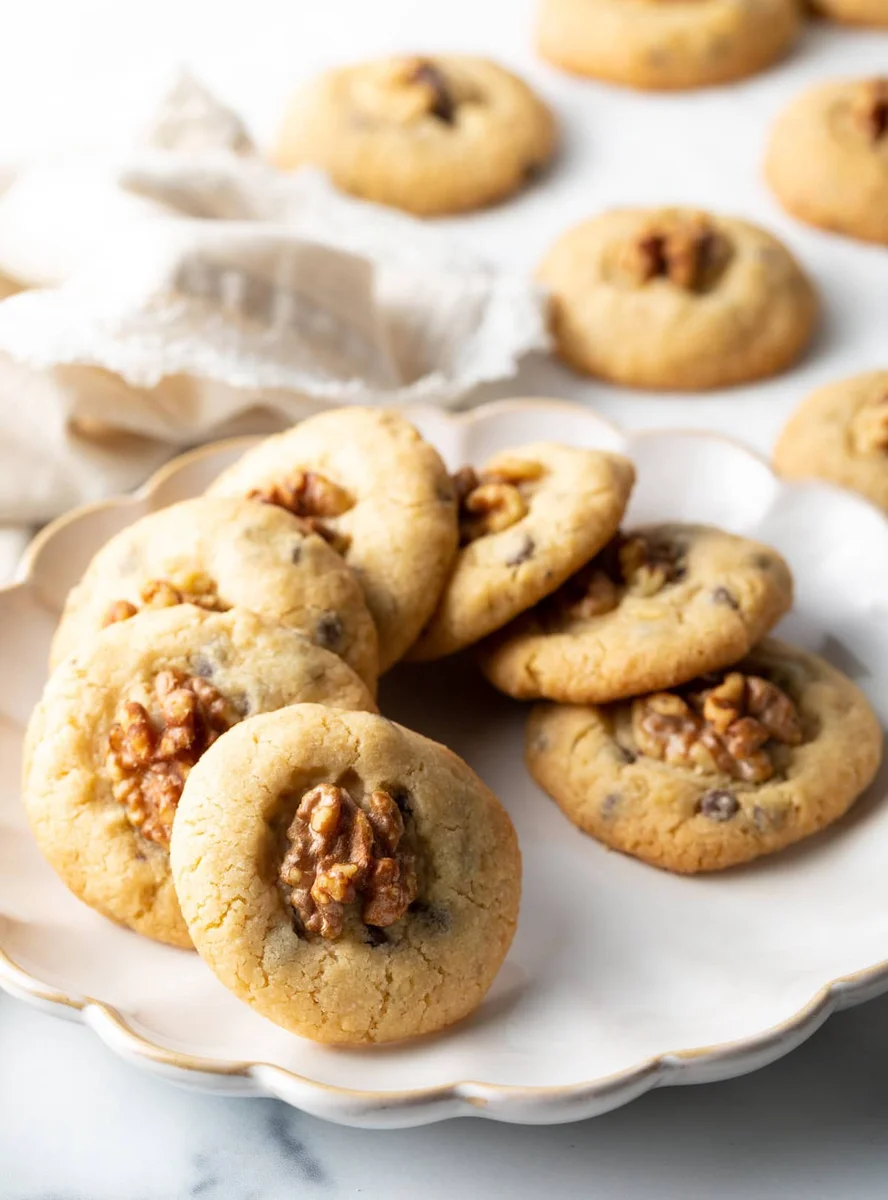
These thick American-style cookies combine chocolate chips with finely ground walnuts for a buttery, crumbly bite. The dough needs no chilling and contains no eggs, so you can have a batch ready to bake in under an hour.
Ingredients
- 454 g (2 cups; 1 pound)unsalted butter, softened
- 133 g (⅔ cup)granulated sugar
- 133 g (⅔ cup)light brown sugar
- 7.5 ml (1½ teaspoons)vanilla extract
- 5 ml (1 teaspoon)salt
- 438 g (3½ cups)plain flour
- 170 g (1 cup)mini chocolate chips
- About 120 g (1 cup ground; from 1 heaping cup of pieces)walnuts, ground
- 48walnut halves, for the tops
Instructions
- 1
Preheat the oven
Heat the oven to 180°C (350°F). Line several large baking sheets with baking parchment.
- 2
Cream the butter
Put the softened butter, granulated sugar, brown sugar, vanilla and salt in a stand mixer. Beat on high for 3–5 minutes, until the mixture is light and fluffy.
- 3
Grind the walnuts
While the butter mixture is beating, pulse 1 cup of walnut pieces in a food processor or blender until finely ground, like a fine crumble or flour. Stop before they turn into walnut butter, and keep the prettiest halves for the tops.
- 4
Mix the dough
Scrape down the bowl with a rubber spatula. With the mixer on low, add the flour and ground walnuts and mix until smooth. Mix in the mini chocolate chips just until incorporated, then switch off the mixer.
- 5
Shape the cookies
Use a 1½-tablespoon scoop or a kitchen scale to portion the dough into 28 g (1-ounce) balls. Roll them tightly and arrange them on the baking sheets about 5 cm (2 inches) apart.
- 6
Add walnut tops
Press one walnut half into each dough ball, flattening it until the cookie is about 2 cm (¾ inch) tall.
- 7
Bake and cool
Bake for 15–18 minutes, checking at 15 minutes. The centres should be just cooked through, not doughy, and the edges only slightly golden. Leave the cookies on the baking sheets to cool and firm up.
What are chocolate chip walnut cookies?
These are American-style butter cookies with chocolate chips and walnuts, shaped into individual rounds and baked until the edges are lightly coloured. Chocolate chip cookies are a familiar American home-baking classic; this version uses ground walnuts in the dough as well as walnut halves on top.
Walnut flour gives the cookies a nutty flavour and a tender, crumbly texture, while creaming the butter and sugars helps make the dough light. The no-chill dough can go straight from mixing to the oven.
Nutrition and macros by portion
The nutrition label shows one serving as written: 172 calories, 2g protein, 16g carbs, 12g fat.
| Portion | Adjustment | kcal | Protein | Carbs | Fat |
|---|---|---|---|---|---|
| Lighter | Smaller cookies | 120 kcal | 1g | 11g | 8g |
| This serving | As written | 172 kcal | 2g | 16g | 12g |
| Hungry | Larger portion | 258 kcal | 3g | 24g | 18g |
The flour and sugars provide most of the carbohydrates, while butter supplies much of the fat. The walnuts and chocolate chips add some protein as well as fat, with walnuts also bringing their characteristic nutty flavour. Pair a cookie or two with fruit or yoghurt for a more rounded snack.
The butter and sugar base
Creaming: Beat the softened butter with both sugars for the full 3–5 minutes, until noticeably pale and fluffy. This step helps build the texture, so avoid stopping as soon as the ingredients are merely combined.
Butter temperature: Use softened butter that can be beaten smoothly, rather than melted butter. If it is too firm, it will be harder to cream evenly.
Getting the walnut texture right
Fine grind: Pulse the walnut pieces until they resemble fine crumbs or flour. Stop before they become a paste; the food processor can turn nuts into butter if they are ground for too long.
Reserved halves: Set aside 48 attractive walnut halves for the tops. Pressing them into the shaped dough gives each cookie a clear walnut finish.
Mixing without overworking
Flour and nuts: Add the flour and ground walnuts with the mixer on low, and stop once the dough is smooth. This keeps the mixing controlled after the flour goes in.
Chocolate chips: Add the mini chips last and mix only until they are spread through the dough. Switch off the mixer promptly rather than continuing to beat.
Shaping and spacing
Even portions: A 1½-tablespoon scoop or a scale helps divide the dough into consistent 28 g (1-ounce) balls. Roll each one tightly before placing it on the lined tray.
Room to spread: Leave about 5 cm (2 inches) between dough balls. Press each walnut half in until the cookie is about 2 cm (¾ inch) tall.
How to judge when they are done
Colour: Start checking at 15 minutes. The edges should be just slightly golden, while the centres should be set but not dry.
Cooling: Leave the cookies on the baking sheets after baking. They continue to firm as they cool, so moving them while hot can make them more fragile.
What to serve with them
These cookies are easy to share on their own, with coffee or tea, or alongside a glass of milk. Their buttery richness also makes them a natural finish to a simple lunch or dinner.
For a dessert plate, serve one or two with fresh fruit. The fruit adds a fresh contrast to the sweet chocolate and toasted-nut flavour.
Recipe notes & tips
- Line the baking sheets before mixing so the shaped dough can go straight into the oven.
- Cream the butter and sugars for the full 3–5 minutes to get the light, fluffy mixture the method calls for.
- Pulse the walnuts in short bursts and check their texture often to avoid making walnut butter.
- Use a scoop or scale to keep the dough portions even and help the cookies bake at the same rate.
- Check the first tray at 15 minutes, as the edges should be only slightly golden.
- Let the cookies firm on the baking sheets before transferring or serving them.
Variations
- Larger chips: Use regular chocolate chips instead of mini chips for bigger pockets of chocolate.
- Walnut pieces: Leave some walnuts roughly chopped rather than grinding them all for a more textured cookie.
- Dark chocolate: Swap in dark chocolate chips for a less sweet chocolate flavour.
- Extra walnut finish: Chop a few additional walnuts and press them onto the tops alongside the halves.
- Mixed chocolate: Combine different types of chocolate chips while keeping the total amount the same.
Common mistakes to avoid
- Under-creaming: The cookies may not get the intended texture; beat the butter and sugars for 3–5 minutes until fluffy.
- Over-grinding walnuts: The nuts can turn into butter; stop once they look like fine crumbs or flour.
- Overmixing the dough: Too much mixing after adding flour can affect the texture; stop as soon as the chips are incorporated.
- Crowded trays: Cookies may not have room to bake evenly; leave about 5 cm (2 inches) between them.
- Overbaking: The cookies can dry out; begin checking at 15 minutes and look for just-golden edges.
- Moving them too soon: Warm cookies can break apart; let them cool and firm on the baking sheets.
How to store
Once completely cool, keep the cookies in an airtight container at room temperature for up to 5 days. Rewarm briefly in a low oven if you like them warm. The recipe description also suggests freezing some to save for later; pack them airtight to protect their texture.
Frequently asked questions
Do I need to chill the dough?
No. This dough is designed to be shaped and baked without chilling.
Are these cookies eggless?
Yes. There are no eggs in the listed ingredients.
How finely should I grind the walnuts?
Grind them until they resemble fine crumbs or flour. Stop before they become a smooth paste or walnut butter.
How do I know when the cookies are baked?
Check from 15 minutes. The centres should be just cooked through, and the edges should be only slightly golden.
Why do the cookies need to cool on the baking sheet?
They continue to firm up as they cool. Leaving them on the sheet helps them set before you handle them.
Can I freeze the cookies?
Yes. The recipe description recommends freezing them to save for later; store them in an airtight container or freezer bag.
Cook it from the original
This recipe comes from aspicyperspective.com. Their page has the author’s own photos, notes and tips — the best place to cook it from.
Open the recipe on aspicyperspective.com