
Sweet Irish Soda Bread
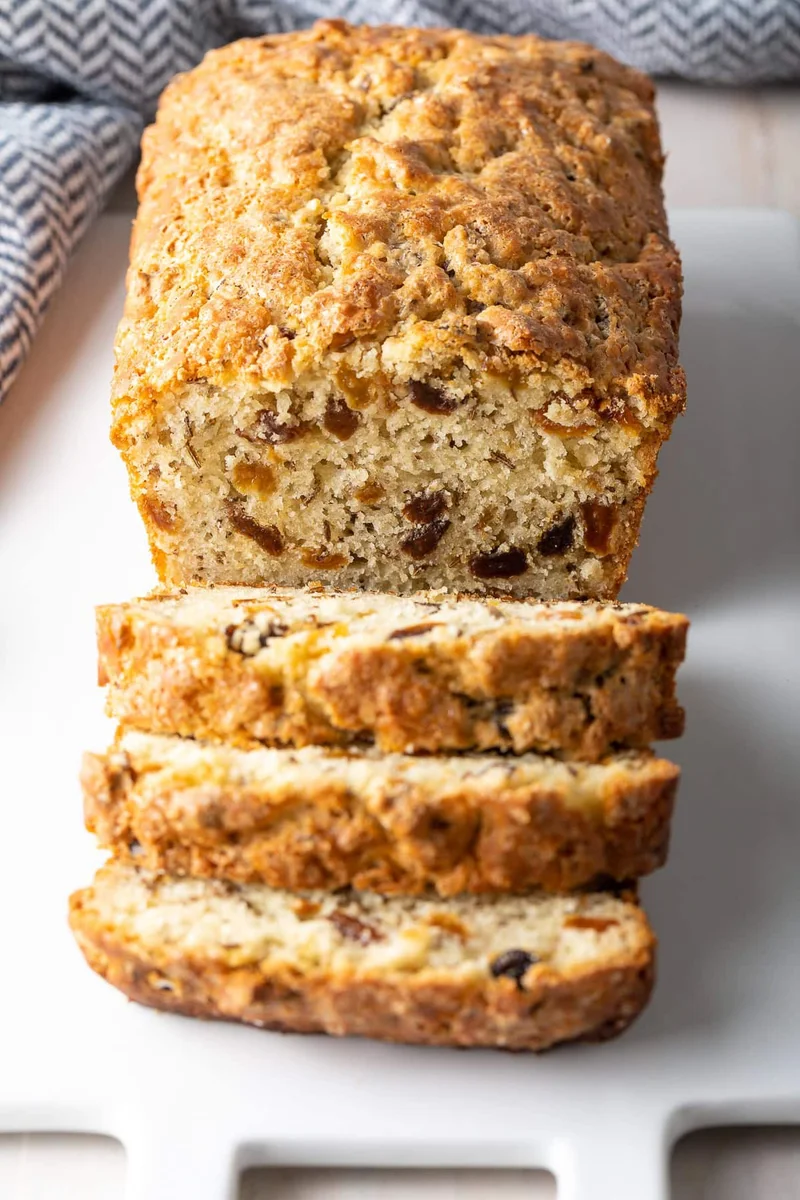
This Irish-style sweet soda bread is a tender, raisin-studded loaf with a hint of caraway and a sparkling sugar top. It makes two loaves and is a cosy bake for sharing with tea or coffee.
Ingredients
- 625 g (5 cups)plain flour, sifted
- 150 g (¾ cup)granulated sugar
- 2 teaspoonsbaking powder
- 1½ teaspoonssalt
- 1 teaspoonbicarbonate of soda
- 113 g (½ cup)unsalted butter
- 600 ml (2½ cups)buttermilk
- 1 largeegg
- 375 g (2½ cups)raisins, a mixture of light and dark
- 3 tablespoonscaraway seeds
- to tastedemerara sugar, for sprinkling
Instructions
- 1
Prepare the pans
Heat the oven to 175°C (350°F). Generously butter two 23 × 13 cm (9 × 5-inch) loaf tins. Soak the raisins in hot water for 15–20 minutes, then drain them thoroughly.
- 2
Mix dry ingredients
Combine the flour, sugar, baking powder, salt and bicarbonate of soda. Cut the butter into cubes and rub it thoroughly into the flour mixture by hand until it looks grainy. Stir in the drained raisins and caraway seeds.
- 3
Fill the tins
Add the buttermilk and egg to the flour mixture and stir well; the dough should be like thick cake batter. Divide it evenly between the two loaf tins, then sprinkle each top with demerara sugar.
- 4
Bake and cool
Bake for 60–70 minutes, checking for doneness with a toothpick. Leave the loaves in their tins for 3–5 minutes, then transfer them to a wire rack to cool.
What is sweet Irish soda bread?
Irish soda bread is a quick bread leavened with bicarbonate of soda rather than yeast. This sweeter, fruit-filled style pairs raisins and caraway with a crisp, sugar-dusted top.
The recipe keeps the method straightforward: the butter is rubbed into the dry ingredients, then buttermilk and egg bring the mixture together. That approach makes a soft, cake-like crumb without a proving stage.
Nutrition and macros by portion
The nutrition label shows one serving as written: 220 calories, 4g protein, 40g carbs, 5g fat.
| Portion | Adjustment | kcal | Protein | Carbs | Fat |
|---|---|---|---|---|---|
| Lighter | Smaller slice | 154 kcal | 3g | 28g | 4g |
| This serving | As written | 220 kcal | 4g | 40g | 5g |
| Hungry | Larger slice | 330 kcal | 6g | 60g | 8g |
The flour and sugar provide most of the carbohydrate, while butter contributes much of the fat; the egg, buttermilk and flour add some protein. Pair a slice with yoghurt or eggs and fruit for a more balanced plate.
Raisins and caraway
Raisins: soaking them in hot water for 15–20 minutes plumps them before baking. Drain them well so excess water does not loosen the thick batter.
Caraway: these small seeds bring a distinctive aromatic note that balances the sweetness of the fruit. Stir them through with the raisins so they are distributed across both loaves.
Rub in the butter
Butter: cut it into cubes and work it into the flour by hand until the mixture looks grainy. Keeping the pieces small and well dispersed helps give the bread its tender texture.
Stop once the flour looks evenly crumbly; the method does not call for creaming the butter and sugar separately.
Look for thick batter
The buttermilk and egg should turn the flour mixture into a thick, cake-batter-like dough. Stir it well, then divide it evenly between the tins for loaves that bake at a similar rate.
A toothpick is the recipe’s doneness check after 60–70 minutes. If it does not come out clean, continue baking and check again.
A sparkling sugar top
Demerara sugar: sprinkle it over both filled tins just before baking. Its larger crystals give the tops a shimmery finish.
The bread needs only 3–5 minutes in the tins after baking before it is moved to a wire rack. Letting it cool there helps the loaves firm up before slicing.
Serving the loaves
Serve slices plain or with butter alongside tea or coffee. The raisins provide sweetness throughout, so the bread also works well as a simple breakfast or afternoon snack.
For a more filling plate, pair a slice with yoghurt or eggs; for a lighter snack, have a smaller slice with fruit.
Recipe notes & tips
- Drain the soaked raisins thoroughly before adding them to the flour.
- Rub the butter in until the flour mixture looks evenly grainy.
- Divide the batter evenly between the two prepared tins.
- Use a toothpick to check the centre of a loaf after 60 minutes.
- Cool the loaves on a wire rack before slicing for a neater crumb.
Variations
- Extra citrus: add finely grated orange zest to the dry ingredients for a fragrant note.
- Mixed dried fruit: replace some raisins with an equal amount of dried currants.
- Nutty addition: fold chopped walnuts into the batter with the raisins.
- Less caraway: reduce the seeds for a milder, fruit-forward loaf.
- No sugar crust: leave off the demerara topping for a less crunchy finish.
Common mistakes to avoid
- Wet raisins: drain them well after soaking so they do not add excess liquid to the batter.
- Uneven butter: keep rubbing until the mixture looks grainy rather than leaving large butter chunks.
- Uneven filling: divide the batter between the tins as evenly as possible so the loaves bake consistently.
- Guessing doneness: check with a toothpick rather than relying only on the top’s colour.
- Slicing too soon: allow the loaves to cool on a rack before cutting so the crumb can settle.
How to store
Once completely cool, store the bread in an airtight container at room temperature and eat within 2–3 days. Rewarm slices briefly in a low oven or toaster.
Frequently asked questions
Why soak the raisins first?
The 15–20-minute soak plumps the raisins before they go into the batter. Drain them well afterwards.
What should the dough look like?
It should resemble thick cake batter, as described in the method, rather than a firm kneadable dough.
How do I know when the loaves are baked?
Bake for 60–70 minutes and test with a toothpick. The recipe does not specify another doneness cue.
Can I leave out the caraway seeds?
Yes. The loaf will have a milder flavour, with the raisins taking centre stage.
How long should the bread cool before slicing?
The method specifies 3–5 minutes in the tins, followed by cooling on a wire rack. For easier slicing, allow the loaves to cool further before cutting.
Cook it from the original
This recipe comes from aspicyperspective.com. Their page has the author’s own photos, notes and tips — the best place to cook it from.
Open the recipe on aspicyperspective.com