
Salmon Nigiri
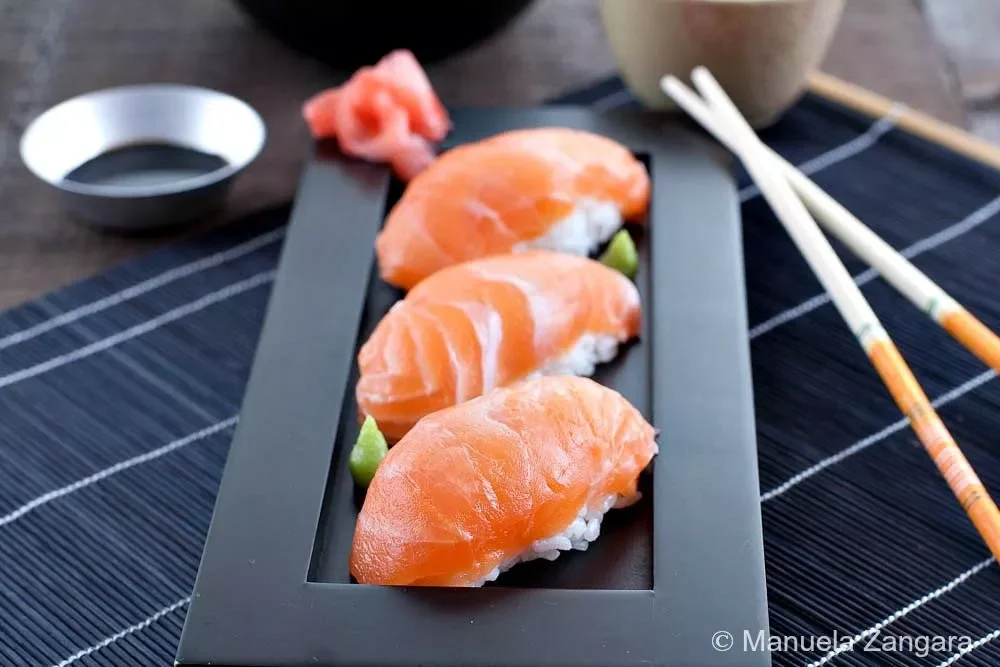
Salmon nigiri pairs seasoned sushi rice with thin slices of sushi-grade salmon, shaped by hand into neat ovals. It is a simple homemade way to serve a Japanese sushi favourite with soy sauce and pickled ginger on the side.
Ingredients
- 400 g (2 cups)cooked, seasoned sushi rice
- 10 thin slicessushi-grade salmon
- to tastewasabi
- to servesoy sauce
- to servepickled ginger
Instructions
- 1
Prepare the rice
Prepare the sushi rice and season it. The recipe refers to a separate sushi rice method for detailed instructions.
- 2
Shape the rice
Wet your hands and form the seasoned rice into 10 oval mounds, or quenelles.
- 3
Add the salmon
Spread a little wasabi on each salmon slice, then place each slice over a rice mound so the wasabi helps it adhere.
- 4
Press the nigiri
Gently press each piece with your hands to shape and bring it together.
- 5
Serve immediately
Serve the nigiri straight away, with soy sauce and pickled ginger on the side.
What is salmon nigiri?
Nigiri is a Japanese style of sushi made by shaping seasoned rice and topping it with a piece of fish or another ingredient. This version uses salmon and a small amount of wasabi between the fish and rice.
The short ingredient list keeps the focus on the salmon and properly seasoned rice. Making each piece by hand also lets you adjust its shape and size.
Nutrition and macros by portion
The nutrition label shows one serving as written: 430 calories, 23g protein, 64g carbs, 8g fat.
| Portion | Adjustment | kcal | Protein | Carbs | Fat |
|---|---|---|---|---|---|
| Lighter | Less rice per piece | 301 kcal | 16g | 45g | 6g |
| This serving | As written | 430 kcal | 23g | 64g | 8g |
| Hungry | Add more nigiri | 645 kcal | 35g | 96g | 12g |
The rice provides most of the carbohydrates, while salmon contributes protein and fat; soy sauce also adds sodium. For a more balanced plate, pair the nigiri with a portion of vegetables or a simple salad.
Choose the salmon carefully
Sushi-grade salmon: use fish sold as suitable for eating raw, and keep it chilled until you are ready to shape the nigiri. Slice it thinly so it can sit neatly over the rice.
Season the rice first
Rice: this recipe starts with cooked, seasoned sushi rice rather than giving the rice-making method. Prepare it before shaping, and follow the referenced sushi rice recipe for its cooking and seasoning details.
Temperature: rice that is cool enough to handle is easier to shape. Avoid leaving it sitting out for longer than needed while you work.
Shape with damp hands
Wet hands: dampen your hands before handling the rice to help limit sticking. Re-wet them as needed, without making the rice soggy.
Light pressure: form 10 oval mounds and press them just enough to hold together. A gentle, even touch helps keep the rice from becoming dense.
Use wasabi sparingly
Wasabi: spread a small amount on each salmon slice, then set it on the rice. It adds its distinctive heat and helps the topping stay in place.
Balance: start with a little, since diners can add more heat at the table if they wish.
Serve as soon as it is shaped
Timing: assemble the nigiri shortly before serving so the rice and salmon are at their best. The method gives a total time of 20 minutes, including preparation of the rice.
On the side: offer soy sauce for dipping and pickled ginger as a palate-cleansing accompaniment between pieces.
Round out the meal
Serve the nigiri with a light miso soup or a simple cucumber salad if you want a fuller meal. Keep the accompaniments modest so the salmon and seasoned rice remain the focus.
Recipe notes & tips
- Keep the salmon chilled until just before assembling.
- Wet your hands lightly each time the rice starts sticking.
- Make the 10 rice mounds before topping them to keep the assembly moving.
- Use only a small dab of wasabi on each slice to begin with.
- Serve the soy sauce on the side so diners can control how much they use.
Variations
- Skip the wasabi: leave it out or serve it separately for a milder version.
- Add cucumber: place a very thin cucumber slice with the salmon for extra freshness.
- Try another topping: use sushi-suitable tuna in place of the salmon.
- Make it smaller: shape more, smaller rice ovals and cut the fish to fit.
- Add sesame: sprinkle a little toasted sesame over the salmon just before serving.
Common mistakes to avoid
- Using unsuitable raw fish: choose salmon specifically sold for raw consumption and keep it chilled.
- Overhandling the rice: shape with damp hands and use gentle pressure so the grains do not become compact.
- Making the rice too wet: dampen your hands rather than adding water to the rice.
- Adding too much wasabi: start with a small dab on each slice and adjust to taste.
- Assembling too early: shape the nigiri shortly before serving for the best texture.
How to store
Nigiri is best eaten immediately after assembly. Keep any unserved pieces covered and refrigerated, and eat them as soon as possible; do not leave raw-fish sushi at room temperature for an extended time. Reheating is not suitable.
Frequently asked questions
How many pieces does this recipe make?
The method makes 10 pieces, using 10 thin slices of salmon. The recipe lists 4 servings.
Can I use ordinary salmon?
Use salmon sold as suitable for eating raw. If you cannot obtain it, do not serve ordinary raw salmon; cook the fish first and use it as a cooked topping instead.
Do I need a sushi mat?
No. Nigiri is shaped by hand, so a mat is not needed.
Why is the rice sticking to my hands?
Sushi rice is naturally sticky. Wet your hands lightly before shaping and re-wet them when necessary.
Can I make the rice ahead?
You can prepare the rice before assembling, following your sushi rice recipe. Shape the nigiri close to serving time and keep the fish chilled.
How should I serve nigiri?
Serve it immediately with soy sauce and pickled ginger on the side. Diners can dip lightly and eat ginger between pieces.
Cook it from the original
This recipe comes from manusmenu.com. Their page has the author’s own photos, notes and tips — the best place to cook it from.
Open the recipe on manusmenu.com