
Vegan Roasted Banana Ice Cream
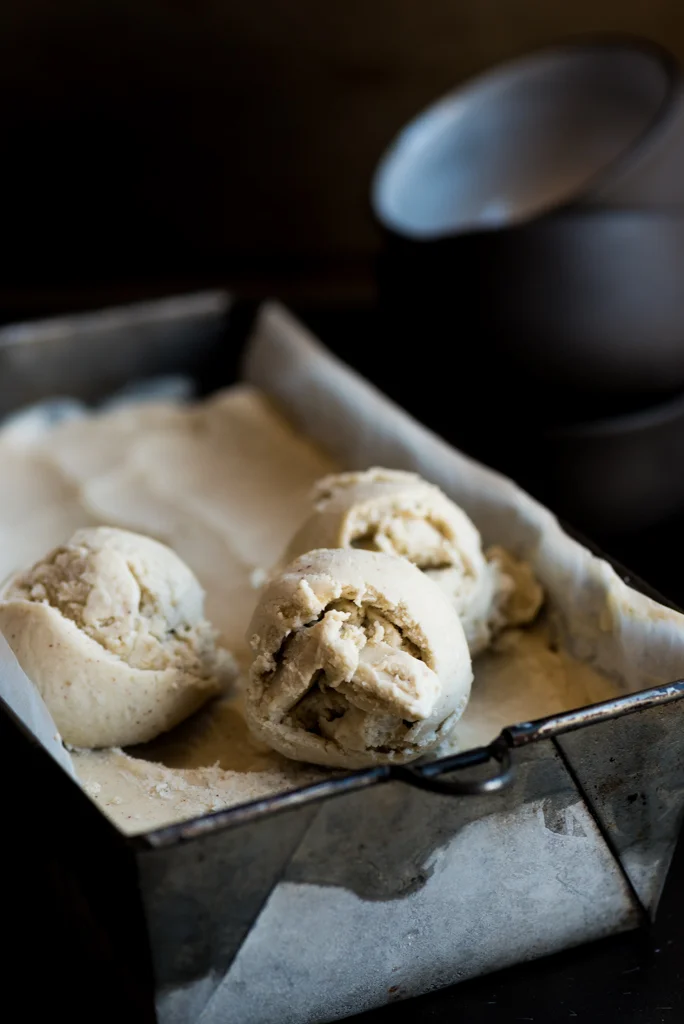
This vegan ice cream combines roasted, caramelised bananas with a rich coconut and cashew base. It takes some advance chilling and churning, but the roasting adds deep banana flavour without dairy.
Ingredients
- 200 graw unsalted cashew nuts
- as neededwater for soaking
- 450 mlwater
- 4 medium-largeripe bananas, peeled and sliced into 5 mm rounds
- 2 tbspcoconut oil
- 2 tbspdark brown sugar or muscovado sugar
- 1 pinchsalt
- 150 gsugar
- 4 tbspwater
- 4 tbspcoconut oil
- 1 tspsalt
- 1 tin (400 ml)coconut cream
- 1/2 tspground cinnamon
- 1/2 tspvanilla extract
- 50 gchopped walnuts, toasted (optional)
- 50 gdried banana chips (optional)
Instructions
- 1
Soak the cashews
Put the cashews in a bowl and cover them with cold water by a couple of centimetres.
- 2
Leave overnight
Soak the cashews overnight.
- 3
Heat the oven
Preheat the oven to 200°C.
- 4
Blend the cashews
Drain the cashews, put them in a blender with 450 ml water and blend until smooth.
- 5
Strain if needed
Check the cashew milk's consistency and, if necessary, pass it through a strainer.
- 6
Coat the bananas
Toss the banana slices with 2 tbsp coconut oil, the brown or muscovado sugar and a pinch of salt.
- 7
Roast the bananas
Spread the bananas on a baking sheet and bake for about 15–25 minutes, until caramelised. Set aside to cool slightly.
- 8
Dissolve the sugar
Put the sugar and 4 tbsp water in a small saucepan. Stir over medium heat until the sugar has dissolved.
- 9
Add oil and salt
Stir in 4 tbsp coconut oil and 1 tsp salt until combined.
- 10
Blend the base
Pour the sugar mixture into a blender. Add the coconut cream, 240 ml (1 cup) cashew milk, roasted bananas and all the caramelised bits from the baking sheet, along with the cinnamon and vanilla. Blend until smooth.
- 11
Chill the base
Cover the ice cream base and refrigerate until chilled, about 3 hours.
- 12
Churn the ice cream
Churn the chilled base in an ice cream maker, following the manufacturer's instructions.
- 13
Add the walnuts
At the end of churning, add the toasted walnuts, if using, and churn until incorporated.
- 14
Freeze until firm
Transfer the ice cream to a suitable container and freeze.
- 15
Serve within a week
Eat within 7 days, with dried banana chips if desired.
What is vegan roasted banana ice cream?
This is a dairy-free churned ice cream made with a blended cashew milk and coconut cream base. Roasting the bananas with sugar and coconut oil brings out their sweetness and gives the finished ice cream a caramelised flavour.
Banana-based frozen desserts have many home-style variations rather than one defining origin. In this version, the cashew milk helps make a smooth base, while coconut cream and oil provide richness.
Nutrition and macros by portion
The nutrition label shows one serving as written: 1080 calories, 13g protein, 91g carbs, 76g fat.
| Portion | Adjustment | kcal | Protein | Carbs | Fat |
|---|---|---|---|---|---|
| Lighter | Smaller scoop, fewer toppings | 756 kcal | 9g | 64g | 53g |
| This serving | As written | 1080 kcal | 13g | 91g | 76g |
| Hungry | Larger scoop | 1620 kcal | 20g | 137g | 114g |
The bananas and added sugars supply most of the carbohydrates, while cashews contribute some protein. Coconut cream, coconut oil and cashews account for much of the fat. For a more balanced plate, serve a modest scoop with fresh fruit rather than extra toppings.
Why roast the bananas?
Caramelised fruit: roasting concentrates the banana flavour and gives the slices browned edges. Keep the banana pieces and sticky tray juices for blending; both go into the base.
Ripe fruit: choose bananas with plenty of brown speckles, but avoid fruit that is leaking or fermented-smelling. Ripe bananas blend easily and bring more sweetness.
Making the cashew milk
Soaking: leave the cashews covered overnight so they soften before blending. Drain them before adding the measured 450 ml water.
Smoothness: blend thoroughly, then check the texture. Strain the milk if it still seems grainy; the recipe uses 240 ml of it in the ice cream base.
Getting the sugar mixture right
Dissolve first: stir the sugar with 4 tbsp water over medium heat until no sugar granules remain. Avoid letting the mixture catch on the base of the pan.
Combine gently: stir in the coconut oil and salt until they are incorporated. Pour the mixture into the blender with the other base ingredients and blend until smooth.
Chilling and churning
Chill the base: refrigerate it for about 3 hours, or until thoroughly cold, before churning. A cold base is easier to churn evenly.
Follow your machine: churn according to its manufacturer's instructions, since machines vary. Add the optional toasted walnuts at the end so they remain in pieces.
Texture and serving
Freshly churned: the ice cream may be soft straight from the machine. Freezing it in a suitable container firms it up for scooping.
Toppings: dried banana chips add a crisp contrast, while toasted walnuts bring a nutty crunch. Let the frozen ice cream soften briefly before serving if it is too firm to scoop.
What to serve it with
A small scoop works well on its own or alongside fresh berries for a tart contrast. For more crunch, scatter over the optional banana chips or toasted walnuts just before serving.
Recipe notes & tips
- Slice the bananas evenly so they roast at a similar rate.
- Keep the browned, sticky residue from the baking sheet; it carries caramelised banana flavour into the base.
- Taste the blended base before chilling and make sure it is smooth.
- Chill the base thoroughly before adding it to the ice cream maker.
- Toast the walnuts before churning if you are using them, then add them near the end.
- Use a lidded freezer-safe container to store the finished ice cream.
Variations
- Add toasted walnuts: fold them in at the end of churning for a crunchy finish.
- Use banana chips: scatter the optional dried chips over each serving.
- Boost the cinnamon: add a little more ground cinnamon for a warmer spice flavour.
- Make it nut-free: replace the cashew milk with a suitable unsweetened plant milk, though the texture may change.
- Add berries: serve with fresh berries for a bright, tart contrast.
Common mistakes to avoid
- Using underripe bananas: they can taste starchy and less sweet; choose ripe, speckled fruit.
- Skipping the soak: cashews may blend less smoothly; soak them overnight as directed.
- Discarding the tray juices: the caramelised bits add flavour; scrape them into the blender with the bananas.
- Churning a warm base: it may not freeze evenly; chill it for about 3 hours first.
- Over-roasting the bananas: they can dry out or burn; check them during the 15–25 minute baking time.
- Adding walnuts too early: they can break up during churning; mix them in at the end.
How to store
Keep the ice cream covered in a suitable container in the freezer and eat it within 7 days. If it is too firm to scoop, leave it out briefly to soften before serving.
Frequently asked questions
Do I need an ice cream maker?
This method is written for an ice cream maker and calls for churning according to the manufacturer's instructions. Without one, the texture may be less smooth.
Can I make the cashew milk ahead?
Yes. Blend it after soaking and straining the cashews, then refrigerate it until needed.
How long should I roast the bananas?
Bake them at 200°C for about 15–25 minutes, until caramelised. The exact time depends on how quickly they brown in your oven.
Why does the base need to chill?
The recipe calls for about 3 hours in the fridge so the base is chilled before churning. Follow your ice cream maker's instructions as well.
Are the walnuts and banana chips necessary?
No. Both are optional: walnuts are added at the end of churning, and banana chips can be served on top.
How long does the ice cream keep?
The recipe recommends eating it within 7 days. Keep it covered in the freezer.
Cook it from the original
This recipe comes from heinstirred.com. Their page has the author’s own photos, notes and tips — the best place to cook it from.
Open the recipe on heinstirred.com