
Easy Homemade French Bread
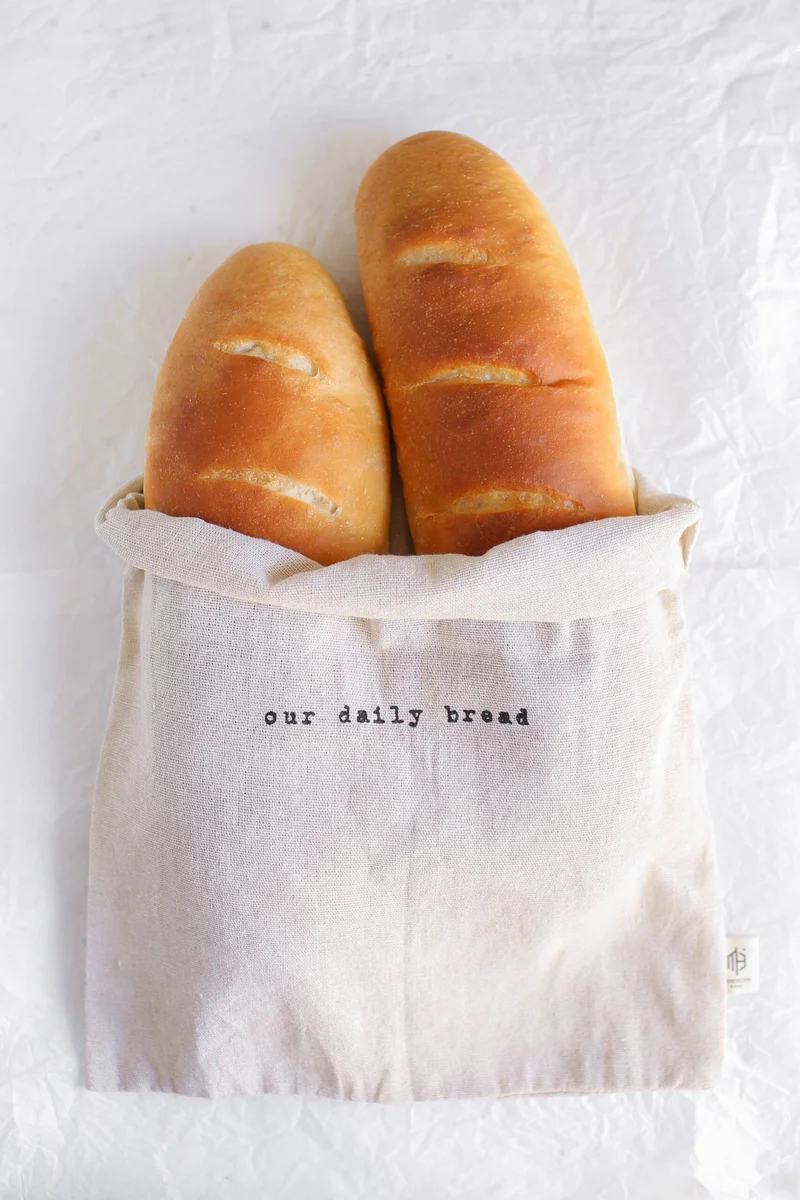
These two homemade French-style loaves have a soft, stretchy dough and a deeply golden crust. A stand mixer makes the kneading straightforward, while weighing the flour helps keep the dough consistent.
Ingredients
- 500 g (about 4 cups)bread flour
- 340 g (about 1 1/2 cups)warm water
- 7 g (2 1/2 tsp/1 sachet)instant yeast
- 10 g (about 1 1/2 tsp)salt
- 10 g (about 2 1/2 tsp)sugar
- 10 g (about 2 tsp)oil
Instructions
- 1
Wake the yeast
Pour the warm water into the bowl of a stand mixer. Add the yeast and sugar, stir gently, and leave for 2–3 minutes to get the yeast going.
- 2
Add the dry ingredients
Add the bread flour, salt and oil. Keep the salt from sitting directly on the yeast.
- 3
Knead with mixer
Using the dough hook, knead at medium speed for 6–8 minutes, until the dough is smooth, stretchy and slightly sticky. A little stickiness is normal.
- 4
Knead by hand
If working by hand, mix everything in a bowl until a shaggy dough forms. Turn it onto a lightly floured surface and knead for 8–10 minutes, until smooth and elastic.
- 5
Let dough rise
Lightly oil a clean bowl, put the dough in it, cover and leave in a warm spot until doubled in size, about 1 hour.
- 6
Turn out dough
Once the dough has doubled, lightly dust the worktop with flour and turn the dough out onto it.
- 7
Divide the dough
Cut the dough into two equal pieces.
- 8
Shape the loaves
Flatten each piece slightly into a rectangle, fold the sides in and roll it tightly into a long loaf. Pinch the seam closed and place each loaf seam-side down on a baking tray.
- 9
Rise once more
Cover the loaves loosely and leave for 30–40 minutes, until puffy and almost doubled.
- 10
Heat and score
Preheat the oven to 230°C (450°F). With a new razor blade, sharp knife or bread lame, make quick, shallow slashes across the tops.
- 11
Bake until golden
Bake on the middle rack for about 20 minutes, until deeply golden. If the loaves begin browning too quickly, cover them loosely with foil.
- 12
Cool before slicing
Take the bread out of the oven and cool it on a rack for at least 20 minutes before slicing.
What is French bread?
French bread is a broad name for lean, crusty loaves made mainly from flour, water, yeast and salt. The long shape and scored crust make this recipe reminiscent of familiar French-style bakery loaves.
This version uses a little sugar and oil alongside the basic dough ingredients. Dividing the dough into two loaves gives it a manageable shape and makes it easy to serve at the table.
Nutrition and macros by portion
The nutrition label shows one serving as written: 977 calories, 31g protein, 188g carbs, 9g fat.
| Portion | Adjustment | kcal | Protein | Carbs | Fat |
|---|---|---|---|---|---|
| Lighter | Serve a smaller slice | 684 kcal | 22g | 132g | 6g |
| This serving | As written | 977 kcal | 31g | 188g | 9g |
| Hungry | Larger bread portion | 1466 kcal | 47g | 282g | 14g |
The flour supplies most of the carbohydrates and some protein, while the small amount of oil contributes most of the fat. Pair a slice with a protein-rich food and vegetables for a more balanced plate.
Why weigh the flour?
Flour: weighing 500 g gives a more repeatable dough than relying on cups, since the amount in a cup can change with how the flour is scooped.
Water: the 340 g of warm water hydrates the flour and helps form an elastic dough. Add the flour, salt and oil after briefly mixing the yeast and sugar into the water.
Kneading and dough feel
Mixer: use the dough hook on medium speed for 6–8 minutes, stopping when the dough looks smooth and stretches readily.
By hand: bring the ingredients together until shaggy, then knead on a lightly floured surface for 8–10 minutes. The finished dough should be elastic and may feel slightly sticky; that is expected.
Shaping the loaves
Fold and roll: flatten each portion into a rectangle, fold it inward and roll it tightly into a long loaf. Pinching the seam closed helps the loaf hold its shape.
Second rise: arrange the loaves seam-side down and cover them loosely. They are ready for the oven when puffy and almost doubled, rather than judged by the clock alone.
Scoring and baking
Scoring: make quick, shallow slashes across the tops just before baking. A sharp blade helps make clean cuts without pressing down on the risen dough.
Baking: use the middle rack at 230°C and look for a deeply golden crust after about 20 minutes. If the crust darkens too quickly, loosely tent the loaves with foil.
Timing and serving
The recipe lists a total time of 40 minutes, but its stated rises alone take about 1 hour and another 30–40 minutes, in addition to mixing, baking and cooling. Allow for those rises when planning when to serve the bread.
Serve slices with soup, a salad or a savoury meal, or use them for sandwiches. Let the loaves cool on a rack for at least 20 minutes before cutting so the crumb can settle.
Recipe notes & tips
- Use a kitchen scale for the flour to make the dough more consistent.
- Keep the salt from sitting directly on the yeast when adding the ingredients.
- Expect the dough to feel slightly sticky rather than adding flour until it feels dry.
- Judge each rise by the dough's size and puffiness as well as the suggested time.
- Use a new razor blade, sharp knife or bread lame to score the loaves cleanly.
- Cool the bread on a rack for at least 20 minutes before slicing.
Variations
- Add herbs: Mix dried herbs into the flour for a savoury loaf.
- Add seeds: Sprinkle seeds over the loaves before baking.
- Use wholemeal flour: Replace some bread flour with wholemeal flour for a heartier loaf.
- Make rolls: Divide the dough into smaller portions and shape them into rolls.
- Add garlic: Brush the baked bread with garlic-flavoured oil before serving.
Common mistakes to avoid
- Scooping the flour loosely: the amount can vary, so weigh out 500 g for consistency.
- Adding too much flour: slightly sticky dough is normal, so avoid drying it out during kneading.
- Skipping the first rise: let the dough double in size before shaping.
- Underproofing the shaped loaves: wait until they are puffy and almost doubled before baking.
- Cutting too deeply: make shallow slashes so the risen loaves keep their shape.
- Slicing too soon: cool the bread on a rack for at least 20 minutes first.
How to store
Once completely cool, store the bread in a bread bag or airtight container at room temperature and use within a couple of days for the best texture. Rewarm slices briefly in the oven or toast them; freezing the cooled loaves is another option for longer storage.
Frequently asked questions
Can I make the dough without a stand mixer?
Yes. Mix the ingredients in a bowl until shaggy, then knead on a lightly floured surface for 8–10 minutes, until smooth and elastic.
How sticky should the dough be?
It should feel slightly sticky, which the recipe describes as normal. Knead until it is smooth and stretchy rather than adding enough flour to make it dry.
How can I tell when the dough has risen enough?
For the first rise, look for the dough to double in size. After shaping, wait until the loaves look puffy and almost doubled.
Do I need to score the loaves?
Scoring is part of the method and creates shallow cuts across the tops just before baking. Use a sharp blade or knife and make the cuts quickly.
What should I do if the crust browns too quickly?
Loosely cover the loaves with foil for the rest of the bake.
Why should I wait before slicing?
Cooling on a rack for at least 20 minutes gives the interior time to settle and makes the loaf easier to slice.
Cook it from the original
This recipe comes from kikifoodies.com. Their page has the author’s own photos, notes and tips — the best place to cook it from.
Open the recipe on kikifoodies.com