
Fluffy Homemade Doughnuts
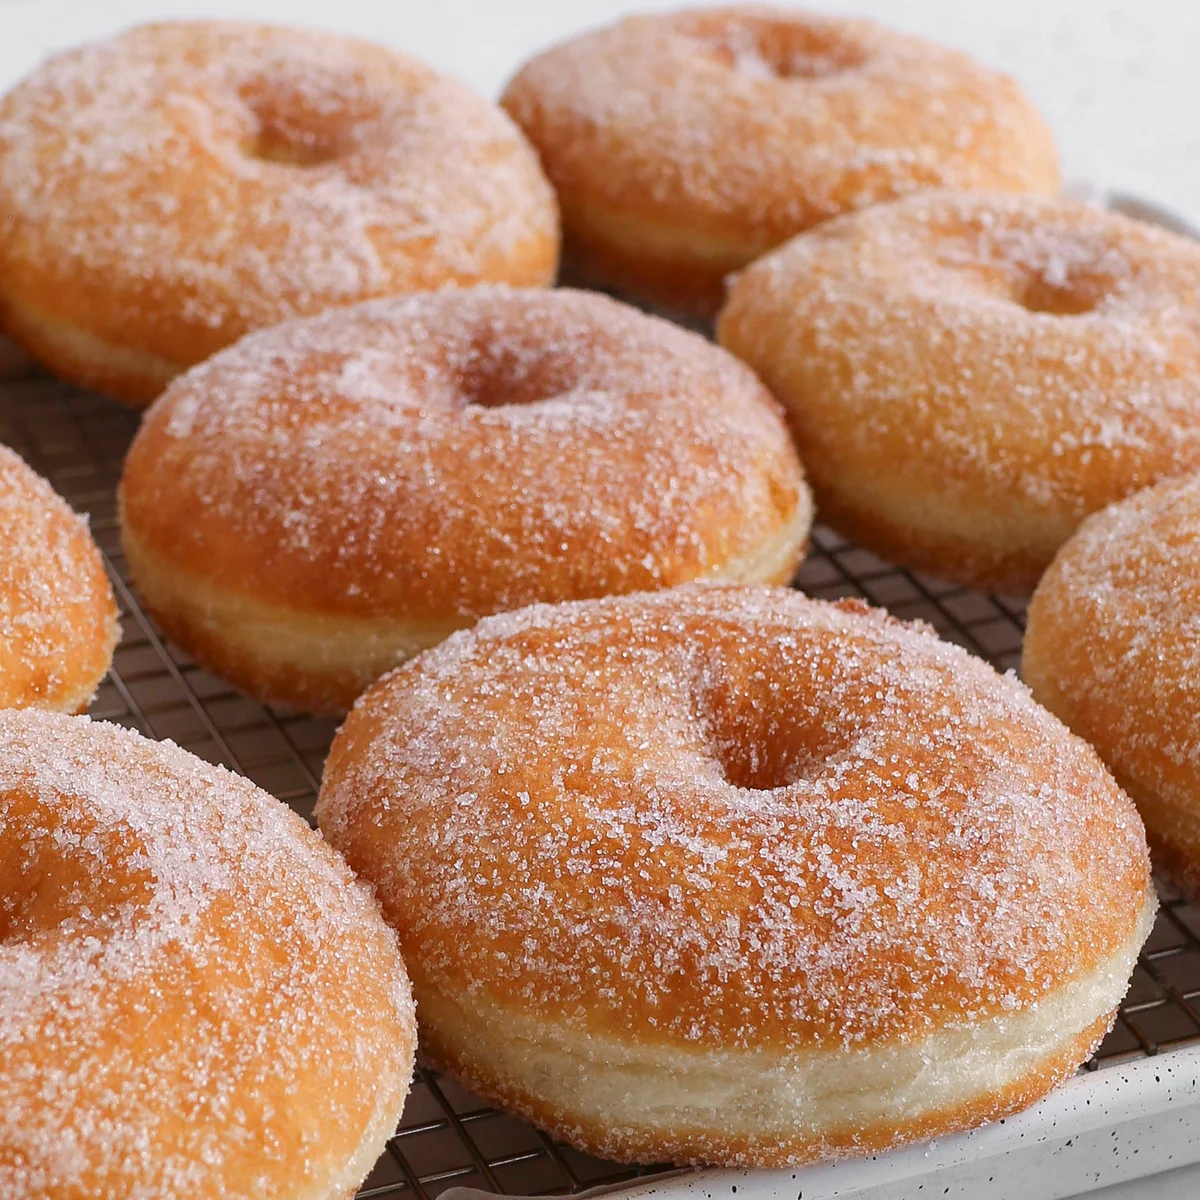
These soft, yeasted homemade doughnuts are fried until golden and finished with a coating of sugar or glaze. They take time to rise, but the dough is straightforward to make and can be shaped into doughnut holes as well.
Ingredients
- 480 g (4 cups)bread flour
- 300 ml (1¼ cups)whole milk
- 50 g (¼ cup)sugar
- 7 g (2¼ tsp)instant yeast
- 1 mediumegg, without shell
- 57 g (½ stick)unsalted butter
- ½ tspsalt
- For fryingoil
- Extrasugar for coating
Instructions
- 1
Wake the yeast
Add the warm milk, sugar and yeast to a stand mixer or a bowl if kneading by hand. Mix and leave for a few minutes, until slightly foamy.
- 2
Mix the dough
Add the egg, vanilla, flour and salt. Mix and knead until a soft dough forms.
- 3
Knead in butter
Add the softened butter and keep kneading for about 5 to 6 minutes, until the dough is smooth and elastic. It should feel soft and slightly tacky, not excessively sticky.
- 4
First rise
Lightly oil a bowl and transfer the dough to it. Cover and leave in a warm place until doubled in size; a switched-off oven works well. Depending on the kitchen temperature, this can take about 1 to 2 hours.
- 5
Roll the dough
Move the dough to a lightly floured surface and roll it out to about 1 inch thick.
- 6
Cut doughnuts
Cut out doughnut shapes with a doughnut cutter or a cup for the outer circle, then use a smaller cutter to make the centres.
- 7
Reuse the scraps
Gather the leftover dough, roll it out again and cut more doughnuts until it is used. If the dough springs back and is difficult to roll, leave it for about 10 to 15 minutes to relax before continuing. You can shape any stubborn scraps into doughnut holes.
- 8
Dust the shapes
Lightly dust both sides of each cut doughnut with flour in a small bowl, then shake off the excess. This helps give the surface a smooth finish and prevents sticking.
- 9
Arrange on parchment
Set the doughnuts and doughnut holes on small squares of parchment paper to make them easier to transfer into the oil. Alternatively, flour a tray and place them directly on it.
- 10
Second rise
Cover the shaped dough loosely and leave it to rise again until puffy and doubled in size.
- 11
Check the proof
Press a doughnut gently. It is ready if it springs back slowly and leaves a slight dent; if it springs back quickly, give it more time. If it does not spring back at all, it may be over-proofed.
- 12
Heat the oil
Heat oil in a deep pot or wok over medium heat. If using a thermometer, aim for about 150°C (305°F).
- 13
Fry until golden
Transfer the doughnuts gently into the oil using the parchment paper. Fry for about 2 to 3 minutes on each side, until golden brown to your liking.
- 14
Drain the doughnuts
Lift the doughnuts out of the oil and place them on a tray lined with kitchen paper to absorb excess oil.
- 15
Coat and serve
Let the doughnuts cool slightly, then roll them in granulated sugar or glaze them.
What are doughnuts?
Doughnuts are sweet fried pastries, popular in the United States in both ring-shaped and filled forms. This homemade version uses a yeasted dough, which gives the finished doughnuts a soft, airy crumb.
The method builds flavour and texture through two rises, then finishes the doughnuts with a simple sugar coating or glaze.
Nutrition and macros by portion
The nutrition label shows one serving as written: 228 calories, 7g protein, 37g carbs, 6g fat.
| Portion | Adjustment | kcal | Protein | Carbs | Fat |
|---|---|---|---|---|---|
| Lighter | Smaller doughnuts | 160 kcal | 5g | 26g | 4g |
| This serving | As written | 228 kcal | 7g | 37g | 6g |
| Hungry | Add doughnut holes | 342 kcal | 11g | 56g | 9g |
The flour and sugar provide most of the carbohydrates, while butter and frying oil contribute fat; the egg, milk and flour supply some protein. Pair a doughnut with fruit or yoghurt for a more balanced plate.
Why use bread flour?
Bread flour gives the dough structure for shaping and helps it hold its shape as it rises. Kneading develops that structure, while the butter softens the dough and contributes richness.
The dough should feel slightly tacky rather than wet and sticky. Add flour sparingly when shaping so the doughnuts do not become dense.
Let the dough rise fully
The first rise should take the dough to about twice its original size; the time varies with the warmth of the room. A switched-off oven can provide a sheltered place, but check the dough rather than relying on the clock alone.
After shaping, the second rise matters too. The gentle press test is a useful guide: a slow spring-back with a small dent indicates the doughnuts are ready to fry.
Shaping without sticking
Cut the rings cleanly and arrange each one on its own small piece of parchment. This makes it easier to lower the delicate dough into the oil without squashing it.
Gather and re-roll the scraps to use the dough. If it keeps shrinking back, let it rest for 10 to 15 minutes before rolling again.
Frying and checking doneness
Aim for oil at about 150°C (305°F), using a thermometer if you have one. Fry each side for about 2 to 3 minutes, watching for a golden-brown colour.
Work gently when transferring the doughnuts, and drain them on kitchen paper after frying. Let them cool slightly before coating so the sugar or glaze can cling without immediately melting away.
How to serve them
Serve the doughnuts while they are still fresh, with coffee, tea or a glass of milk. Their sweet coating also pairs well with fresh berries for a little contrast.
For a mixed batch, coat some in sugar and glaze others. The doughnut holes can be fried alongside the rings, checking them closely as their smaller size may affect how quickly they cook.
Recipe notes & tips
- Warm the milk gently; it should not be hot when mixed with the yeast.
- Use a lightly oiled bowl for the first rise to make the dough easier to turn out.
- Dust the cut doughnuts lightly and shake off excess flour before frying.
- Use parchment squares to help move the risen doughnuts without deflating them.
- Fry in manageable batches so you can turn each doughnut carefully.
- Coat the doughnuts while slightly warm for an even sugar finish.
Variations
- Sugar coating: Roll the slightly cooled doughnuts in granulated sugar.
- Glazed finish: Use a glaze instead of the sugar coating.
- Doughnut holes: Shape the scraps into small balls and fry them alongside the rings.
- Mixed toppings: Coat some doughnuts in sugar and glaze the rest.
- Filled style: Cut the dough without centres and fill the fried doughnuts after cooling.
Common mistakes to avoid
- Milk too hot: Let it cool until warm before adding the yeast.
- Adding too much flour: Keep the dough slightly tacky and use only a light dusting for shaping.
- Rushing the rise: Wait until the dough has doubled and the cut shapes are puffy.
- Over-proofing: Use the gentle press test and fry when the dough springs back slowly.
- Oil too hot: Keep it near 150°C so the outside does not brown too quickly.
- Rough transferring: Lower doughnuts gently with their parchment to help them keep their shape.
How to store
Store cooled doughnuts in an airtight container at room temperature and eat within 1 to 2 days for the best texture. Warm briefly in the microwave or in a low oven; add sugar or glaze after reheating if needed.
Frequently asked questions
Can I knead the dough by hand?
Yes. Mix the ingredients in a bowl, then knead by hand until the dough is soft, smooth and elastic. The butter is added after the initial dough forms.
How can I tell if the yeast is active?
After a few minutes, the milk, sugar and yeast mixture should look slightly foamy. If it shows no signs of activity, the yeast may not be working.
What if the dough keeps shrinking when I roll it?
Cover it and let it rest for about 10 to 15 minutes, then try again. This gives the dough time to relax.
Do I need a doughnut cutter?
No. A cup or other round object can cut the outer shape, and a smaller cutter can make the centre.
Can I make doughnut holes from the scraps?
Yes. Shape stubborn leftover pieces into balls, or use the cut-out centres, and fry them with the doughnuts.
How do I know when the doughnuts are ready to fry?
Press one gently: it should spring back slowly and leave a slight dent. A quick spring-back means it needs longer to rise.
Cook it from the original
This recipe comes from kikifoodies.com. Their page has the author’s own photos, notes and tips — the best place to cook it from.
Open the recipe on kikifoodies.com