
Adai upma
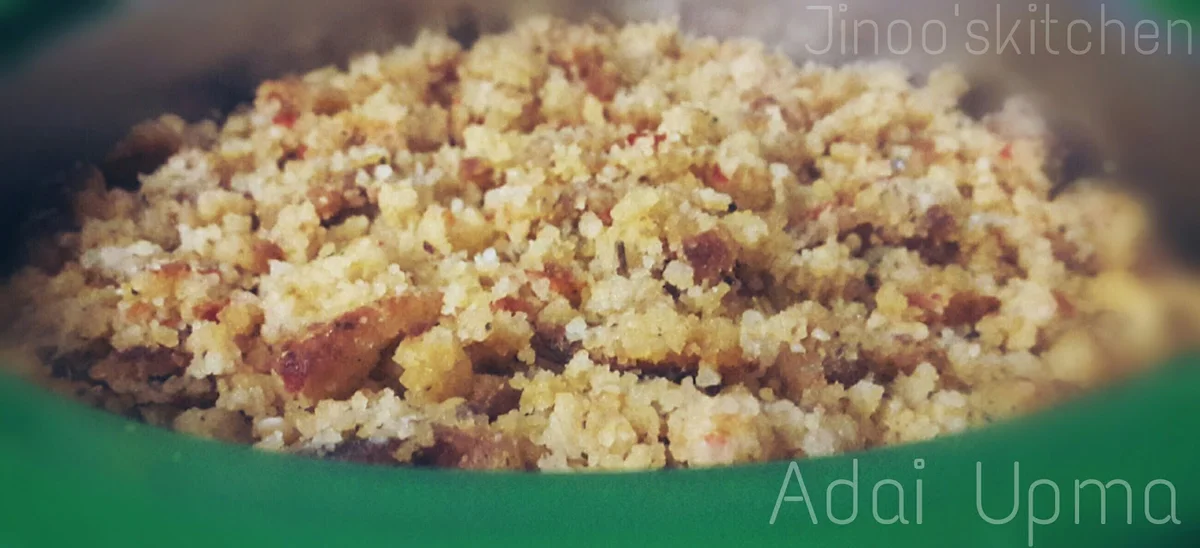
Adai upma turns adai batter into a pan-roasted, crumbly dish with tomato, onion, chilli and garlic. It takes patient, low-heat cooking, but makes a filling meal that needs no separate side dish.
Ingredients
- 2 cups (480 ml)adai batter
- 1tomato
- 1onion
- 1red chilli
- 2 podsgarlic
- 5–6 tsp (25–30 ml)oil
Instructions
- 1
Heat the oil
Heat 5–6 tsp oil in a non-stick kadai; the full quantity of batter will go into the pan.
- 2
Spread the batter
Pour in the adai batter, then tilt the kadai to spread it across the pan.
- 3
Grind and combine
Leave the batter to simmer. Meanwhile, grind the tomato, onion, red chilli and garlic with a little salt into a smooth paste. Add the paste to the batter, mix well and keep stirring from time to time as it cooks towards a crisp, upma-like consistency.
- 4
Break into pieces
Cook over a simmer for about 30–40 minutes. Break the mixture into pieces and stir every 10 minutes.
- 5
Check the oil
Check the pan as it cooks and add oil if needed to prevent the mixture from burning.
- 6
Serve hot
Once roasted, serve hot. The dish already contains its masala, so no side dish is required.
What is adai upma?
Adai is a savoury South Indian pancake made from a ground batter, and upma is a soft, crumbly preparation usually cooked by stirring ingredients together in a pan. This version, associated here with Kerala cuisine, takes adai batter and cooks it down with a freshly ground tomato, onion, chilli and garlic paste.
Slow simmering and frequent breaking turn the spread batter into small roasted pieces. The result is savoury and crisp in places, with the masala mixed through.
Nutrition and macros by portion
The nutrition label shows one serving as written: 480 calories, 16g protein, 62g carbs, 18g fat.
| Portion | Adjustment | kcal | Protein | Carbs | Fat |
|---|---|---|---|---|---|
| Lighter | Use less oil | 336 kcal | 11g | 43g | 13g |
| This serving | As written | 480 kcal | 16g | 62g | 18g |
| Hungry | Serve a larger portion | 720 kcal | 24g | 93g | 27g |
Most of the carbohydrates and protein come from the adai batter, while the oil supplies most of the fat; the vegetables contribute smaller amounts of carbohydrates. Pair a serving with extra vegetables for a more balanced plate.
The batter and masala
Adai batter: Use the full 2 cups so it can spread across the kadai and cook as one layer before being broken up. The recipe does not specify whether the batter is homemade or ready-prepared.
Masala: Tomato, onion, red chilli and garlic are ground with a little salt. A smooth paste helps the flavour distribute through the batter as it is stirred.
Cooking it evenly
Start with the oil already hot in a non-stick kadai, then tilt the pan to spread the batter. Keep the heat low enough for a steady simmer rather than rushing the browning.
Stir every 10 minutes, breaking the batter into pieces as it firms. Check the base and add a little oil if it looks dry or starts to catch.
When it is ready
The recipe gives a cooking time of about 30–40 minutes, but the pan and heat can affect how long it takes. Look for roasted, crisp pieces and a loose, crumbly consistency like upma.
Keep stirring and breaking up larger pieces so they cook more evenly. If the mixture is still soft and cohesive, continue simmering and check it again.
Serving suggestions
Serve the upma hot, as the recipe recommends; it is intended to be seasoned enough to eat without a side dish. For a fuller plate, add a serving of vegetables or a fresh salad alongside it.
If you are cooking for several people, serve it soon after roasting so the crisp pieces do not soften while sitting in the pan.
Recipe notes & tips
- Use a non-stick kadai to make stirring and breaking up the batter easier.
- Grind the masala until smooth so it blends evenly into the batter.
- Spread the batter across the pan before leaving it to simmer.
- Break up the batter and stir every 10 minutes as directed.
- Check the pan for dry spots during cooking and add oil if needed.
- Serve the upma hot for the best contrast between crisp pieces and softer crumbs.
Variations
- Milder chilli: Use a less hot red chilli if you prefer a gentler masala.
- Extra vegetables: Add finely chopped vegetables to the masala before grinding for a more vegetable-forward version.
- Fresh finish: Scatter chopped coriander over the hot upma just before serving.
- Tangier flavour: Add a little extra tomato to the masala for a more pronounced tomato taste.
Common mistakes to avoid
- High heat: The base can burn before the mixture cooks through; keep it simmering gently.
- Skipping the stirring: The batter may catch or cook unevenly; break it up and stir every 10 minutes.
- Leaving it in one piece: It will not develop the intended upma-like texture; break the layer into pieces as it cooks.
- Not checking the pan: The mixture can burn if the oil runs low; inspect it between stirs and add oil if needed.
- Rough masala: Larger pieces may not spread evenly through the batter; grind the paste until smooth.
How to store
Cool leftovers and refrigerate them in a sealed container for up to 2 days. Reheat in a pan over low heat, stirring until hot; add a little oil if the mixture seems dry.
Frequently asked questions
How long does adai upma take to cook?
The method estimates about 30–40 minutes at a simmer. Check the texture as it cooks, since pan size and heat can change the timing.
Can I use a regular frying pan instead of a kadai?
Yes, use a wide, heavy-based non-stick pan that can hold the batter spread across its surface. A wider pan may help the batter cook in a thinner layer.
How often should I stir it?
Break up the batter and stir every 10 minutes, while checking the pan between stirs to make sure it is not catching.
What does the finished texture look like?
It should be roasted and broken into small pieces, with a crumbly consistency similar to upma and some crispness.
Do I need to serve a side dish?
The recipe says no side dish is required because the masala is mixed into the upma. You can still serve vegetables or salad alongside it if you like.
Cook it from the original
This recipe comes from jinooskitchen.com. Their page has the author’s own photos, notes and tips — the best place to cook it from.
Open the recipe on jinooskitchen.com