
Cheese Tortellini with Peas and Pepper
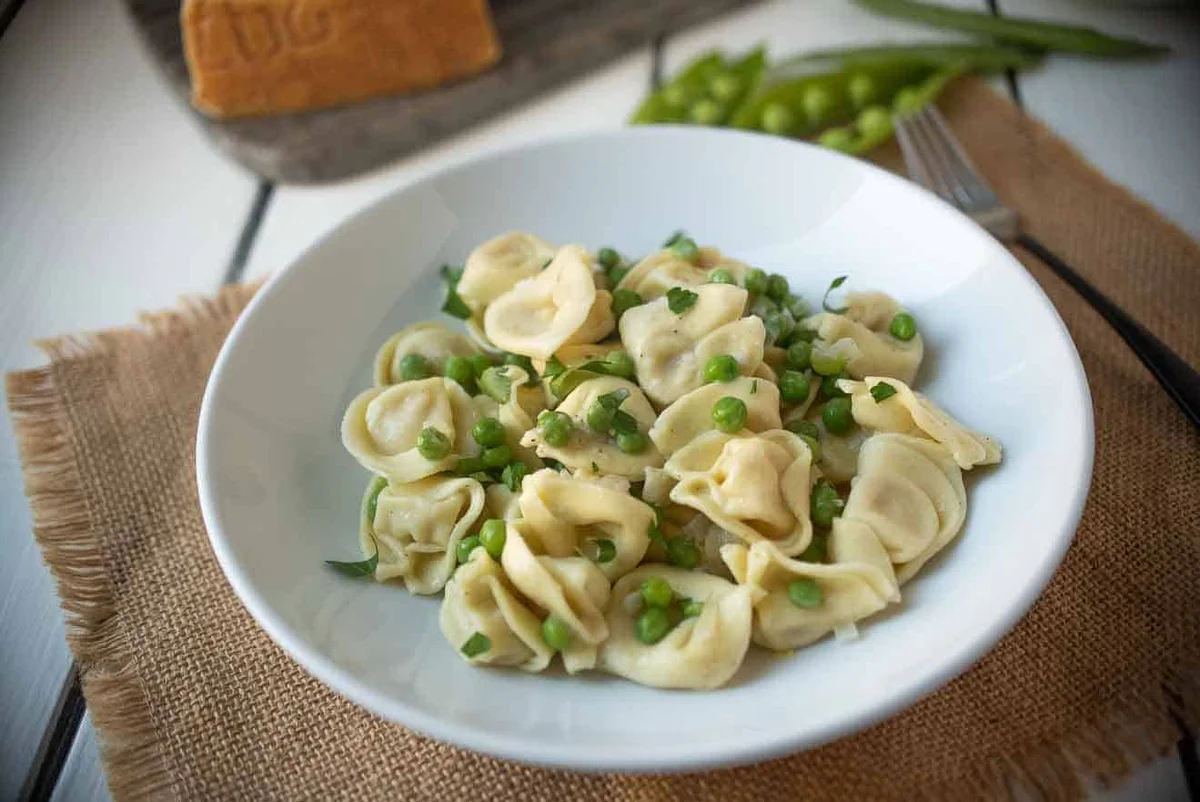
Cheese tortellini is tossed with buttery shallots, Parmesan, black pepper and sweet peas for a quick, creamy Italian-inspired meal. It comes together in about 15 minutes, making it a handy choice for a simple dinner.
Ingredients
- 113 g (8 tablespoons)unsalted butter
- 60 g (1/2 cup)large shallot, chopped
- 60 g (1 cup)Parmesan cheese, grated
- 195 g (1 1/2 cups)fresh or frozen peas
- 510 g (18 oz; 6 cups)cheese tortellini
- 1/2 teaspoonground black pepper
- to tastechopped parsley, for garnish
Instructions
- 1
Soften shallots
Melt the butter in a large, high-sided pan over medium heat. Once it is bubbling, add the shallot and cook until softened, taking care not to let the butter brown.
- 2
Cook tortellini
When the water is boiling, add the tortellini and cook until the pieces float to the surface. If using shop-bought tortellini, follow the packet directions.
- 3
Transfer pasta
Once the tortellini is cooked, lift it out with a slotted spoon and transfer it straight into the pan with the butter and shallots.
- 4
Save pasta water
Scoop out and reserve a cup of the pasta cooking water.
- 5
Finish the sauce
Add the Parmesan, pepper and peas to the pan and stir well. Mix the cheese with the butter, adding a little reserved pasta water until the sauce is as creamy as you like. Turn off the heat and serve immediately, garnished with chopped parsley.
What is tortellini with peas and pepper?
Tortellini are ring-shaped pasta parcels traditionally associated with the Emilia-Romagna region of Italy. This version uses ready-made cheese-filled pasta, so the main work is bringing the sauce together.
Buttery shallot, Parmesan and black pepper coat the pasta, while peas add sweetness and freshness. Pasta water helps bind the ingredients into a smooth sauce.
Nutrition and macros by portion
The nutrition label shows one serving as written: 686 calories, 22g protein, 74g carbs, 33g fat.
| Portion | Adjustment | kcal | Protein | Carbs | Fat |
|---|---|---|---|---|---|
| Lighter | Use less butter | 480 kcal | 15g | 52g | 23g |
| This serving | As written | 686 kcal | 22g | 74g | 33g |
| Hungry | Serve a larger portion | 1029 kcal | 33g | 111g | 50g |
The tortellini supplies most of the carbohydrates and some of the protein, with Parmesan adding more protein and fat. Butter is the main source of fat; serve the pasta with a generous side of salad or vegetables to round out the plate.
Choose the ingredients
Tortellini: Cheese-filled shop-bought pasta keeps the preparation quick; fresh or dried varieties can have different cooking times, so check the packet.
Peas: Fresh or frozen peas both work here. Frozen peas can go straight into the pan for the final stir.
Keep the butter gentle
Shallots: Cook them over medium heat until soft, rather than browned. Browned butter can change the flavour and make the sauce taste less delicate.
Butter: Watch for bubbling as the shallot cooks, and lower the heat if the butter starts to colour.
Build a creamy sauce
Pasta water: Reserve a cup before draining or lifting out the tortellini. Its starchy water helps the Parmesan and butter coat the pasta.
Add gradually: Stir in just a little water at a time, stopping when the sauce looks creamy and clings to the tortellini.
Check the texture
Tortellini: Follow the packet timing if the pasta is shop-bought, and check that it is tender before transferring it to the pan.
Peas: Stir them in with the cheese and pepper so they warm through without losing their fresh pop.
Serve it straight away
Timing: The sauce comes together quickly, so have the Parmesan, pepper and peas ready before the tortellini finishes cooking.
On the side: A crisp green salad or simply cooked vegetables provide a fresh contrast to the rich, buttery pasta.
Recipe notes & tips
- Grate the Parmesan finely so it mixes into the sauce more easily.
- Reserve the pasta water before you drain or lift out the tortellini.
- Add the pasta water a little at a time to control the sauce consistency.
- Keep the pan over moderate heat so the butter does not brown while the shallot softens.
- Serve as soon as the sauce is mixed for the creamiest coating.
Variations
- Add lemon: Finish with a little lemon zest for a brighter flavour.
- Use another filled pasta: Swap in a different cheese-filled tortellini and follow its packet directions.
- Add greens: Stir in a handful of baby spinach with the peas and let it wilt.
- Boost the pepper: Grind extra black pepper over each serving at the table.
- Add herbs: Scatter fresh basil over the finished pasta instead of, or alongside, parsley.
Common mistakes to avoid
- Browning the butter: Keep the heat moderate and add the shallot as soon as the butter bubbles.
- Skipping the pasta water: Reserve a cup before draining so you can loosen and bind the sauce.
- Adding too much water at once: Stir in small splashes until the sauce reaches the consistency you want.
- Overcooking the tortellini: Check the packet timing and remove the pasta when it is tender.
- Letting the dish stand: Serve immediately so the sauce stays creamy around the pasta.
How to store
Refrigerate leftovers in a sealed container for up to 3 days. Reheat gently in a pan with a small splash of water, stirring until warmed through; the sauce may thicken as it cools.
Frequently asked questions
Can I use frozen peas?
Yes. Add them with the Parmesan and pepper, and stir until they are warmed through.
Do I need to thaw frozen tortellini first?
Follow the packet directions for your tortellini. Cook it as directed, then transfer it to the butter and shallots.
How much pasta water should I add?
Start with a small splash and stir well before adding more. Stop when the sauce looks creamy and coats the pasta.
Can I make this ahead?
It is best served straight after cooking, when the sauce is creamy. You can chop the shallot and grate the Parmesan in advance.
What can I serve with it?
A green salad or simply cooked vegetables make a fresh side alongside the rich, buttery pasta.
Cook it from the original
This recipe comes from culinaryginger.com. Their page has the author’s own photos, notes and tips — the best place to cook it from.
Open the recipe on culinaryginger.com