
No Churn Vanilla Bean Ice Cream
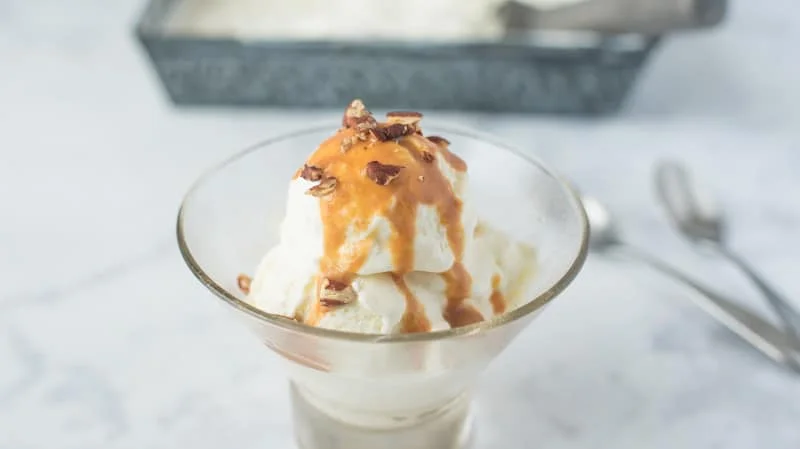
This no-churn vanilla bean ice cream is a creamy, softly sweet frozen dessert dotted with real vanilla seeds. It needs no ice-cream maker, making it an easy base for scooping as it is or adding other flavours.
Ingredients
- 946 ml (4 cups; 2 pints)heavy whipping cream
- 397 g (14 oz), 1 cansweetened condensed milk
- Seeds from 1vanilla bean
Instructions
- 1
Chill the pan
Place an 8-cup (9 × 5 × 3-inch) loaf pan, or a similarly sized freezer-safe container, in the freezer.
- 2
Combine ingredients
Put the whipping cream, sweetened condensed milk and vanilla seeds in a large mixing bowl.
- 3
Whip until thick
Whip on high for about 5 minutes, until the mixture is thick and coats the back of a spoon.
- 4
Freeze the mixture
Pour the mixture into the chilled pan. Cover with plastic wrap or a lid and freeze for 8–12 hours, until completely frozen.
- 5
Soften before serving
Take the ice cream out of the freezer a few minutes before scooping so it softens slightly.
What is no-churn vanilla bean ice cream?
No-churn ice cream is made without an ice-cream maker. In this American-style version, whipped cream provides a light, creamy base, while sweetened condensed milk adds sweetness and body.
Vanilla bean seeds give the finished dessert visible specks and a direct vanilla flavour. The short ingredient list also makes it a useful starting point for other flavours.
Nutrition and macros by portion
The nutrition label shows one serving as written: 619 calories, 9g protein, 40g carbs, 49g fat.
| Portion | Adjustment | kcal | Protein | Carbs | Fat |
|---|---|---|---|---|---|
| Lighter | Serve a smaller scoop | 433 kcal | 6g | 28g | 34g |
| This serving | As written | 619 kcal | 9g | 40g | 49g |
| Hungry | Serve a larger scoop | 929 kcal | 14g | 60g | 74g |
The supplied nutrition per serving is 619 kcal, with 9 g protein, 40 g carbohydrate and 49 g fat. The condensed milk contributes most of the carbohydrate, while the whipping cream supplies most of the fat; the dairy ingredients provide the protein. Serve a scoop with fresh fruit for a simple way to balance the plate.
Why these ingredients work
Whipping cream: its airiness helps give the frozen mixture a scoopable texture. Whip it with the other ingredients until it thickens and coats a spoon.
Condensed milk: this concentrated, sweetened milk brings sweetness and richness without needing a separate syrup or sugar mixture.
Vanilla bean: scrape out the seeds and add them to the bowl so they are distributed throughout the ice cream.
Getting the texture right
Whipping: use a large bowl and whip on high for about 5 minutes, checking the consistency as you go. The mixture should be thick enough to cling to the back of a spoon.
Freezing: transfer it to the pre-chilled pan and cover the surface with a lid or plastic wrap. Give it 8–12 hours, and check that it is completely frozen before serving.
A simple serving routine
Soften: let the container stand at room temperature for a few minutes before scooping. This brief rest makes serving easier without needing to thaw the whole batch.
Pair: serve it on its own, or alongside a fruit pie, crumble or warm brownie. Its vanilla flavour also works well as a base for toppings.
Choosing and preparing the pan
Size: an 8-cup loaf pan measuring 9 × 5 × 3 inches is the stated option; a similar-sized freezer-safe container works too. Chilling it first means the mixture goes straight into a cold vessel.
Cover: use a lid or plastic wrap before freezing. A close cover helps protect the ice cream while it sets and is stored.
Planning the freezer time
Active work is brief, but freezing takes 8–12 hours, so make the ice cream well ahead of serving. The exact time depends on when it is completely frozen, rather than on a fixed serving schedule.
For easier scooping, take it out a few minutes before serving. If it is still firm, give it a little more time rather than forcing the scoop.
Recipe notes & tips
- Chill the freezer-safe pan before you begin mixing.
- Scrape the vanilla seeds into the bowl and distribute them as you whip.
- Start checking the mixture for thickness at about 5 minutes.
- Cover the pan before putting it in the freezer.
- Allow the ice cream a few minutes out of the freezer before scooping.
Variations
- Chocolate: fold in chocolate chips after whipping for extra texture.
- Berry: swirl in a little berry purée before freezing.
- Coffee: add cooled, strongly brewed coffee to the mixture for a coffee flavour.
- Citrus: add finely grated lemon or orange zest for a fragrant twist.
- Nutty: scatter chopped toasted nuts over each serving.
Common mistakes to avoid
- Skipping the pan chill: the mixture starts in a warmer container; place the pan in the freezer before mixing.
- Stopping while the mixture is thin: it may not have the intended texture; whip until it coats the back of a spoon.
- Freezing for too little time: the centre may remain soft; allow 8–12 hours and check that it is completely frozen.
- Leaving the pan uncovered: the surface is exposed in the freezer; use plastic wrap or a lid.
- Scooping straight from the freezer: the ice cream can be very firm; let it soften for a few minutes first.
How to store
Keep the ice cream covered in its freezer-safe container. It is best enjoyed within a few weeks for good texture; let it stand for a few minutes before serving rather than reheating it.
Frequently asked questions
Do I need an ice-cream maker?
No. This recipe is made by whipping the ingredients together and freezing them in a pan.
How long does it need to freeze?
Freeze it for 8–12 hours, until it is completely frozen.
How can I tell when the mixture is whipped enough?
After about 5 minutes on high, it should be thick and coat the back of a spoon.
Can I use vanilla extract instead of a bean?
The recipe specifies seeds from a vanilla bean, which give the ice cream its visible specks. Extract can be used as a substitute, though the result will not have those seeds.
What can I serve with it?
Try it with fruit pie, crumble or a warm brownie, or add fresh fruit as a topping.
Why is it difficult to scoop?
It may be very firm straight from the freezer. Leave it out for a few minutes to soften slightly before scooping.
Cook it from the original
This recipe comes from culinaryginger.com. Their page has the author’s own photos, notes and tips — the best place to cook it from.
Open the recipe on culinaryginger.com