
Gluten-Free Cornbread
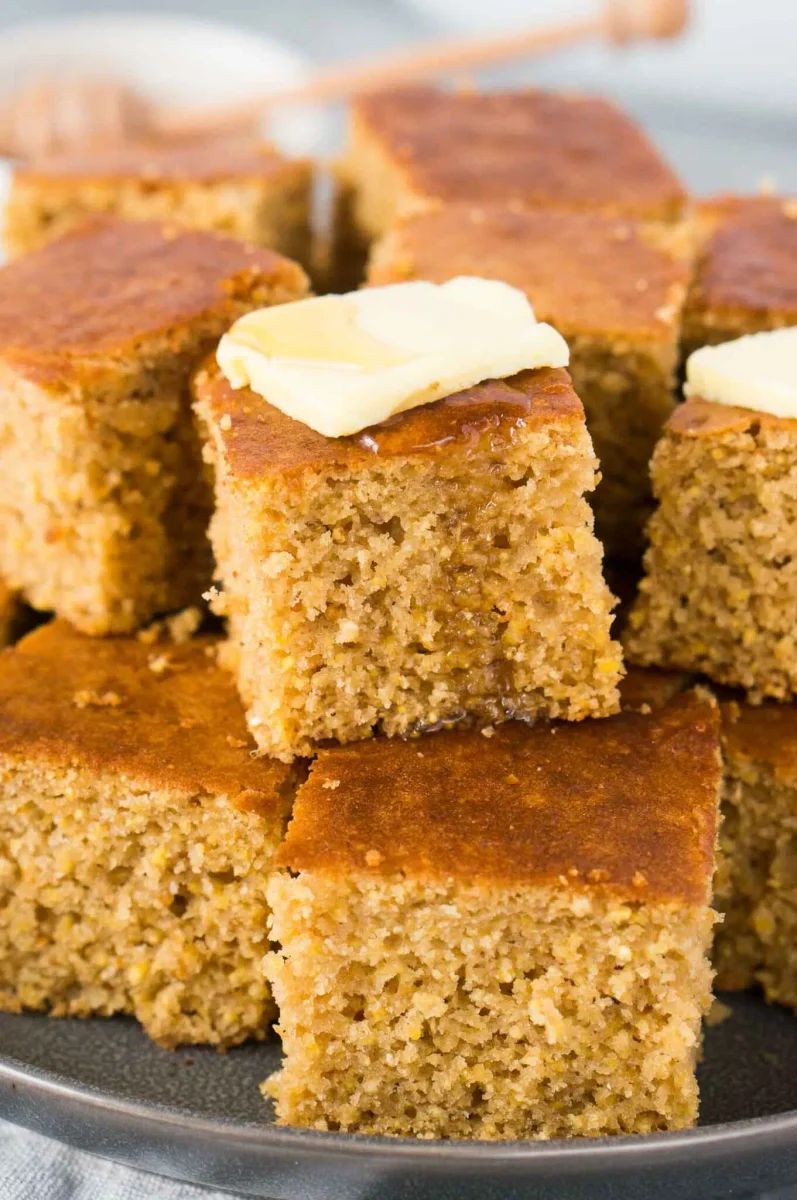
This sweet, fluffy gluten-free cornbread is baked in a skillet and ready to serve warm alongside a main meal. Its quick method makes it a handy choice when you want a homemade bread without a long rise.
Ingredients
- 150 g (1 cup)yellow cornmeal
- 140 g (1 cup)gluten-free flour
- 12 g (1 tablespoon)baking powder
- 100 g (½ cup)coconut sugar
- 5 g (1 teaspoon)salt
- 240 ml (1 cup)milk
- 2 largeeggs
- 57 g (¼ cup), meltedunsalted butter
- 170 g (½ cup)honey
Instructions
- 1
Heat the oven
Preheat the oven to 200°C (400°F). Lightly coat a 23 or 25 cm (9 or 10-inch) cast-iron skillet or baking dish with non-stick cooking spray.
- 2
Mix dry ingredients
In a large bowl, whisk together the cornmeal, gluten-free flour, baking powder, coconut sugar and salt.
- 3
Mix wet ingredients
In a medium bowl, whisk the milk, eggs, melted butter and honey until combined.
- 4
Combine the batter
Pour the wet mixture into the dry ingredients and whisk just until combined.
- 5
Fill the skillet
Pour the batter into the prepared cast-iron skillet.
- 6
Bake the cornbread
Set the skillet on the centre rack and bake for about 13–15 minutes, until golden and a toothpick inserted in the centre comes out clean.
- 7
Cool and serve
Take the skillet out of the oven and leave the cornbread to cool for 5 minutes. Run a spatula around the edge, cut into squares or triangles and serve warm.
What is cornbread?
Cornbread is an American bread made with cornmeal, often served alongside savoury mains. It is commonly baked rather than yeast-risen, so it can be mixed and cooked quickly.
This version pairs cornmeal with gluten-free flour and uses honey and coconut sugar for a distinctly sweet crumb. Baking it in a skillet gives the batter a simple, even shape for serving.
Nutrition and macros by portion
The nutrition label shows one serving as written: 207 calories, 4g protein, 36g carbs, 6g fat.
| Portion | Adjustment | kcal | Protein | Carbs | Fat |
|---|---|---|---|---|---|
| Lighter | Smaller cornbread portion | 145 kcal | 3g | 25g | 4g |
| This serving | As written | 207 kcal | 4g | 36g | 6g |
| Hungry | Larger cornbread portion | 311 kcal | 6g | 54g | 9g |
Most of the carbohydrates come from the cornmeal, gluten-free flour, coconut sugar and honey; butter supplies much of the fat, while the milk and eggs contribute protein. Pair a piece with a protein-rich main and vegetables to make the meal more balanced.
Choosing the dry ingredients
Cornmeal: yellow cornmeal gives the bread its characteristic colour and grainy texture. Use the amount specified so it remains balanced with the flour.
Gluten-free flour: the flour helps hold the crumb together without wheat. Use a blend intended for baking, and check its packaging if avoiding gluten is important.
Mixing without overworking
Dry mixture: whisk the cornmeal, flour, baking powder, sugar and salt thoroughly so the raising agent is spread through the bowl.
Wet mixture: blend the milk, eggs, melted butter and honey separately before adding them to the dry ingredients. Stop whisking as soon as the batter is combined; a few small lumps are preferable to prolonged mixing.
Getting the bake right
Oven: preheat fully to 200°C (400°F) before the skillet goes in. The recipe gives a baking time of about 13–15 minutes, but use the colour and toothpick test as your cues.
Doneness: the top should be golden, and a toothpick pushed into the centre should come out clean. If it has wet batter on it, bake a little longer and check again.
Cooling and cutting
Resting: leave the cornbread in the skillet for 5 minutes after baking. This brief rest helps it settle before you loosen the edge.
Serving: run a spatula around the sides, then cut into squares or triangles. Serve warm while the crumb is soft.
What to serve with it
Its honeyed sweetness works well alongside savoury mains, including soups, stews and chilli. The skillet format also makes it easy to cut portions at the table.
For a more balanced plate, serve a piece with a protein-rich main and vegetables rather than treating the bread as the whole meal.
Recipe notes & tips
- Measure the flour and cornmeal carefully for a consistent crumb.
- Whisk the dry ingredients well so the baking powder is evenly distributed.
- Mix the batter only until the wet and dry ingredients come together.
- Use the toothpick test as well as the stated baking time to check the centre.
- Let the cornbread rest for 5 minutes before loosening and cutting it.
- Serve it warm for the softest texture.
Variations
- Add chilli: fold finely chopped chilli into the batter for a little heat.
- Add cheese: stir grated cheese into the mixed batter for a savoury note.
- Use a baking dish: bake in a lightly greased baking dish if you do not have a cast-iron skillet.
- Add herbs: mix chopped herbs into the batter to complement savoury meals.
Common mistakes to avoid
- Overmixing the batter: stop whisking as soon as it is combined to avoid a dense result.
- Skipping the preheat: wait until the oven reaches 200°C before baking so the timing is meaningful.
- Guessing doneness by time alone: check that the top is golden and a toothpick comes out clean.
- Cutting immediately: allow the cornbread to cool in the skillet for 5 minutes so it can settle.
- Forgetting to grease the pan: lightly coat the skillet or baking dish to help release the bread.
How to store
Cool completely, then store in an airtight container in the fridge for up to 3 days. Reheat portions briefly in the oven or microwave until warm.
Frequently asked questions
Can I bake this in a dish instead of a skillet?
Yes. The method allows for a 23 or 25 cm (9 or 10-inch) baking dish in place of the cast-iron skillet.
How do I know when the cornbread is done?
Look for a golden top and insert a toothpick in the centre. It should come out clean, without wet batter.
Can I mix the batter ahead of time?
It is best to mix it just before baking so the baking powder can do its job in the oven. The method is quick, so prepare the pan and ingredients first.
Is this cornbread suitable for someone avoiding gluten?
It uses gluten-free flour, but check the flour and other ingredient labels for suitability and cross-contamination information.
Can I serve it cold?
Yes, though the recipe recommends serving it warm. You can gently reheat a piece if you prefer it warm after storage.
Cook it from the original
This recipe comes from deliciousmeetshealthy.com. Their page has the author’s own photos, notes and tips — the best place to cook it from.
Open the recipe on deliciousmeetshealthy.com