
No-knead garlic dinner rolls with garlic butter
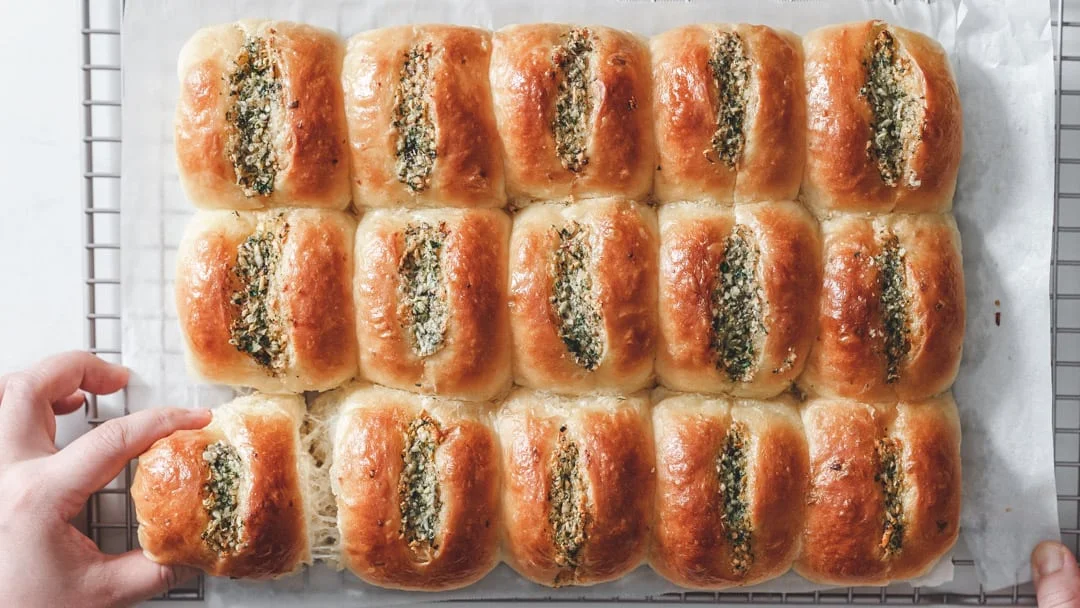
These soft, no-knead garlic dinner rolls use resting time and a few folds to build structure without a mixer. A generous garlic-butter filling goes in before and during baking, and melted butter brushed on after baking makes the tops fragrant and glossy.
Ingredients
- 325 gbread flour
- 5 ginstant yeast
- 24 gsugar
- 4 gsalt
- 190 gwhole milk
- 35 gwater
- 40 gwhole egg, with the remaining egg reserved for brushing
- 62 gunsalted butter
- 9 gminced garlic
- 60 gunsalted butter
- 25 gfreshly grated garlic
- 10 g (2 tbsp)grated Parmesan
- 1 g (1 tsp)dried parsley, or chopped fresh parsley
- ¼ tspsalt and pepper, to season
Instructions
- 1
Prepare garlic
Mince the garlic and leave the butter out at room temperature until soft.
- 2
Mix the dough
Put all the ingredients except the butter and minced garlic in a mixing bowl and combine with a spatula. Transfer the dough to the work surface, cut it into pieces with a dough scraper, then stack the pieces over one another to help mix everything evenly.
- 3
Rest the dough
Cover the dough with the mixing bowl so it does not dry out. Leave it to rest for 20–30 minutes for the autolyse.
- 4
Add butter and garlic
Add the softened butter and minced garlic, distributing the butter in small pieces and wrapping the dough around them. Knead gently for about 1 minute, then use the French-fold technique around 20 times to help develop the gluten. The dough will be quite wet; dust with a little flour as needed to shape it into a ball, then place it in an oiled bowl.
- 5
Fold and rise
Let the dough rise at about 30°C for 1 hour. Take it out, give it 20–30 French folds, shape it into a ball again and leave it to rise for another hour.
- 6
Shape the rolls
Once the first rise is complete, divide the dough into 45 g portions to make 15 rolls. Stretch each piece out from its four sides and fold the edges into the centre, then roll it into a ball. Rest the pieces on the work surface for 5 minutes and roll them into balls again to tighten their shape.
- 7
Proof the rolls
Line a baking tray with baking paper and arrange the rolls on it; the original recipe uses a 3 by 5 arrangement on a 33 × 24 cm tray. Leave them to proof for 40–50 minutes, until they wobble softly when the tray is moved.
- 8
Make garlic butter
While the rolls proof, grate the garlic into a bowl and mix it with the other garlic-butter ingredients. Transfer the mixture to a piping bag and snip a small opening in the end.
- 9
Fill the rolls
Heat the oven to 180°C. Brush each roll with the reserved egg, make a cut down the centre with a sharp blade and pipe in a narrow line of garlic butter.
- 10
Bake with filling
Bake for 7 minutes, until the rolls have expanded and opened at the cuts. Carefully remove the tray and pipe another line of garlic butter into the centre of each roll, then return them to the oven and bake until the sides and bottoms are golden, about 23–25 minutes; do not bake for less than 23 minutes.
- 11
Cool and butter
Lift the rolls off the tray by holding the baking paper and transfer them to a wire rack. While they are still hot, brush them with melted butter. Cooling them on the tray can trap steam and leave the tops wrinkled.
What are no-knead garlic dinner rolls?
Dinner rolls are small, soft bread rolls commonly served alongside a meal. This version takes a no-knead approach: time, resting and folds help the dough develop instead of sustained machine or hand kneading.
The recipe pairs that tender, enriched dough with garlic butter piped into each roll. Adding more filling partway through baking gives the centres an extra hit of garlic.
Nutrition and macros by portion
The nutrition label shows one serving as written: 158 calories, 4g protein, 22g carbs, 8g fat.
| Portion | Adjustment | kcal | Protein | Carbs | Fat |
|---|---|---|---|---|---|
| Lighter | Smaller rolls, less filling | 111 kcal | 3g | 15g | 5g |
| This serving | As written | 158 kcal | 4g | 22g | 8g |
| Hungry | Two rolls per portion | 237 kcal | 7g | 33g | 12g |
Most of the carbohydrates come from the bread flour and sugar, while the butter contributes much of the fat and saturated fat. The flour, milk, egg and Parmesan provide some protein; serve a roll alongside a protein-rich main and vegetables for a more balanced plate.
Why the dough rests
Autolyse: the initial 20–30-minute rest lets the flour hydrate before the butter and garlic go in. Keep the dough covered so its surface does not dry out.
Folds: the French folds help organise the dough and build strength, even though it stays soft and sticky. A little flour on your hands or the work surface can make handling easier, but too much can make the rolls firm.
Shaping for soft rolls
Portions: weighing out 45 g pieces helps the batch of 15 rolls bake evenly. Pull the edges towards the centre, then roll each piece into a ball.
Second shaping: after the 5-minute bench rest, roll each portion again to tighten its surface. This helps the rolls hold a rounded shape as they proof.
How to judge the proof
First rise: the dough has two one-hour rises at about 30°C, with a round of folds and reshaping between them. Keep it covered during rests to prevent a dry skin forming.
Final proof: the rolls need 40–50 minutes after shaping. The recipe describes them as softly wobbling when the tray is moved; use that movement as a cue rather than relying only on the clock.
Getting the garlic butter inside
Fresh garlic: grating it into a puree makes a strongly flavoured filling. If you prefer a milder garlic taste, the recipe suggests chopping it instead.
Two additions: pipe filling into each cut before baking, then add another line after the first 7 minutes. Use a small opening in the piping bag so you can place the butter neatly along the centre.
Browning and cooling
Bake: set the oven to 180°C and check the sides and bottoms for a golden colour. The recipe calls for about 23–25 minutes in total and cautions against baking for less than 23 minutes.
Cool: move the rolls to a wire rack by lifting the baking paper. Brushing them with melted butter while hot adds a fragrant finish; cooling them on the tray can leave the tops wrinkled from trapped steam.
What to serve with the rolls
These rolls suit a soup or a simple salad, where their soft crumb can soak up a little of the meal. They also work as a bread side for a shared dinner.
Because the rolls are buttery and savoury, pair them with lighter, less rich accompaniments if you want the plate to feel balanced.
Recipe notes & tips
- Soften the dough butter before adding it so it is easier to distribute through the dough.
- Keep the dough covered during each rest to stop the surface from drying out.
- Use a dough scraper to handle the wet dough with less sticking.
- Weigh the portions to keep the 15 rolls a similar size.
- Use a sharp blade for the centre cut so the rolls can open as they bake.
- Let the rolls cool on a wire rack rather than leaving them on the hot tray.
Variations
- Milder garlic: chop the fresh garlic instead of grating it for a less intense filling.
- Fresh parsley: use chopped fresh parsley in place of the dried parsley.
- More Parmesan: add a little extra grated Parmesan to the garlic-butter mixture for a cheesier finish.
- Different herbs: swap the parsley for another dried or fresh herb that suits your meal.
- Smaller rolls: divide the dough into smaller portions and keep an eye on them as they bake.
Common mistakes to avoid
- Adding too much flour: the dough is meant to be wet, so use only a light dusting while shaping.
- Leaving the dough uncovered: a dry surface can form, so cover it with the mixing bowl during rests.
- Skipping the second shaping: roll the portions again after their 5-minute rest to tighten them.
- Overproofing by the clock: check for the soft wobble described in the recipe as well as the 40–50-minute timing.
- Using a blunt blade: make the centre cut with a sharp blade so the roll can open around the filling.
- Removing the rolls too early: bake for at least 23 minutes and check that the sides and bottoms are golden.
How to store
Keep cooled rolls in an airtight container at room temperature and eat within 2 days. Reheat briefly in a low oven until warm; avoid leaving them uncovered, as the soft bread can dry out.
Frequently asked questions
Can I make these rolls without a stand mixer?
Yes. The dough is mixed with a spatula, then developed through resting and French folds, so a machine is not required.
Why is the dough so sticky?
This is a wet, no-knead dough, and the recipe notes that stickiness is normal. Use a dough scraper and only a little flour when shaping.
Can I use chopped garlic instead of grated garlic?
Yes. The recipe suggests chopping the garlic if you would rather have a less intense garlic flavour.
How can I tell when the rolls are proofed?
After the 40–50-minute final proof, the rolls should wobble softly when you move the tray.
Why add garlic butter twice?
The first line of filling goes into the cut before baking; the second is piped in after 7 minutes, once the rolls have expanded and opened.
Can I cool the rolls on the baking tray?
The recipe recommends transferring them to a wire rack. Steam can collect beneath the rolls on the tray and wrinkle their tops.
Cook it from the original
This recipe comes from ciao.kitchen. Their page has the author’s own photos, notes and tips — the best place to cook it from.
Open the recipe on ciao.kitchen