
Easy homemade mandioquinha bread
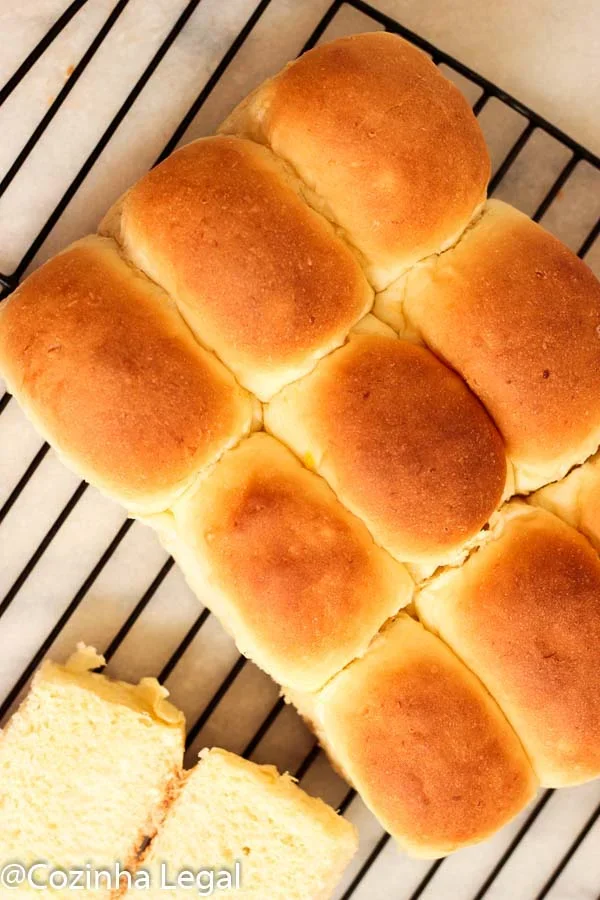
These soft Brazilian rolls are made with cooked mandioquinha, also known as arracacha, which gives the dough a tender texture. They take a little time to rise, but the method is straightforward and works by hand or with a stand mixer.
Ingredients
- 300 gcooked and mashed mandioquinha, cooled
- 120 ml (½ cup)warm water
- 180 ml (¾ cup)warm milk
- 1egg, lightly beaten
- 15 ml (1 tablespoon)melted butter
- 1 sachetdried yeast
- 45 ml (3 tablespoons)sugar
- 15 ml (1 tablespoon)salt
- 1.92 litres (8 cups)plain flour, added gradually
- A littleoil, for greasing
Instructions
- 1
Mix the dough
For the by-hand method, put the cooled, cooked and mashed mandioquinha in a large bowl. Add the water, milk, egg, melted butter, yeast and sugar, then mix until dissolved.
- 2
Add the flour
Gradually mix in the flour, starting with 1 cup (240 ml).
- 3
Finish mixing
Turn the dough out onto a clean, smooth work surface and work in the remaining flour gradually. Stop adding flour when the dough begins to pull away from your hands; avoid making it dry.
- 4
Knead the dough
Knead the dough for 15 minutes.
- 5
Rest the dough
Shape the dough into a ball, cover it with cling film and leave it to rest for 30 minutes.
- 6
Shape the rolls
Divide the dough into small portions of 60–75 g and shape each into a ball.
- 7
Arrange the rolls
Lightly oil a large rectangular baking tray and arrange the dough balls side by side.
- 8
Let them rise
Cover the tray with cling film and leave the rolls to rise until doubled in size.
- 9
Heat the oven
Preheat the oven to 200°C for 10 minutes.
- 10
Bake the rolls
Bake for about 30 minutes, or until the tops are golden.
- 11
Cool and serve
Remove from the oven, leave the rolls to cool until warm, then serve.
- 12
Prepare the mixer
For the stand-mixer method, fit the dough hook. Put all the ingredients except the flour in the mixer bowl and beat at medium speed for a few minutes, until dissolved.
- 13
Add the flour
Reduce the mixer to its lowest speed and add the flour gradually, 1 cup (240 ml) at a time. The dough is ready when it pulls away from the bottom of the bowl.
- 14
Rest the dough
Remove the dough from the bowl, shape it into a large ball, cover with cling film and leave it to rest for 30 minutes.
- 15
Shape and rise
Divide the dough into 60–75 g portions and shape them into balls. Place them on a lightly oiled baking tray, cover with cling film and leave to rise until doubled in size.
- 16
Bake and serve
Preheat the oven to 200°C. Bake the rolls for 30–40 minutes, or until the tops are golden. Remove them from the oven, let them cool a little and serve.
What is mandioquinha bread?
Mandioquinha is a Brazilian root vegetable also called arracacha. It has a mild, slightly sweet flavour and is often used in soups, purées and baked goods.
This version folds cooked, mashed mandioquinha into an enriched yeast dough. The vegetable helps make the rolls soft, while the small portions are easy to serve alongside a meal or as a snack.
Nutrition and macros by portion
The nutrition label shows one serving as written: 75 calories, 0g protein, 0g carbs, 0g fat.
| Portion | Adjustment | kcal | Protein | Carbs | Fat |
|---|---|---|---|---|---|
| Lighter | Smaller rolls | 53 kcal | 0g | 0g | 0g |
| This serving | As written | 75 kcal | 0g | 0g | 0g |
| Hungry | Two rolls per serving | 113 kcal | 0g | 0g | 0g |
The mandioquinha, flour and sugar supply most of the carbohydrates; the butter, egg and milk contribute fat, with some protein also coming from the egg, milk and flour. Pair a roll with eggs, beans or another protein-rich food and some vegetables for a more balanced plate.
Getting the dough consistency right
Flour first: begin with 1 cup (240 ml) and add the rest in stages rather than tipping it all in at once. The recipe’s full amount is a guide; stop when the dough starts to come away from your hands, as instructed.
Cool purée: use the mandioquinha once it has cooled. The method specifies it should be cold when mixed with the other ingredients.
Kneading and resting
By hand: knead for the full 15 minutes to bring the dough together and develop its structure. It should feel cohesive and workable rather than dry.
First rise: cover the dough and leave it for 30 minutes before dividing. After shaping, let the rolls rise until they have doubled in size; the recipe does not give a fixed time for this second rise.
Shaping even rolls
Portions: aim for 60–75 g per roll, as the method suggests. Keeping the portions similar helps them bake at a similar rate.
Spacing: arrange the shaped rolls side by side on the greased rectangular tray. Cover them while they rise so the surface does not dry out.
Using a stand mixer
Hook attachment: use the dough hook and mix the wet ingredients and mandioquinha first, leaving out the flour. Add the flour gradually at the lowest speed.
Dough cue: the mixer version says the dough is ready when it pulls away from the bottom of the bowl. The recipe gives this option as an alternative to the 15-minute hand kneading step.
Knowing when they are baked
Oven: preheat to 200°C. The by-hand instructions give about 30 minutes of baking, while the mixer instructions allow 30–40 minutes.
Colour: look for golden tops as the recipe’s doneness cue. Let the rolls cool until warm before serving.
What to serve with the rolls
At the table: serve them warm with soup, a salad or a savoury main, or set them out as bread with a meal.
For breakfast or a snack, pair a roll with an egg or another source of protein to make the meal more substantial.
Recipe notes & tips
- Use the mandioquinha cooked, mashed and cooled before mixing.
- Add the flour gradually and stop when the dough begins to pull away from your hands.
- Keep the shaped portions within the recipe’s 60–75 g range.
- Cover the dough and shaped rolls during their rests.
- Check for golden tops, allowing for the different baking times given for each method.
Variations
- Serve savoury: pair the warm rolls with soup or a salad for a simple meal.
- Make smaller rolls: divide the dough into portions below the suggested range, keeping in mind that smaller rolls may bake sooner.
- Use the mixer: follow the stand-mixer method with a dough hook instead of kneading by hand.
- Serve at breakfast: offer the rolls with eggs or another savoury accompaniment.
Common mistakes to avoid
- Adding all the flour at once: add it gradually and stop when the dough starts to pull away from your hands.
- Using hot mandioquinha: let the cooked mash cool before mixing it into the dough.
- Making the dough dry: hold back some flour if the dough is already coming away from your hands.
- Skipping the rise: let the shaped rolls rise until doubled in size before baking.
- Relying only on the timer: use the golden tops as the recipe’s cue that the rolls are ready.
How to store
Once cool, store the rolls in an airtight container at room temperature and eat within 2 days. Reheat briefly in a low oven until warm.
Frequently asked questions
What is mandioquinha?
It is a Brazilian root vegetable also known as arracacha. This recipe uses it cooked, mashed and cooled.
Can I make the dough in a stand mixer?
Yes. Fit a dough hook, mix everything except the flour first, then add the flour gradually at the lowest speed until the dough pulls away from the bowl.
How long should the dough rise?
The first rest is 30 minutes. After shaping, cover the rolls and let them rise until doubled in size; no specific time is given for that stage.
How big should each roll be?
Shape portions of 60–75 g, as specified in the recipe.
How long do the rolls bake?
The by-hand method says about 30 minutes; the stand-mixer method gives 30–40 minutes. In either case, look for golden tops.
Can I serve them straight from the oven?
Let them cool until warm before serving, as the recipe directs.
Cook it from the original
This recipe comes from cozinhalegal.com.br. Their page has the author’s own photos, notes and tips — the best place to cook it from.
Open the recipe on cozinhalegal.com.br