
A different chicken fillet recipe
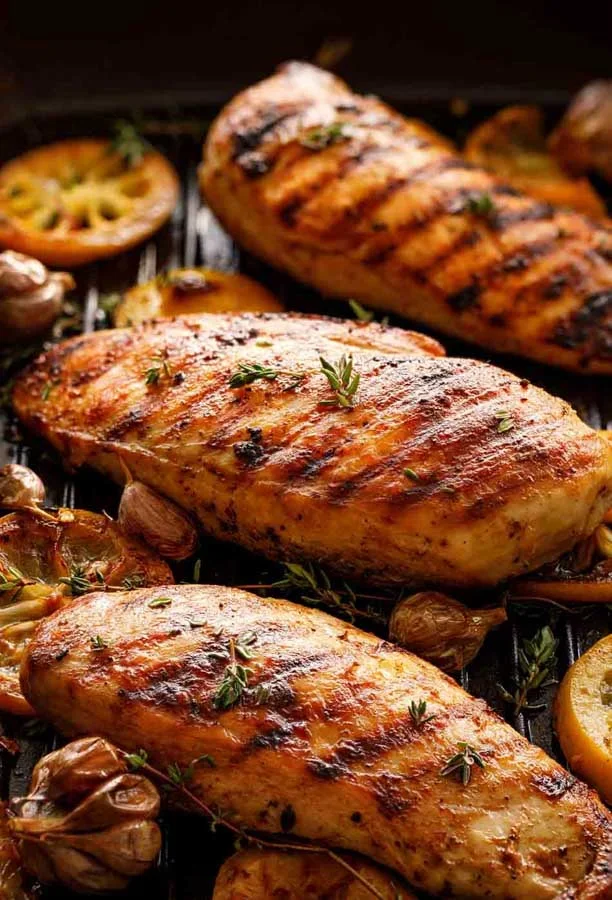
Pan-seared chicken breasts are browned in oil, finished with butter and rested before slicing. This straightforward method makes a useful centrepiece for a quick dinner, with little preparation beyond drying and seasoning the chicken.
Ingredients
- 2boneless, skinless chicken breasts
- 3.75 ml (¾ teaspoon)salt
- 1.25 ml (¼ teaspoon)freshly ground black pepper
- 30 ml (2 tablespoons)oil
- 15 g (1 tablespoon)unsalted butter
Instructions
- 1
Dry and season
Pat the chicken dry thoroughly on all sides with kitchen paper, then season it with the salt and pepper.
- 2
Heat the oil
Warm the oil in a frying pan, preferably a straight-sided, non-stick-free pan such as cast iron, over medium-high heat for about 3 minutes.
- 3
Sear the first side
Swirl the hot pan to spread the oil, then carefully add the chicken breasts one at a time. Leave them undisturbed for 5–7 minutes; if a breast seems stuck when you try to turn it, it has not browned enough to release easily.
- 4
Cook the other side
Turn the breasts and add the butter between them. Lift and gently swirl the pan to distribute the melting butter, then cook for a further 5–7 minutes.
- 5
Rest before serving
Move the chicken to a clean plate or chopping board and leave it to rest for 3 minutes before slicing and serving.
What is pan-seared chicken?
This is a simple preparation of chicken breasts cooked in a hot pan until browned on the outside, then finished with butter. It is a familiar home-cooking approach rather than a dish tied to one particular culinary tradition.
The recipe's appeal is its short ingredient list and direct method. Drying the meat and leaving it still while the first side cooks help build a golden surface.
Nutrition and macros by portion
The nutrition label shows one serving as written: 120 calories, 0g protein, 0g carbs, 0g fat.
| Portion | Adjustment | kcal | Protein | Carbs | Fat |
|---|---|---|---|---|---|
| Lighter | Use less butter | 84 kcal | 0g | 0g | 0g |
| This serving | As written | 120 kcal | 0g | 0g | 0g |
| Hungry | Serve with potatoes | 180 kcal | 0g | 0g | 0g |
The chicken provides most of the protein, while the oil and butter contribute most of the fat; the recipe contains no substantial carbohydrate ingredient. Pair a portion with vegetables and a grain or potato side for a more balanced plate.
Why dry the chicken first?
Surface moisture: pat each breast dry on all sides before seasoning. A dry surface browns more readily than a wet one in the hot pan.
Even seasoning: spread the salt and pepper over the chicken after drying so they cling to the meat.
Choosing the pan and oil
Pan choice: the method favours a straight-sided pan that is not non-stick, with cast iron given as an option. Use a pan large enough to hold the breasts without crowding them.
Oil: heat it for about 3 minutes over medium-high heat, then swirl the pan to coat the cooking surface before adding the chicken.
How to get a good sear
First side: place the breasts in the pan one at a time and leave them alone for 5–7 minutes. Moving them too soon can interrupt browning.
Turning cue: if a breast seems stuck when you try to turn it, give it more time rather than forcing it. The recipe uses release from the pan as a cue that the surface has browned.
Butter and doneness
Butter finish: add the butter between the breasts after turning them, then gently swirl the pan so the melting butter spreads around the chicken.
Timing: cook the second side for another 5–7 minutes as directed. Breast thickness can affect cooking time, so check that the chicken is cooked through before serving.
Resting and serving
Rest: transfer the chicken to a clean plate or chopping board and leave it for 3 minutes before cutting. This also gives you a moment to finish the rest of the meal.
Pairings: serve sliced chicken with vegetables, salad, potatoes or rice. Choose a side that suits the meal and makes the portions feel complete.
Recipe notes & tips
- Dry the chicken thoroughly before it goes into the pan.
- Swirl the pan after adding the oil to spread it over the cooking surface.
- Add the breasts one at a time, taking care around the hot oil.
- Leave the first side undisturbed for the full 5–7 minutes before attempting to turn it.
- Rest the chicken for 3 minutes before slicing.
Variations
- Add herbs: scatter chopped parsley over the sliced chicken just before serving.
- Add lemon: serve with lemon wedges for a bright finish.
- Add garlic: stir a little minced garlic into the butter near the end of cooking.
- Add paprika: season the chicken with a small pinch alongside the salt and pepper.
- Serve with greens: pair the chicken with cooked green vegetables for an easy plate.
Common mistakes to avoid
- Wet chicken: pat it dry on every side before seasoning so the surface can brown.
- Crowded pan: cook in batches if the breasts do not fit with space around them.
- Moving it too soon: leave the first side alone for 5–7 minutes and wait if it resists turning.
- Forcing the turn: if the chicken seems stuck, give it more time to brown before trying again.
- Skipping the rest: leave the cooked breasts for 3 minutes before slicing.
How to store
Refrigerate leftover chicken in a covered container and use within 3 days. Reheat gently in a pan or microwave until hot throughout; take care not to overcook it.
Frequently asked questions
How long does this chicken take to cook?
The method calls for 5–7 minutes on the first side and another 5–7 minutes on the second, after heating the pan. It also includes a 3-minute rest.
What if the chicken sticks when I try to turn it?
Leave it in the pan for longer rather than forcing it. The recipe uses easy release as a sign that the first side has browned.
Can I use a non-stick pan?
The method prefers a pan that is not non-stick and suggests cast iron. If you use another pan, take care when heating it and follow its manufacturer's guidance.
How can I tell when the chicken is cooked through?
Check the thickest part of each breast before serving; it should be cooked through, not pink in the centre. The recipe's timings are a guide and may vary with the thickness of the meat.
Can I prepare the chicken ahead?
You can pat and season it shortly before cooking, then keep it chilled until needed. Cook it close to serving time for the best browned surface.
Cook it from the original
This recipe comes from cozinhalegal.com.br. Their page has the author’s own photos, notes and tips — the best place to cook it from.
Open the recipe on cozinhalegal.com.br