
Vietnamese Thit Heo Quay - Simple Crispy Crunchy Pork Belly Recipe
Nutrition per Serving
406
Calories
31g
Protein
2g
Carbs
29g
Fat
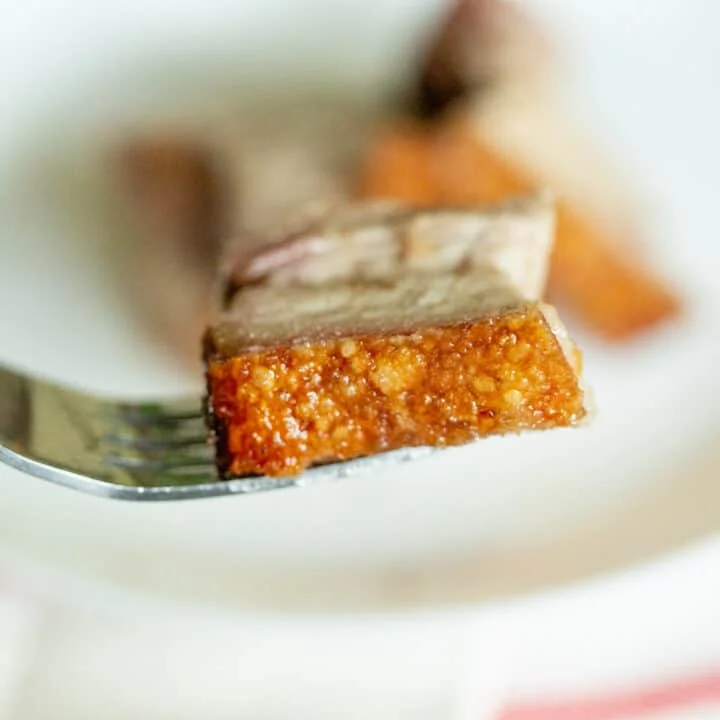
Thit Heo Quay is a popular Vietnamese crispy pork belly dish that provides three layers of delicious texture: crispy pork skin, juicy fat, and well seasoned meat in one bite!
📝 Ingredients
- Kosher salt
- 2 teaspoons of lime juice
- 1 teaspoon of salt
- 3 pounds of pork belly
- 2 teaspoons of salt
- 2 teaspoons of five spice
- 1 tablespoon of sugar
- 3 cloves of garlic, minced
👨🍳 Instructions
- 1Eliminate the impurities and odor of the pork...: Eliminate the impurities and odor of the pork skin by using a sharp knife to scrape the pork belly skin. If you see extra hairs, use a tweezer to remove the hair on the skin. Pat the skin completely dry with a paper towel.
- 2In a small bowl or mortar and pestle,...: In a small bowl or mortar and pestle, combine the salt, five spice, sugar, and garlic. Mix the ingredients together.
- 3Flip the pork with the skin side down...: Flip the pork with the skin side down on a dry cutting board. Make vertical cuts into the pork belly that are about 1/2 inches deep and 1 inch apart, not cutting into the skin.
- 4Add the seasoning mixture onto the top and...: Add the seasoning mixture onto the top and sides of the meat, careful not touching the skin with the mixture.
- 5Flip the meat over with the skin facing...: Flip the meat over with the skin facing the ceiling. Using a paper towel, pat the skin surface until it's completely dry.
- 6Place the meat on a dry plate (and...: Place the meat on a dry plate (and even using a rack on top of a dry plate) and place in the refrigerator for at least four hours, uncovered. (Note: Do not wrap the meat in plastic wrap as the goal is to dry out the meat. Wrapping it in plastic wrap will cause moisture to form on the meat.)
- 7Preheat the oven to 400 degrees fahrenheit.
- 8Remove the marinated pork belly from the refrigerator.
- 9Using a skewer, sharp knife, or meat thermometer,...: Using a skewer, sharp knife, or meat thermometer, prick holes into the skin without going into the fat layer. If you go into the fat layer, it will cause the fat to release moisture onto the skin, which will cause your skin not to get the crackly, bubbly crispy texture this dish is known for.
- 10Choose a roasting pan that will fit the...: Choose a roasting pan that will fit the entirety of the pork belly. Create a rectangular aluminum foil box around the meat, tall enough to hold a layer of salt. Place the aluminum foil box on the roasting pan. Add the pork belly into the aluminum foil box.
- 11Dry the skin once more with a paper...: Dry the skin once more with a paper towel. Squeeze the lime juice all over the skin, rubbing it in.
- 12Cover the pork skin with a layer of...: Cover the pork skin with a layer of sea salt. This will allow heat and moisture to be trapped underneath the salt crust. It has the added benefit of reducing the pork odor that often permeates into the house with this dish.
- 13Put it in the oven. For three pound...: Put it in the oven. For three pound pork belly, generally it will roast for about an hour.
- 14After an hour, remove the pork tray from...: After an hour, remove the pork tray from oven. Scrape off the top layer of salt and throw it away along with the aluminum foil.
- 15Line the roasting tray with a new aluminum...: Line the roasting tray with a new aluminum foil to catch dripping fat in the next step.
- 16On the sam roasting pan, add a rack....: On the sam roasting pan, add a rack. Put the pork belly on top of the rack with the roasting tray.
- 17Put the try in the oven at the...: Put the try in the oven at the lowest rack. Switch the oven temperature and heat to broil for another 15 minutes.
- 18The skin should start crackling and evenly create...: The skin should start crackling and evenly create bubbles throughout the skin layer. If you see parts of skin burning or crisping faster than the other, you can add aluminum foil and continue to broil the pork belly until it is uniformly crispy.
- 19The meat is ready when the juices run...: The meat is ready when the juices run clear after poking it.
- 20Remove from oven and let cool for 15...: Remove from oven and let cool for 15 minutes.
- 21Scrape off any burnt parts of the skin.
- 22Cut into bite sized pieces, each with skin...: Cut into bite sized pieces, each with skin and meat.
- 23Serve with Vietnamese nuoc mam sauce.
About the Chef & Original Recipe
This recipe was published by Lane on cookingwithlane.com. Visit the original source for step-by-step photos, chef notes and additional details.
Source: cookingwithlane.com