
Vietnamese Banh Bao Dough from Scratch
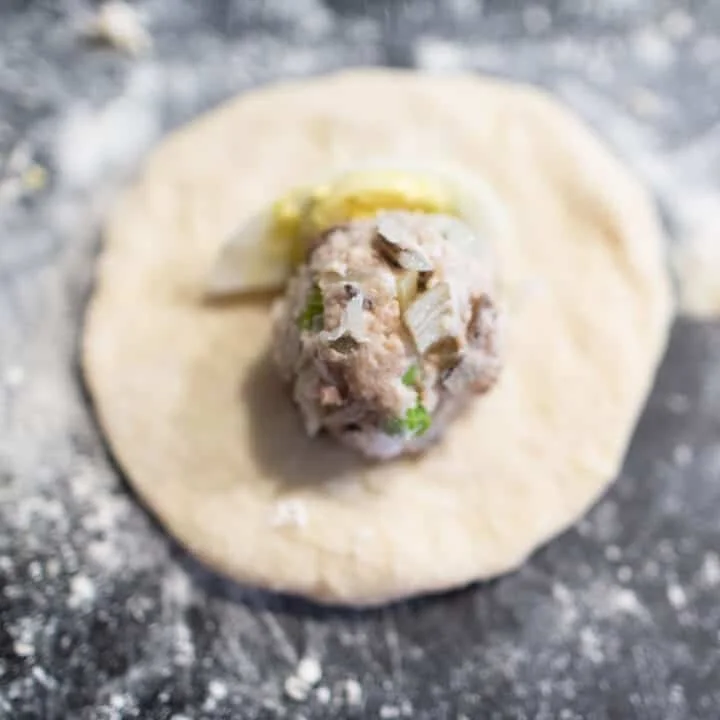
This Vietnamese banh bao dough is a soft, yeast-raised wrapper made from everyday baking ingredients rather than premixed flour. Make a batch to wrap around your chosen filling and steam into fluffy buns.
Ingredients
- 240 ml (1 cup)milk, warmed in the microwave
- 1 1/4active dry yeast
- 50 g (1/4 cup)sugar
- 1.5 g (1/4 teaspoon)salt
- 315 g (2 1/2 cups)flour
- 30 ml (2 tablespoons)vegetable oil
- 8 g (2 teaspoons)baking powder
- 1.25 ml (1/4 teaspoon)lime juice
Instructions
- 1
Warm the milk
Heat the milk in a microwave-safe bowl for 30 seconds. It should be warm, not hot, so it does not kill the yeast.
- 2
Wake the yeast
Stir the sugar into the warm milk until dissolved, then gently stir in the yeast. Leave it for 10 minutes, until it begins to foam.
- 3
Mix the dough
Put the sugar, salt, flour, vegetable oil and baking powder in a mixer. Knead with a dough hook, or by hand, until the dough is no longer sticky and pulls away cleanly.
- 4
Let it rise
Cover the bowl with a clean towel or plastic wrap and leave it in a warm place for at least 1 hour, until the dough has doubled in size.
- 5
Knead out bubbles
Take the dough out of the bowl, add the lime juice and knead to remove air bubbles.
- 6
Divide the dough
Shape the dough into a log and keep halving the portions until you have 12 pieces. Roll each into a ball, cover with a damp cloth and leave for 15 minutes before shaping.
- 7
Roll each wrapper
On a floured surface, roll one ball into a circle about 6 mm (1/4 inch) thick, making the edge thinner than the centre.
- 8
Add the filling
Add filling as needed.
- 9
Prepare the steamer
Bring the steamer to a rolling boil, then turn the heat to low. Arrange the buns about 2.5 cm (1 inch) apart.
- 10
Steam the buns
Steam buns with cooked filling for 6–8 minutes. If the filling is raw, steam for 13–16 minutes.
- 11
Cover the lid
Wrap the steamer lid in a kitchen towel to stop condensation dripping onto the buns.
What is banh bao dough?
Banh bao is a Vietnamese steamed bun, with a tender, risen dough wrapped around a savoury or sweet filling. The dish belongs to a wider family of steamed buns found across East and Southeast Asia, and Vietnamese versions are often enjoyed as a snack or light meal.
This from-scratch dough combines yeast for rise with baking powder for extra lift. It is a handy alternative when premixed banh bao flour is not available.
Nutrition and macros by portion
The nutrition label shows one serving as written: 143 calories, 4g protein, 25g carbs, 3g fat.
| Portion | Adjustment | kcal | Protein | Carbs | Fat |
|---|---|---|---|---|---|
| Lighter | Use a leaner filling | 100 kcal | 3g | 18g | 2g |
| This serving | As written | 143 kcal | 4g | 25g | 3g |
| Hungry | Serve extra buns | 215 kcal | 6g | 38g | 5g |
The flour and sugar provide most of the carbohydrates, while the vegetable oil contributes fat; milk and flour contribute some protein. Pair a bun with vegetables and a protein-rich filling or side to make a more balanced plate.
The key ingredients
Yeast: The warm milk and sugar give the yeast a chance to foam before it is mixed into the dough. The ingredient list gives the yeast quantity as 1 1/4 but does not specify a unit, so check the source recipe if you need to confirm it.
Flour and raising agents: Flour forms the wrapper, while yeast and baking powder both contribute to its rise. Vegetable oil helps bring the dough together.
Lime juice: This is kneaded in after the first rise, as directed in the method.
Mixing a soft dough
Knead until the dough is no longer sticky and pulls cleanly away, rather than adding extra flour at the first sign of tackiness. A stand mixer with a dough hook can do the work, but the method also allows for kneading by hand.
The method lists sugar both in the milk and again with the dry ingredients. Follow the written instructions, dividing the listed sugar between those stages.
Allow time to rise
The dough needs at least 1 hour in a warm place to double, followed by another 15-minute rest once divided into balls. These rests matter for the dough's texture, so use the rise cues rather than relying only on the stated 55-minute total time.
A covered bowl helps prevent the surface drying out. Keep the dough in a comfortably warm spot, not somewhere hot.
Shape the wrappers
Roll each ball into a circle around 6 mm thick, leaving the centre thicker than the perimeter. The thicker middle supports the filling, while the thinner edge is easier to gather and seal.
Use a lightly floured surface so the dough releases without building excess flour into the wrapper. Add the filling as needed; the recipe does not specify a filling or an amount.
Steam gently
Bring the steamer to a rolling boil before turning the heat down to low and arranging the buns with about 2.5 cm of space between them. This spacing gives the buns room while they cook.
The steaming time depends on the filling: use 6–8 minutes for cooked filling or 13–16 minutes for raw filling. The recipe calls for a towel around the lid to catch condensation and prevent drips onto the buns.
Serving ideas
Serve the steamed buns warm, either as a snack or alongside a simple soup or vegetable dish. Since this recipe provides the dough but leaves the filling open, choose a filling that suits the meal you are planning.
For a batch with different fillings, keep track of which buns contain raw filling so you can use the longer steaming time for those.
Recipe notes & tips
- Check that the milk is warm rather than hot before adding the yeast.
- Wait for the yeast mixture to foam before moving on.
- Cover the dough during both rests so its surface does not dry out.
- Keep the centre of each wrapper thicker than its edge.
- Leave about 2.5 cm between buns in the steamer.
- Use the longer steaming time when the filling is raw.
Variations
- Savoury filling: Use your preferred savoury filling, adding it in the amount needed for each wrapper.
- Sweet filling: Try a sweet filling for a snack-style bun.
- Mixed batch: Make different fillings in one batch and keep track of which need the longer steaming time.
- Hand-kneaded dough: Knead by hand instead of using a stand mixer.
- Flour dusting: Lightly flour the work surface to help shape the wrappers without sticking.
Common mistakes to avoid
- Milk too hot: Let it cool until warm before adding the yeast so it does not kill it.
- Skipping the foam check: Give the yeast mixture its full 10 minutes to start foaming.
- Adding flour too quickly: Knead until the dough pulls cleanly before deciding it needs more.
- Wrappers evenly thin: Leave the centre thicker than the perimeter to support the filling.
- Buns too close: Space them about 2.5 cm apart in the steamer.
- Condensation on buns: Wrap the steamer lid in a kitchen towel to catch drips.
How to store
The recipe does not give storage instructions. For best texture, serve the buns freshly steamed; refrigerate leftovers in a covered container and reheat in a steamer until hot.
Frequently asked questions
Can I knead the dough by hand?
Yes. The method allows either a stand mixer with a kneading attachment or manual kneading. Work it until it is no longer sticky and pulls cleanly.
How long should the dough rise?
Leave it covered in a warm place for at least 1 hour, until it has doubled in size. The recipe also gives the divided dough balls a 15-minute rest.
Why is the dough quantity for yeast unclear?
The ingredient list says 1 1/4 active dry yeast but does not give a unit. Check the original recipe for the intended measurement before making the dough.
How thick should I roll the wrappers?
Roll each piece to about 6 mm (1/4 inch), keeping the centre thicker than the edge.
How long do I steam the buns?
Steam buns with cooked filling for 6–8 minutes. For buns with raw filling, the method gives 13–16 minutes.
Can I use any filling?
The method says to add filling as needed but does not specify a particular filling. Choose one suitable for steaming and adjust the cooking time according to whether it is raw or cooked.
Cook it from the original
This recipe comes from cookingwithlane.com. Their page has the author’s own photos, notes and tips — the best place to cook it from.
Open the recipe on cookingwithlane.com