
Coconut banana bread
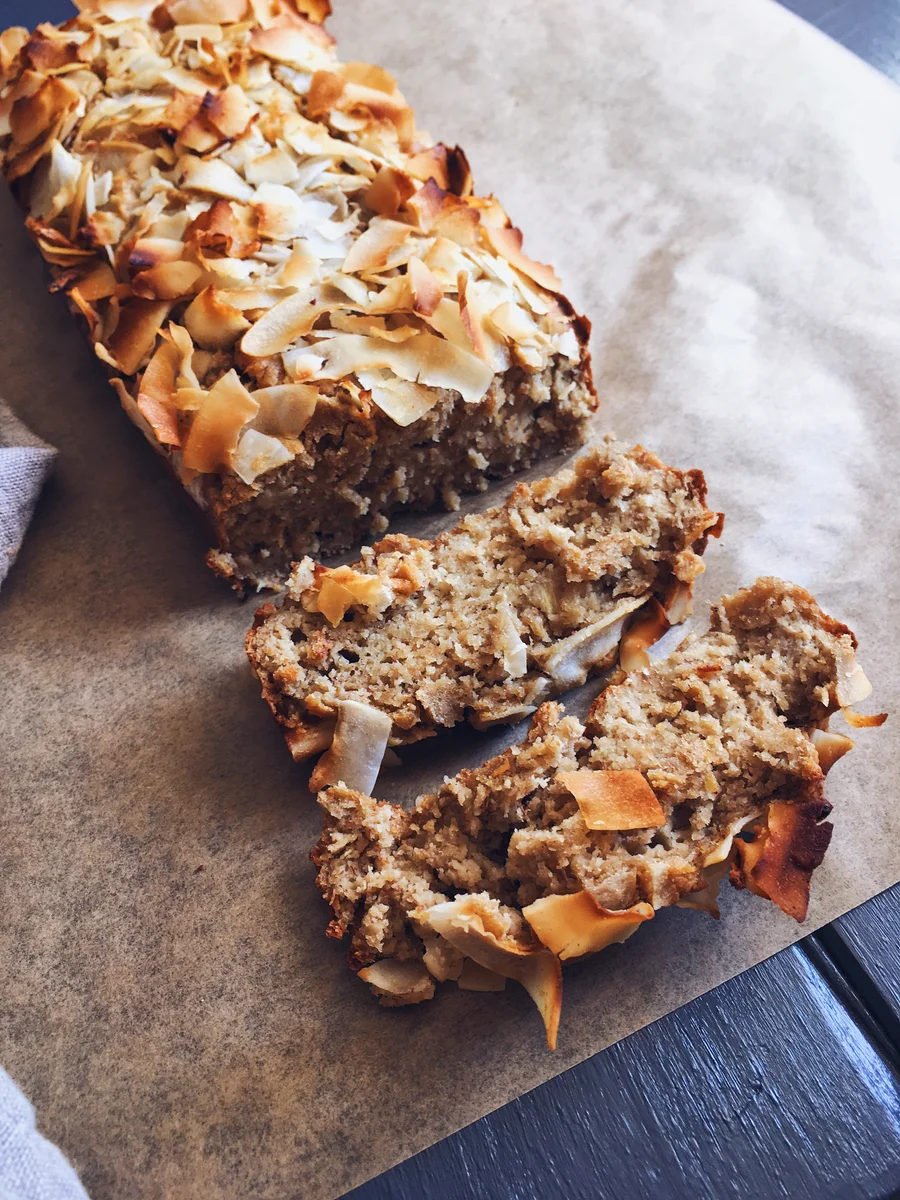
This coconut banana bread is a compact, tender loaf made with ripe bananas, coconut peanut butter and coconut flour. It is an easy way to use very ripe fruit, with coconut chips adding a crisp topping.
Ingredients
- 3medium ripe bananas
- 165 gcoconut peanut butter
- 3eggs
- 15 ml (1 tablespoon)maple syrup
- 55 gcoconut flour
- 5 ml (1 teaspoon)bicarbonate of soda
- 5 ml (1 teaspoon)ground cinnamon
- 30 gcoconut chips
Instructions
- 1
Prepare the tin
Heat the oven to 180°C and line a loaf tin with baking paper.
- 2
Mash the bananas
Slice the bananas into a bowl and mash with a fork until fairly smooth. Add the other wet ingredients and mix well with the fork.
- 3
Mix the batter
Add the dry ingredients and stir until the batter is evenly combined.
- 4
Fill the tin
Pour the mixture into the loaf tin and scatter the coconut chips over the top. Cover with baking paper to help stop the coconut chips and banana from burning.
- 5
Bake the loaf
Bake for about 40–45 minutes, or until the banana bread is golden and firm.
- 6
Cool and serve
Take the loaf out of the oven and leave it to cool for 5–10 minutes before serving.
What is coconut banana bread?
Banana bread is a loaf-style bake made with mashed bananas, popular in home kitchens in many countries. This version uses coconut peanut butter and coconut flour in place of more typical wheat flour and butter, giving it a pronounced coconut flavour.
Ripe bananas bring sweetness and moisture, while eggs help bind the batter. Coconut chips on top add a contrast to the soft loaf.
Nutrition and macros by portion
The nutrition label shows one serving as written: 165 calories, 7g protein, 14g carbs, 11g fat.
| Portion | Adjustment | kcal | Protein | Carbs | Fat |
|---|---|---|---|---|---|
| Lighter | Smaller slice, fruit alongside | 115 kcal | 5g | 10g | 7g |
| This serving | As written | 165 kcal | 7g | 14g | 11g |
| Hungry | Larger slice with yoghurt | 248 kcal | 10g | 21g | 16g |
Most of the carbohydrates come from the bananas, coconut flour and maple syrup; the coconut peanut butter and coconut chips contribute much of the fat, while the eggs and nut butter provide protein. Pair a slice with plain yoghurt or fruit to make it a more balanced plate.
Choosing the ingredients
Ripe bananas: use fruit with plenty of brown speckles, which mashes easily and tastes sweeter than firm, underripe bananas.
Coconut peanut butter: stir it before measuring if the oils have separated, so the mixture is easier to combine evenly.
Coconut flour: measure it carefully, as it absorbs liquid readily and can make the loaf dense if overused.
Getting an even batter
Mash the banana thoroughly before adding the wet ingredients; a few small lumps are fine, but large pieces can leave wet pockets in the loaf.
Once the coconut flour and bicarbonate of soda go in, stir just until there are no obvious dry patches. Scrape the bottom and sides of the bowl to catch any flour that has settled there.
Checking when it is baked
Look for a golden top and a loaf that feels firm when gently pressed. The recipe gives a 40–45 minute baking window, but ovens and loaf tins can vary.
The paper cover helps protect the coconut topping and exposed banana from browning too quickly. Keep it in place during baking as directed.
Cooling and slicing
Leave the loaf in the tin for 5–10 minutes after baking, as directed, so it can settle before serving. For neater slices, allow it to cool further before cutting.
Use a sharp knife and wipe it between cuts if the soft crumb begins to cling.
What to serve with it
Serve a slice plain with tea or coffee, or add yoghurt and fresh fruit for a more substantial breakfast or snack.
The loaf is already sweetened with banana and a little maple syrup, so toppings such as nut butter or jam are optional rather than essential.
Recipe notes & tips
- Use well-ripened bananas so they mash smoothly into the batter.
- Line the tin with baking paper to make it easier to lift out the loaf.
- Measure the coconut flour accurately rather than packing it into the measuring container.
- Cover the topping with baking paper as directed to help prevent the coconut chips from burning.
- Let the loaf cool longer than the minimum if you want cleaner slices.
Variations
- Add chopped nuts: fold a small handful into the batter for extra crunch.
- Use extra cinnamon: increase the spice slightly for a warmer flavour.
- Add dark chocolate: stir chocolate chips through the batter for a sweeter loaf.
- Top with seeds: scatter a few seeds over the coconut chips before baking.
- Serve with berries: add fresh berries alongside a slice for a fruitier plate.
Common mistakes to avoid
- Using underripe bananas: they are firmer and less sweet, so choose bananas that are well speckled.
- Leaving banana chunks too large: mash them more thoroughly to avoid uneven pockets in the loaf.
- Adding too much coconut flour: weigh the 55 g carefully, since extra flour can make the crumb dry.
- Skipping the paper cover: keep baking paper over the topping to help stop the coconut chips and banana from burning.
- Slicing too soon: cool the loaf for at least 5–10 minutes, and longer for neater slices.
How to store
Once completely cool, store the loaf in an airtight container in the fridge for up to 4 days. Reheat a slice briefly in the microwave or warm it in a low oven until heated through.
Frequently asked questions
How ripe should the bananas be?
Use ripe bananas with brown speckles that mash easily. Avoid fruit that is still firm and green.
Can I use a different nut butter?
The recipe is designed around coconut peanut butter, so another nut butter will change the flavour and may alter the texture. Choose a smooth one and mix it well before measuring.
How can I tell when the loaf is done?
It should look golden and feel firm, usually after about 40–45 minutes. If it still feels soft in the centre, continue baking and check again.
Why cover the loaf with baking paper?
The paper helps protect the coconut chips and exposed banana from burning as the loaf bakes.
Can I make this ahead?
Yes. Bake it ahead and let it cool fully before storing it in an airtight container in the fridge.
Cook it from the original
This recipe comes from clemfoodie.com. Their page has the author’s own photos, notes and tips — the best place to cook it from.
Open the recipe on clemfoodie.com