
Homemade Pita Bread
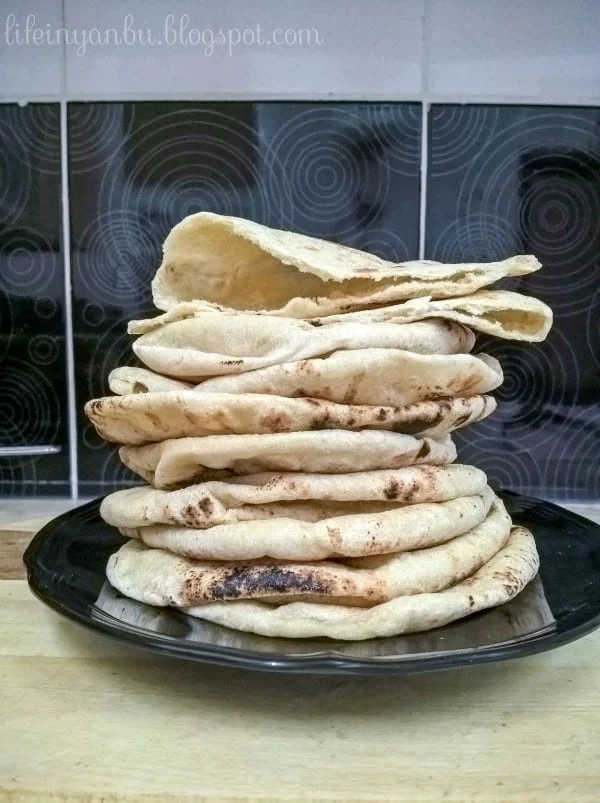
These soft, pocketed pita breads are made with wholemeal and plain flour, then cooked on a hob rather than in an oven. They take time to rise but use simple pantry ingredients and are ready to serve warm.
Ingredients
- 180 g (1½ cups)wholemeal flour
- 60 g (½ cup)plain flour
- 1 teaspoonsugar (optional)
- 1 teaspooninstant yeast
- 1 teaspoon, or to tastesalt
- 240 ml (1 cup), approximatelylukewarm water
- as neededplain flour, for dusting while kneading and rolling
- as neededolive oil, to coat the bowl and dough
Instructions
- 1
Mix the dough
In a wide bowl, thoroughly combine the flours, yeast and salt. Add the lukewarm water gradually until the mixture comes together, then cover and leave it for 10 minutes.
- 2
Knead until smooth
Knead the dough for 8–10 minutes, until smooth, soft and not too sticky.
- 3
Coat the dough
Oil the base and sides of a large bowl, allowing space for the dough to double. Put the dough in the bowl and turn it to coat with oil.
- 4
Leave to rise
Cover the bowl with cling film or a plate and leave the dough undisturbed in a draught-free spot for 2–3 hours, or until doubled in size.
- 5
Shape the portions
Gently deflate the risen dough. Lightly flour the work surface and divide the dough into 10–12 equal balls. Set them apart on a floured tray, cover with a damp tea towel and rest for 10–20 minutes.
- 6
Roll the pitas
Roll each ball from the centre out into a circle 8–10 cm (3–4 inches) across and about 6 mm (¼ inch) thick. Avoid turning the dough over; dust sparingly underneath or on top if it sticks. Place the rounds on baking paper and cover with a towel. Keep a pan warming over a low flame as you roll, and let each round rest for at least 5 minutes before cooking.
- 7
Cook on the pan
Set a rolled pita on a hot skillet over a medium flame and cook for about 20 seconds, until bubbles begin to appear. Turn it with metal tongs and cook for a few seconds, then turn it again.
- 8
Puff and finish
Using the tongs, lift the pita from the tawa and hold it over the direct flame, with the side that was on the pan facing the flame. When it puffs, usually within 3–4 seconds, turn it and roast the other side. Turn it a couple more times to cook any remaining areas, then remove it from the flame. Repeat with the remaining dough, keeping the cooked pitas in a bread basket and serving immediately.
What is pita bread?
Pita is a round flatbread associated with cuisines across the Middle East and Mediterranean. When its centre separates as it cooks, it forms a pocket that can be filled or used to hold dips.
This version combines wholemeal flour with plain flour and cooks on the hob, so an oven is not needed. The final direct-flame step helps the rounds puff and form their characteristic pockets.
Nutrition and macros by portion
The nutrition label shows one serving as written: 228 calories, 6g protein, 48g carbs, 2g fat.
| Portion | Adjustment | kcal | Protein | Carbs | Fat |
|---|---|---|---|---|---|
| Lighter | Smaller pita, more salad | 160 kcal | 4g | 34g | 2g |
| This serving | As written | 228 kcal | 6g | 48g | 2g |
| Hungry | Serve two pitas | 342 kcal | 9g | 72g | 4g |
Most of the carbohydrates come from the wholemeal and plain flours, which also provide some protein; the olive oil contributes most of the fat. Balance a pita with a protein-rich filling and vegetables or salad.
Flour and dough
Wholemeal flour: it brings a fuller, slightly nutty flavour, while plain flour keeps the dough workable. Add the water gradually because the amount needed can vary slightly with the flour.
Soft dough: knead until smooth and soft, but not so sticky that it is difficult to handle. Use only a light dusting of flour while kneading and rolling.
Give the dough time
First rise: an oiled bowl keeps the dough from sticking as it expands. Choose a bowl with room for it to double and cover it while it rests in a draught-free place.
Second rest: after dividing the dough, keep the balls covered for 10–20 minutes. Once rolled, each round also needs at least 5 minutes to rest before it goes on the pan.
Roll evenly
Round shape: roll from the centre out to make circles about 8–10 cm across and 6 mm thick. Keeping the thickness even helps the pita cook consistently.
Gentle handling: avoid flipping the dough while rolling, as directed in the method. Dust sparingly if it sticks so excess flour does not collect on the surface.
Cook for a pocket
Pan stage: begin on a hot skillet over a medium flame and look for bubbles after about 20 seconds. Turn the pita when they start to form.
Direct flame: transfer the pita carefully with metal tongs and turn it as it puffs, usually after 3–4 seconds. This step needs close attention; keep hands away from the flame and use a hob suitable for cooking directly over it.
Serve them warm
Pitas are best served immediately while warm and soft. Use them as pocket breads for fillings, or tear them into pieces for scooping up dips and saucy dishes.
For a simple meal, pair a pita with a protein-rich filling and salad or vegetables. Keep the breads covered in a basket while serving so they do not cool too quickly.
Recipe notes & tips
- Use lukewarm rather than hot water so it is comfortable to touch.
- Choose a bowl large enough to hold dough that has doubled in size.
- Keep the dough balls and rolled rounds covered so their surfaces do not dry out.
- Dust the work surface lightly rather than adding lots of flour to sticky dough.
- Have the skillet ready before you finish rolling, but watch the pitas closely as they cook.
- Use metal tongs to handle the bread over the direct flame.
Variations
- Skip the sugar: leave it out for a version without optional added sugar.
- More wholemeal: replace some plain flour with wholemeal flour, adding water gradually as needed.
- Smaller rounds: divide the dough into more portions and roll them evenly.
- Serve as pockets: fill the warm breads with your preferred savoury ingredients.
- Serve with dips: cut or tear the breads into pieces for dipping.
Common mistakes to avoid
- Adding water all at once: pour it in gradually so the dough is easier to bring together.
- Using too much dusting flour: apply a light coating to avoid floury patches on the cooked bread.
- Skipping the rests: keep the dough covered for the stated rise and resting times.
- Rolling unevenly: aim for an even thickness so the pita cooks at a similar rate throughout.
- Leaving the bread unattended: watch it closely, especially over the direct flame, where it puffs in seconds.
- Handling over the flame by hand: lift and turn the pita with metal tongs.
How to store
The recipe recommends serving the pitas immediately. If you have leftovers, cool them and store in an airtight container; reheat briefly in a dry pan until warm. The source recipe does not specify a storage duration.
Frequently asked questions
How many pitas does this recipe make?
The method divides the dough into 10–12 balls, while the recipe lists 12 servings. The exact number depends on how you portion the dough.
Can I leave out the sugar?
Yes. The sugar is marked as optional in the ingredient list.
Why did my pitas not puff?
Check that the dough had time to rise and rest, and that the skillet was hot. Roll each round evenly and follow the quick pan-and-flame cooking sequence closely.
Can I make these without a gas hob?
The method finishes the pitas over a direct flame, so it is designed for a hob that supports this. If yours does not, the recipe does not provide an alternative cooking method.
Can I prepare the dough ahead?
The recipe gives a room-temperature rise of 2–3 hours but does not specify an overnight or chilled method. For the intended result, follow the stated rise and resting times.
Why should I cover the dough?
Covering it during the rests helps keep the surface from drying. Use a damp tea towel for the shaped balls and rolled rounds.
Cook it from the original
This recipe comes from butfirstchai.com. Their page has the author’s own photos, notes and tips — the best place to cook it from.
Open the recipe on butfirstchai.com