
Hyderabadi Kacchi Chicken Biryani
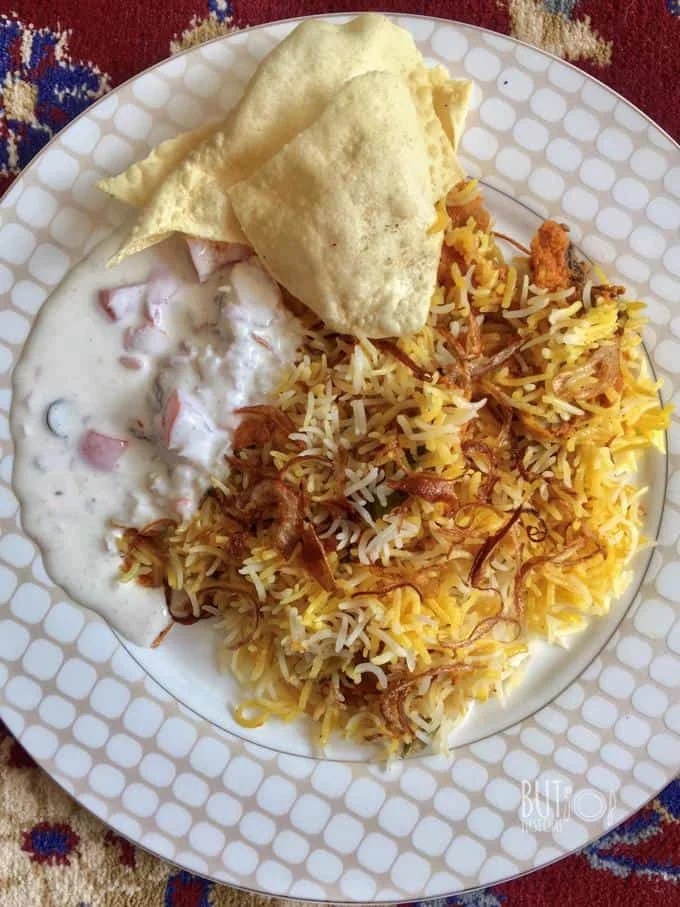
The marinated chicken in the bottom, topped with half-cooked rice, fried onions, mint leaves and sealed to slow-cook in an oven is Hyd Kacchi Biryani.
Ingredients
- 2 to 3 large red onions (sliced finely and strands separated)
- Oil to deep fry
- 700 grams chicken bone-in pieces
- Salt to taste
- 2 teaspoons caraway seeds (shah jeera)
- a small piece of mace (crushed)
- 4 green cardamom
- 1 1/2 inch cinnamon stick
- 5 cloves
- 1 1/2 teaspoon turmeric powder
- 1 tablespoon red chilli powder
- 1 tablespoon ginger garlic paste
- 2 to 3 green chillies (slit)
- 1/2 cup thick yoghurt (whisked)
- Fistful fresh mint leaves
- 3/4 cup fried onions
- 1/4 cup cooking oil (from the fried onion, preferably)
- 1 1/2 cups basmati rice (washed and soaked for 30 minutes and drained )
- 6 cups water
- 2 green cardamom
- 2 cloves
- 2 green chillies (slit)
- 1 1/2 tablespoon salt
- 1 pinch saffron strands (soaked in 2 tablespoons of hot water)
- Fistful fresh mint leaves
- 1/4 cup fried onions
- 1/4 cup water (reserved after parboiling the rice)
Instructions
- 1
--- Prepare the crispy fried onions ---
- 2
Prepare the crispy fried onions: Heat enough cooking oil in a kadai or deep pan.
- 3
Prepare the crispy fried onions: Separate the strands of the sliced onions with your hands. Test the oil by dropping one small onion strand, if it sizzles up immediately, then you can start frying in batches.
- 4
Prepare the crispy fried onions: Drop a handful of onion strands into the hot oil ensuring to spread out and do not overlap. Keep the flame low to medium all time, stir in between to fry evenly and fry till you see the onions changing shades. Takes about 3 to 4 minutes.
- 5
Prepare the crispy fried onions: Remove the onions with a slotted spoon on time before they get burnt. The onions will continue to cook even when you take them out, so remove them when you see the golden light brown shade. Continue to fry in batches.
- 6
Prepare the crispy fried onions: Spread the fried onions on a paper towel to drain the excess oil (It will become crispy as it cools). Let cool before storing in an airtight box in the freezer.
- 7
--- Marinate the Chicken ---
- 8
Marinate the Chicken: Add the washed chicken and salt into a bowl and mix thoroughly. Add the rest of the marinade items and mix thoroughly with your hand preferably.
- 9
Marinate the Chicken: Cover and refrigerate overnight or for at least 6 hours. Take it out 30 minutes before you start the rice prep.
- 10
--- Par-boil the Rice ---
- 11
Par-boil the Rice: Boil the water in a deep large pot with salt, green chillies, cardamoms and cloves.
- 12
Par-boil the Rice: Stir in the drained rice and bring this to a full boil on high flame.
- 13
Par-boil the Rice: Reduce to medium flame and boil for just about 90 seconds to 2 minutes (50% cooked).
- 14
Par-boil the Rice: Switch off and drain the rice in a colander immediately.
- 15
Par-boil the Rice: Reserve 1/4 cup of water for later.
- 16
--- Prepare Biryani Pot ---
- 17
Prepare Biryani Pot: If making in oven, then preheat the oven at 170°C with rack in level 2.
- 18
Prepare Biryani Pot: Spread the marinated chicken in a single layer on the bottom of the biryani pot.
- 19
Prepare Biryani Pot: Spread the drained rice evenly and pour the reserved water all around.
- 20
Prepare Biryani Pot: Add the fried onions, mint leaves and saffron water (you may squeeze some lemon juice or rose water and a few dollops of ghee for extra flavour).
- 21
Prepare Biryani Pot: Cover and seal the pot with foil and then with the lid.
- 22
Prepare Biryani Pot: If making on a stove-top, place a heat diffuser (or any flat pan) on medium flame and keep the biryani pot over the diffuser. This will ensure even heat distribution and prevent the burning of food.
- 23
Prepare Biryani Pot: Dum cook for 45 minutes to 1 hour. For the oven, keep it up for 1 hour.
- 24
--- Serve ---
- 25
Serve: Open and remove the foil - let it cool for 5 minutes before you stir the rice. Serve hot with cold salads, kachumber raita, papadams etc. or traditionally served with Mirch ka salan.
Cook it from the original
This recipe comes from butfirstchai.com. Their page has the author’s own photos, notes and tips — the best place to cook it from.
Open the recipe on butfirstchai.com