
Croissant Recipe
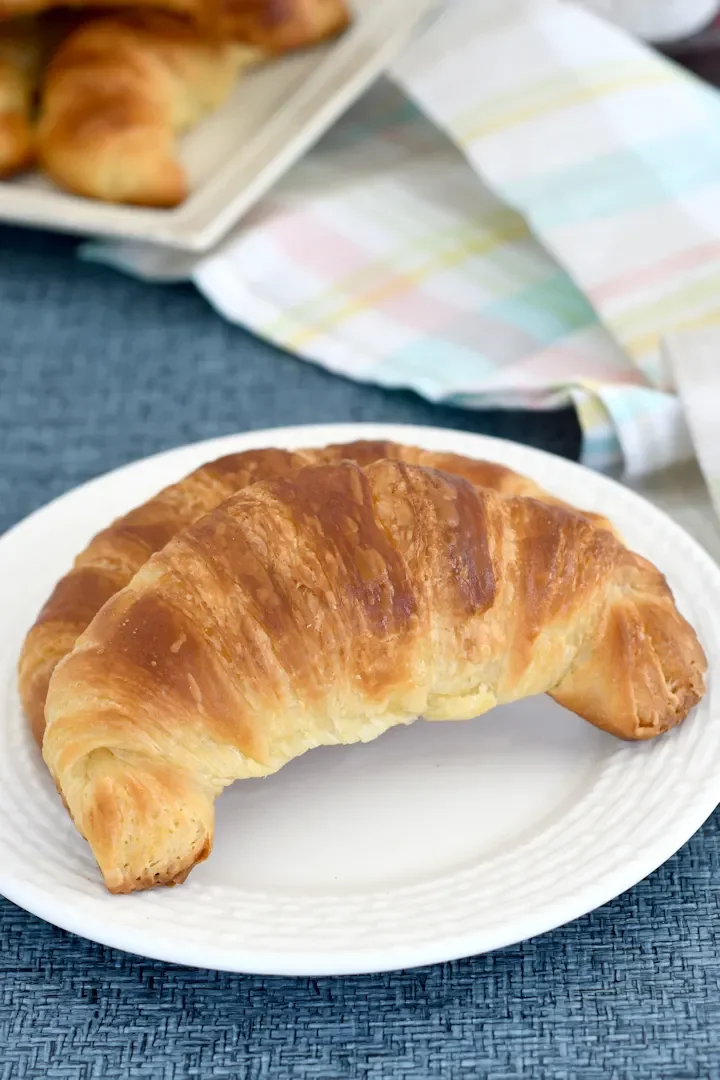
These French-style croissants have crisp, flaky layers and a buttery centre, made by folding butter into a yeasted dough. Shape them the night before, then proof and bake in the morning for warm breakfast pastries.
Ingredients
- 180 ml (6 oz; ¾ cup)warm water
- 240 ml (8 oz; 1 cup)whole milk, scalded and cooled to 43°C (110°F)
- 2¼ teaspoons (1 packet)dried yeast
- 567 g (20 oz; 4 cups)unbleached plain flour
- 85 g (3 oz; ⅓ cup)granulated sugar
- 2 teaspoonstable salt
- 454 g (16 oz)unsalted butter, pliable but still cool
- 1egg, for the egg wash
Instructions
- 1
Mix the starter
Using a stand mixer fitted with the paddle attachment, combine the warm water, milk, yeast and 283 g (10 oz; 2 cups) of the flour to make a thick batter. If mixing by hand, use a wooden spoon. Cover the bowl and leave the mixture to rest for 30–60 minutes.
- 2
Make the dough
Fit the mixer with a dough hook and add the sugar, salt and remaining flour. Mix until the dough gathers around the hook and pulls away from the bowl. By hand, stir in as much flour as possible with a wooden spoon, then knead in the rest. Knead for 5 minutes, until the dough is supple and silky.
- 3
Rise the dough
Transfer the dough to a lightly oiled bowl and turn it once to coat. Cover and leave at room temperature for 1–1½ hours, or until doubled in size.
- 4
Shape the butter
Draw a 20 cm (8-inch) square in the centre of a piece of baking parchment, then turn the paper over. Put the butter in the square, fold the parchment over it and flatten the butter with a rolling pin or another heavy object until it fills the square. Lift the paper if it sticks; trim and reposition the butter as needed. Fold the parchment around the butter and refrigerate it. Take it out 30 minutes before the dough is ready, or 10 minutes ahead if the kitchen is very warm. It should be cool and firm but still slightly flexible.
- 5
Prepare the dough
Turn the dough onto a lightly floured surface without kneading out the air. Roll it into a 25 cm (10-inch) square. Roll each of the four sides outwards to make a 7.5 cm (3-inch) flap, leaving the centre thicker, so the dough has four flaps at its corners.
- 6
Enclose the butter
Unwrap the butter and place it in the centre of the dough. Fold the flaps over it, overlapping them and pinching the corners to seal the seams. You should have an 20 cm (8-inch) square with the butter enclosed. Press gently with the rolling pin to flatten, then roll into a 20 × 61 cm (8 × 24-inch) rectangle, working gently and evenly to keep the butter in one layer.
- 7
Make the first turn
Position the rectangle with its long side facing you and brush away excess flour. Brush the dough all over with cold water. Fold the right third towards the middle, then fold the left third over it, like a letter. This is the first turn.
- 8
Make the second turn
Position the dough with the closed edge at the top and the open edge facing you. Roll it again into a 20 × 61 cm (8 × 24-inch) rectangle, brush away excess flour, moisten the surface with cold water and fold it like a letter. Put it on a baking tray, cover with plastic wrap and refrigerate for at least 30 minutes.
- 9
Make the third turn
Take the dough out of the fridge and repeat a turn exactly as before. Wrap the dough and refrigerate for at least 2 hours.
- 10
Roll the dough
Line two baking sheets with baking parchment or silicone baking mats. Roll the chilled dough into a 61 × 41 cm (24 × 16-inch) rectangle. With the long side facing you, fold the top half down over the bottom half to make a 61 × 20 cm (24 × 8-inch) rectangle.
- 11
Make the first cut
Starting at the left, measure 5 cm (2 inches) along the top edge and mark it. Use a pizza cutter or sharp knife to cut diagonally from that mark to the bottom-left edge. Keep the piece you cut off.
- 12
Cut the triangles
From left to right, mark 10 cm (4-inch) intervals along both the top and bottom edges, with each top mark between two bottom marks. Starting at the top-left, cut diagonally to the next mark on the bottom edge to make a triangle, then cut from the bottom to the next top mark. Continue alternating to cut 11 triangles and one half-triangle at the end. Keep the half-triangle piece.
- 13
Join the ends
Unfold the triangles and cut each in half along the fold to make 22 triangles. Unfold the half-triangle pieces saved from either end and pinch them together to make two more triangles.
- 14
Shape the croissants
Hold a triangle by its wide base and gently stretch it a little wider. Place it on the work surface with the point towards you. Roll from the base towards the point, holding the tip and gently tugging as you go. Bend both ends towards the middle to form a crescent.
- 15
Chill overnight
Arrange the croissants on the prepared baking sheets, 7.5 cm (3 inches) apart, with about 12 on each half-sheet pan. Cover with plastic wrap and refrigerate overnight.
- 16
Proof and bake
In the morning, take the croissants out of the fridge and leave them at room temperature for 1–2 hours. Proofing time depends on the warmth of the kitchen; the croissants should be at least 50% larger and feel airy and puffy. Heat the oven to 200°C (400°F). Brush the croissants with egg wash and bake for 15–20 minutes, until golden brown. Serve warm or at room temperature.
What are croissants?
Croissants are crescent-shaped French pastries made from yeasted dough layered with butter. Their flaky texture comes from repeatedly folding and rolling the dough, rather than mixing the butter into it.
This version uses an overnight chill after shaping, so the pastries can be proofed and baked in the morning. The measured butter square and three turns help create distinct layers.
Nutrition and macros by portion
The nutrition label shows one serving as written: 230 calories, 3g protein, 19g carbs, 16g fat.
| Portion | Adjustment | kcal | Protein | Carbs | Fat |
|---|---|---|---|---|---|
| Lighter | Smaller croissant | 161 kcal | 2g | 13g | 11g |
| This serving | As written | 230 kcal | 3g | 19g | 16g |
| Hungry | Two croissants | 345 kcal | 4g | 29g | 24g |
Most of the carbohydrate comes from the flour and sugar, while the butter supplies most of the fat. The egg wash adds a little protein, and the recipe also gets protein from the milk and flour. Pair a croissant with fruit or yoghurt for a more balanced breakfast plate.
Build a supple dough
Starter: the initial flour, milk, water and yeast mixture rests for 30–60 minutes before the rest of the flour is added. This gives the dough a head start before kneading.
Kneading: work the dough for 5 minutes, until silky and supple. A stand mixer is convenient, but the recipe can also be mixed and kneaded by hand.
Get the butter ready
Butter block: flatten the butter into an even 20 cm square, keeping its thickness consistent. It should be firm and cool yet flexible enough to roll without cracking.
Temperature: let chilled butter sit out briefly before enclosing it in the dough. If it is too hard it can break into pieces; if too soft it may smear into the dough.
Keep the layers intact
Enclosing: fold the dough flaps over the butter and pinch the seams closed before rolling. This helps keep the butter contained as you shape the rectangle.
Turns: roll evenly and brush off excess flour before folding the dough into thirds. Chilling between turns firms the butter, making the layers easier to handle.
Cut and shape evenly
Triangles: alternate the diagonal cuts between marks on the top and bottom edges to create long triangles. Save the end pieces, then join them as directed to make the final two.
Rolling: stretch each base gently and roll towards the point, keeping a light hold on the tip. Avoid pulling hard, which can tear the dough or squash its layers.
Judge the proof
Morning rise: allow 1–2 hours at room temperature, as the recipe specifies. The croissants are ready for the oven when they look noticeably expanded—at least 50% larger—and feel airy and puffy.
Bake: use the stated cue as well as the 15–20-minute range: the croissants should be golden brown. Let them cool slightly if you prefer, or serve warm.
Serve them simply
These croissants are rich enough to enjoy on their own, warm from the oven or at room temperature. For breakfast, pair one with fruit or yoghurt for a contrasting, fresh accompaniment.
The overnight refrigeration makes this a useful make-ahead bake, but allow time in the morning for proofing before baking.
Recipe notes & tips
- Let the scalded milk cool to 43°C (110°F) before combining it with the yeast.
- Keep the butter cool and pliable when layering it into the dough.
- Roll gently and evenly so the butter stays in a single layer.
- Brush away loose flour before wetting and folding the dough.
- Use the puffy appearance and airy feel, not just the clock, to judge the final proof.
- Leave space between croissants on the baking sheets so they have room to expand.
Variations
- Chocolate filling: place a small piece of chocolate near the wide base before rolling.
- Almond finish: top cooled croissants with sliced almonds and a light icing.
- Savoury filling: add a little cheese near the base before rolling, keeping the filling modest.
- Seeded topping: sprinkle sesame or poppy seeds over the egg wash before baking.
- Plain finish: leave off fillings and toppings to enjoy the buttery layers on their own.
Common mistakes to avoid
- Milk too hot: cool it to 43°C (110°F) before mixing so the liquid matches the recipe.
- Butter too hard: let it sit out briefly until cool but flexible before layering.
- Butter too soft: chill it until firm enough to roll without smearing into the dough.
- Rough rolling: use gentle, even pressure to avoid breaking the butter into the dough.
- Underproofing: wait until the croissants are at least 50% larger and feel airy and puffy.
- Crowded trays: space croissants 7.5 cm (3 inches) apart so they can expand.
How to store
Cool baked croissants completely and store them in an airtight container at room temperature for up to 2 days. Warm them briefly in an oven to refresh the crisp exterior. For longer storage, freeze them in a sealed container and thaw before reheating.
Frequently asked questions
Can I prepare these croissants the night before?
Yes. After shaping, cover the croissants on their baking sheets and refrigerate them overnight. In the morning, proof them at room temperature for 1–2 hours before baking.
How do I know when the croissants have proofed enough?
They should be at least 50% larger than when shaped and feel airy and puffy. The time varies with the temperature of your kitchen.
Can I make the dough without a stand mixer?
Yes. Mix with a wooden spoon, then knead the remaining flour in by hand. The recipe also allows you to knead the dough by hand for 5 minutes.
Why does the butter need to be pliable but cool?
It needs to roll into a flat layer without cracking, but it should stay firm enough not to smear into the dough. Let it sit out briefly after chilling until it reaches that texture.
Can I bake the croissants without chilling them overnight?
The method calls for refrigerating the shaped croissants overnight. Follow that schedule, then proof them at room temperature in the morning before baking.
How should I reheat leftover croissants?
Warm them briefly in the oven to refresh their crisp exterior. If frozen, thaw them first.
Cook it from the original
This recipe comes from baking-sense.com. Their page has the author’s own photos, notes and tips — the best place to cook it from.
Open the recipe on baking-sense.com