
Homemade Pitch, chocolate Viennese bread
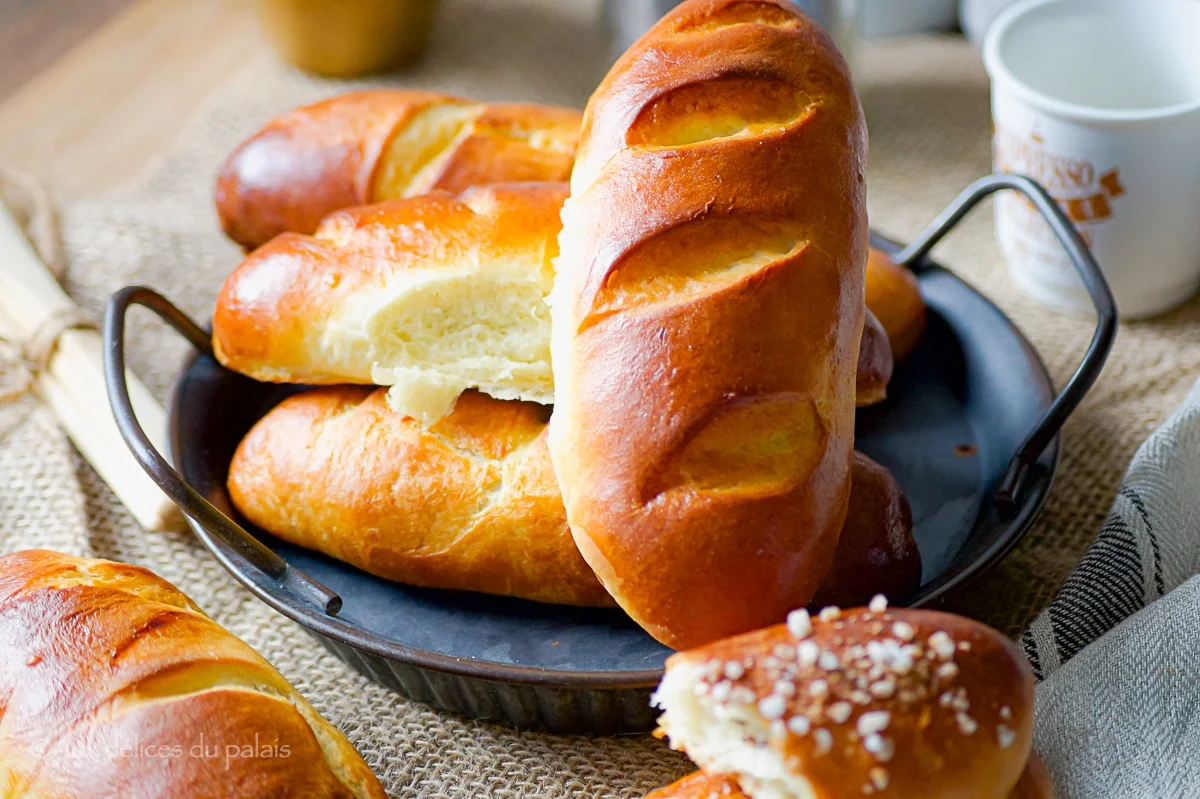
These homemade chocolate Viennese rolls pair a soft, brioche-like milk dough with chocolate tucked inside. They make a comforting breakfast or snack, with a glossy egg-washed crust and a fluffy crumb.
Ingredients
- 240 mlwhole milk
- 25 gfresh baker’s yeast
- 500 gT45 gruau flour (or a mixture of T45 and T55 flour)
- 80 gcaster sugar
- 100 gbutter
- 1egg
- 8 gsalt
- to tastechocolate sticks or a chocolate bar cut into sticks
- 1 egg + 1 generous pinchegg and salt, for the glaze
Instructions
- 1
Mix the yeast
Put 240 ml of warm milk and the fresh yeast, broken into pieces, in a stand mixer bowl or a large mixing bowl, then stir. Add the sugar and egg and mix briefly.
- 2
Knead the dough
Add the flour and salt, then knead at speed 1 for 6 minutes. Gradually add the softened butter, cut into pieces, and continue kneading for 5 minutes.
- 3
First prove
Transfer the dough to a bowl, cover with cling film or a clean tea towel and leave in a warm place for 1 hour 30 minutes.
- 4
Divide the dough
Once the dough has doubled in size, knock it back and divide it into 10 balls.
- 5
Shape the rolls
On a lightly floured work surface, flatten each ball. Place one and a half chocolate sticks on the dough, roll it slightly, add another chocolate stick, then roll it up and seal the dough.
- 6
Arrange on a tray
Place the rolls on a baking tray lined with baking paper.
- 7
Slash and prove
Using a sharp knife, score the rolls, cover them again with a tea towel and leave to rise for 1 hour.
- 8
Heat the oven
Preheat the oven to 200°C, preferably using the fan setting.
- 9
Glaze the rolls
Mix the egg with the pinch of salt, then brush the rolls with the glaze.
- 10
Bake the rolls
Bake at 200°C for 15–20 minutes.
- 11
Cool on a rack
Transfer the Viennese rolls to a wire rack and leave them to cool.
What are chocolate Viennese rolls?
Viennese bread, or pain viennois, is a French bakery-style enriched bread with a tender, slightly sweet crumb. This homemade version wraps chocolate in a soft milk dough, making it a treat for breakfast or an afternoon break.
The dough gets its softness from milk, egg and butter, while fresh yeast helps it rise. Shaping chocolate inside each roll gives every slice a chocolate-filled centre.
Nutrition and macros by portion
The nutrition label shows one serving as written: 215 calories, 0g protein, 0g carbs, 0g fat.
| Portion | Adjustment | kcal | Protein | Carbs | Fat |
|---|---|---|---|---|---|
| Lighter | Smaller chocolate-filled rolls | 151 kcal | 0g | 0g | 0g |
| This serving | As written | 215 kcal | 0g | 0g | 0g |
| Hungry | Larger chocolate-filled rolls | 323 kcal | 0g | 0g | 0g |
The flour and sugar provide most of the carbohydrates, while butter and egg contribute much of the fat; the milk, egg and flour also contribute some protein. Pair a roll with fruit or yoghurt for a more balanced plate.
Choosing the flour and chocolate
Flour: T45 gruau flour is specified for this dough, with a mixture of T45 and T55 offered as an alternative. Keep the flour and salt quantities as listed so the dough has the intended balance.
Chocolate: Use chocolate sticks or cut a chocolate bar into sticks. The recipe does not specify a total quantity; its shaping instructions use one and a half sticks, then another stick, per roll.
Work the butter into the dough
Soft butter: Add it gradually after the initial 6 minutes of kneading, then knead for a further 5 minutes. Adding it in pieces helps it incorporate into the dough rather than sitting in large lumps.
Dough feel: The method calls for kneading in a stand mixer at speed 1. If mixing by hand, expect a soft, enriched dough that may feel sticky; avoid adding unlisted flour.
Shape and seal the chocolate inside
Flatten: On a lightly floured surface, flatten each dough ball before adding the chocolate. Roll the dough around the filling in stages, as directed, rather than placing all the chocolate in one spot.
Seal: Pinch the seam closed after rolling so the chocolate stays enclosed as the rolls rise and bake. Place the shaped rolls on the prepared tray.
Follow the proving cues
First rise: Leave the covered dough in a warm place for 1 hour 30 minutes, until it has doubled in size. The dough’s growth is a more useful cue than the clock alone.
Second rise: After shaping and scoring, cover the rolls and leave them for 1 hour. This recipe includes 2 hours 30 minutes of proving, in addition to kneading, shaping and baking, so its listed 45-minute total time does not represent the full elapsed time.
Bake until golden
Egg wash: Brush the rolls with the beaten egg and pinch of salt before baking. This gives the surface a glossy finish.
Oven: Bake at 200°C for 15–20 minutes, preferably with the fan setting. The rolls should be browned on the outside; cool them on a wire rack as the method directs.
Serving and portion size
These rolls are well suited to breakfast or a snack alongside fruit, yoghurt or a hot drink. The method divides the dough into 10 rolls, although the recipe lists 12 servings, so the finished portions may not match the stated serving count.
Recipe notes & tips
- Warm the milk until just lukewarm rather than hot before mixing it with the yeast.
- Let the dough rise until doubled, even if this takes longer than the stated 1 hour 30 minutes.
- Add the softened butter gradually during the second kneading period.
- Seal the dough around the chocolate before placing each roll on the tray.
- Check the rolls at 15 minutes and continue baking up to 20 minutes if needed.
- Cool the rolls on a wire rack to keep their bases from becoming damp.
Variations
- Use chocolate chunks: Replace the sticks with pieces cut from a chocolate bar.
- Try dark chocolate: Choose dark chocolate for a less sweet-tasting filling.
- Try milk chocolate: Use milk chocolate sticks for a sweeter centre.
- Make smaller rolls: Divide the dough into more pieces and adjust the filling to fit each one.
- Make larger rolls: Divide the dough into fewer pieces and use more chocolate in each.
Common mistakes to avoid
- Hot milk: Very hot milk can harm the yeast; use warm milk as directed.
- Adding butter all at once: Add the softened butter gradually during kneading so it incorporates more evenly.
- Rushing the first rise: Wait until the dough has doubled before knocking it back.
- Loose seams: Seal the dough around the filling so the chocolate stays inside.
- Skipping the second rise: Cover the shaped rolls and give them the full 1 hour to rise.
- Overbaking: Begin checking at 15 minutes and remove the rolls when browned.
How to store
Once cool, store the rolls in an airtight container at room temperature and eat within 2–3 days. Warm briefly in the oven to refresh them.
Frequently asked questions
How many rolls does this recipe make?
The method says to divide the dough into 10 balls, while the recipe lists 12 servings. Follow the shaping instructions for 10 rolls, or divide the dough into more pieces for smaller portions.
How long does the dough need to rise?
The first rise is 1 hour 30 minutes, until doubled, followed by a 1-hour rise after shaping. The full proving time is therefore 2 hours 30 minutes.
Can I use dry yeast instead of fresh yeast?
The ingredient list specifies 25 g of fresh baker’s yeast and does not give a conversion for dry yeast. For best results, use the type and quantity listed.
Can I use a chocolate bar instead of chocolate sticks?
Yes. The ingredient list allows a chocolate bar cut into sticks, which can be placed inside the dough in the same way.
How can I tell when the rolls are baked?
Bake them at 200°C for 15–20 minutes, checking from 15 minutes. They should be browned before you transfer them to a wire rack to cool.
Cook it from the original
This recipe comes from auxdelicesdupalais.net. Their page has the author’s own photos, notes and tips — the best place to cook it from.
Open the recipe on auxdelicesdupalais.net