
Instant Pot Turkey Breast and Gravy
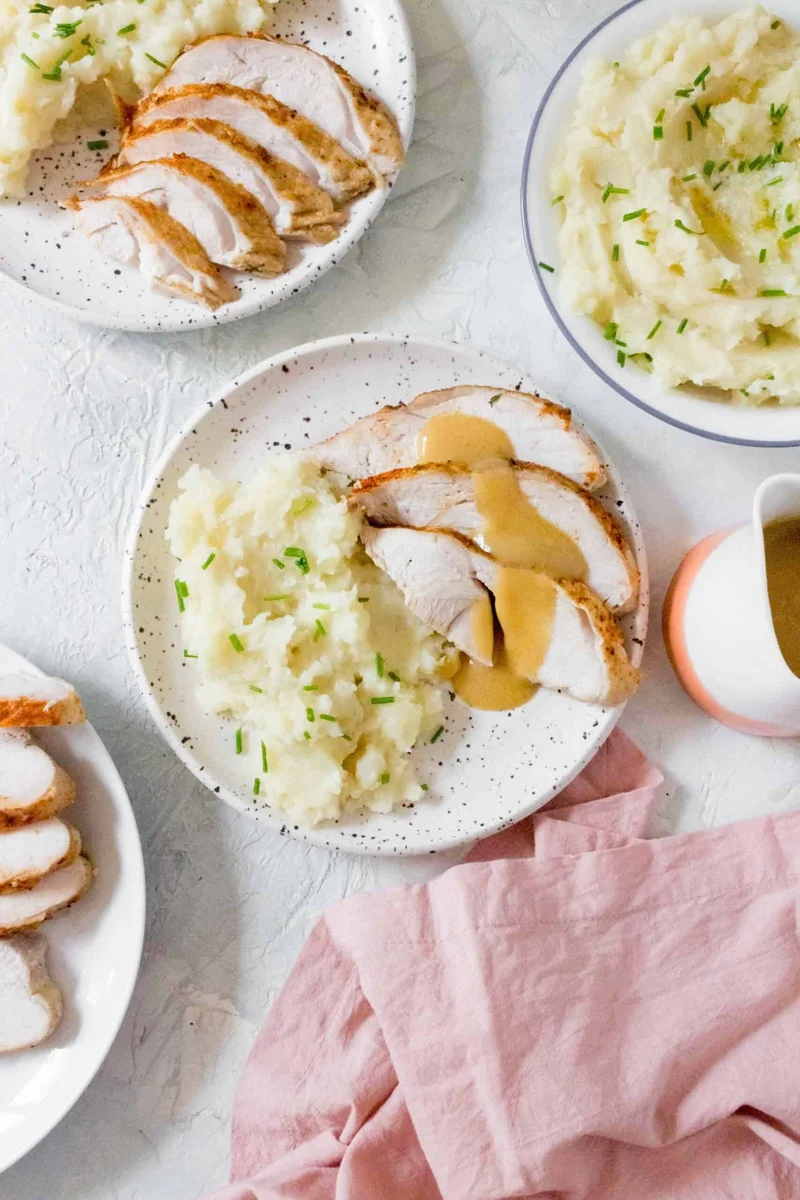
This Instant Pot turkey breast is seasoned with herbs and spices, pressure-cooked until tender, then finished under the grill for crisp skin. The cooking liquid becomes a simple gravy, making it a practical centrepiece when you want turkey without roasting a whole bird.
Ingredients
- 1,134 g (2 1/2 lb)bone-in turkey breast, skin on
- 15 ml (1 tablespoon)paprika
- 15 ml (1 tablespoon)garlic powder
- 5 ml (1 teaspoon)salt
- 14 g (1 tablespoon)butter
- 30 ml (2 tablespoons)olive oil
- 30 ml (2 tablespoons)thyme
- 30 ml (2 tablespoons)rosemary
- 14 g (1 tablespoon)butter
- 15 ml (1 tablespoon)olive oil
- 240 ml (1 cup)chicken broth
- 28 g (2 tablespoons)butter
- 15 ml (1 tablespoon)plain flour
Instructions
- 1
Season the turkey
Let the turkey breast come to room temperature. Meanwhile, mix the paprika, garlic powder, salt, thyme and rosemary, then coat the turkey with the seasoning.
- 2
Sear the breast
Set the Instant Pot to sauté. Add the 1 tablespoon of butter and 2 tablespoons of olive oil, then sear the turkey on all sides for 2–3 minutes.
- 3
Deglaze the pot
Set the turkey aside. Pour 240 ml (1 cup) of chicken broth into the pot and scrape up the browned bits from the bottom.
- 4
Add the trivet
Place the Instant Pot trivet in the pot and return the turkey breast to it.
- 5
Pressure-cook turkey
Close the lid and set the valve to sealing. Cook on high pressure for 15 minutes, then allow the pressure to release naturally for 10 minutes.
- 6
Brown and rest
Transfer the turkey to the oven and broil it to crisp the skin. Rest it for 10 minutes before slicing, and keep the cooking liquid for the gravy.
- 7
Strain the liquid
Pour the cooking liquid through a strainer and set it aside.
- 8
Make the gravy
Set the Instant Pot to sauté and melt the remaining 28 g (2 tablespoons) of butter. Gradually whisk in the flour until incorporated, then slowly pour in the reserved liquid while whisking. Continue until the gravy thickens to your liking, and add extra salt and pepper if desired.
What is Instant Pot turkey breast?
Turkey breast is a lean cut from the bird, served here as a smaller alternative to a whole roast turkey. This American-style version uses the pressure cooker for the main cooking and finishes the skin under the grill.
The seasoning of paprika, garlic, thyme and rosemary gives the meat a savoury, herby flavour. The liquid left in the pot is also used for gravy, so the cooking process does double duty.
Nutrition and macros by portion
The nutrition label shows one serving as written: 515 calories, 62g protein, 8g carbs, 27g fat.
| Portion | Adjustment | kcal | Protein | Carbs | Fat |
|---|---|---|---|---|---|
| Lighter | Use less gravy | 361 kcal | 43g | 6g | 19g |
| This serving | As written | 515 kcal | 62g | 8g | 27g |
| Hungry | Add a larger turkey portion | 773 kcal | 93g | 12g | 41g |
The turkey supplies most of the protein, while the flour and broth contribute some carbohydrates. Butter and olive oil account for much of the fat; serve it with vegetables and a measured portion of potatoes or another starch for a more balanced plate.
Choosing and seasoning the turkey
Bone-in breast: the recipe specifies a skin-on, bone-in cut, so use that rather than a boneless joint. Bring it to room temperature as directed before seasoning.
Herb coating: mix the paprika, garlic powder, salt, thyme and rosemary evenly so the seasoning is distributed across the surface. Pat it onto the turkey to help it adhere.
Searing and deglazing
Sear in batches if needed: brown the breast on all sides for 2–3 minutes in the butter and oil. Use the sauté setting and turn the meat carefully so the surface gets contact with the pot.
Scrape the base: after setting the turkey aside, add the broth and loosen the browned pieces from the pot bottom. This also helps ensure the base is clear before pressure cooking.
Pressure cooking and doneness
Trivet position: set the turkey on the Instant Pot trivet above the broth rather than leaving it directly on the base. Close the lid with the valve set to sealing.
Release time: cook at high pressure for 15 minutes, then leave the pot to release naturally for 10 minutes. The recipe gives these times but does not specify a separate internal-temperature check.
Crisp skin and resting
Broil briefly: the pressure cooker cooks the turkey, but the oven step is what crisps the skin. Watch it closely under the grill, as the recipe does not give a broiling time.
Rest before slicing: leave the turkey for 10 minutes after broiling. Keep the cooking liquid rather than discarding it, as it forms the base of the gravy.
Getting smooth gravy
Make a roux: melt the butter on sauté mode and whisk in the flour gradually until it is fully incorporated. This gives the reserved liquid a thickening base.
Add liquid slowly: pour in the strained cooking liquid in stages while whisking. Stop when the gravy reaches the thickness you prefer, then adjust the seasoning with extra salt and pepper if wanted.
What to serve with it
Serve slices with the gravy and familiar roast-style sides such as potatoes and green vegetables. Their textures complement the tender meat and crisped skin.
For a more substantial plate, add a starch such as mashed potato or bread dressing. Spoon gravy over the turkey just before serving to keep the skin as crisp as possible.
Recipe notes & tips
- Pat the turkey dry before applying the seasoning so the surface is easier to coat.
- Scrape the pot thoroughly when adding the broth to loosen all browned bits.
- Keep the turkey on the supplied trivet during pressure cooking.
- Strain the cooking liquid before using it for gravy.
- Broil the skin while watching closely, since the recipe does not specify a time.
- Let the turkey rest for the full 10 minutes before slicing.
Variations
- Herb balance: adjust the thyme and rosemary proportions while keeping the same total amount.
- Peppery gravy: add black pepper to the gravy along with any extra salt.
- Thicker gravy: whisk in a little more flour with the butter before adding the liquid.
- Lighter gravy: serve a smaller amount of gravy alongside each portion.
- Side vegetables: serve with green beans, carrots or another simply cooked vegetable.
Common mistakes to avoid
- Skipping the sear: the recipe calls for browning on all sides for 2–3 minutes, so take time to turn the breast around the pot.
- Leaving browned bits behind: scrape the base while adding the broth so the pot is deglazed.
- Discarding the liquid: strain and reserve it after cooking because it is needed for the gravy.
- Adding the broth all at once: pour it in gradually while whisking to help the gravy stay smooth.
- Slicing straight away: rest the turkey for 10 minutes before cutting.
- Walking away while broiling: watch the skin closely because no broiling time is specified.
How to store
Refrigerate leftover turkey and gravy in separate airtight containers within 2 hours, and use within 3–4 days. Reheat until piping hot; warm the gravy gently, adding a splash of broth or water if it has thickened.
Frequently asked questions
Can I use boneless turkey breast?
The recipe is written for a skin-on, bone-in breast. A boneless cut may cook differently, so follow the timing guidance for the specific cut you have.
Do I need to sear the turkey first?
Yes, searing is part of the method and takes 2–3 minutes on all sides. It also leaves browned bits that are loosened with broth when you deglaze the pot.
Why use the trivet?
The turkey is placed on the Instant Pot trivet above the broth during pressure cooking. This is the method specified for this recipe.
How do I get crisp skin?
After pressure cooking, transfer the turkey to the oven and broil it. Keep a close eye on it because the recipe does not give a broiling time.
Can I make the gravy ahead?
It is easiest to make it after cooking the turkey, using the strained cooking liquid. You can refrigerate leftover gravy and reheat it gently.
What if my gravy is too thick?
Whisk in a little broth or water until it reaches the consistency you want. Add it gradually so the gravy does not become too thin.
Cook it from the original
This recipe comes from carmyy.com. Their page has the author’s own photos, notes and tips — the best place to cook it from.
Open the recipe on carmyy.com