
Pickled Turnips
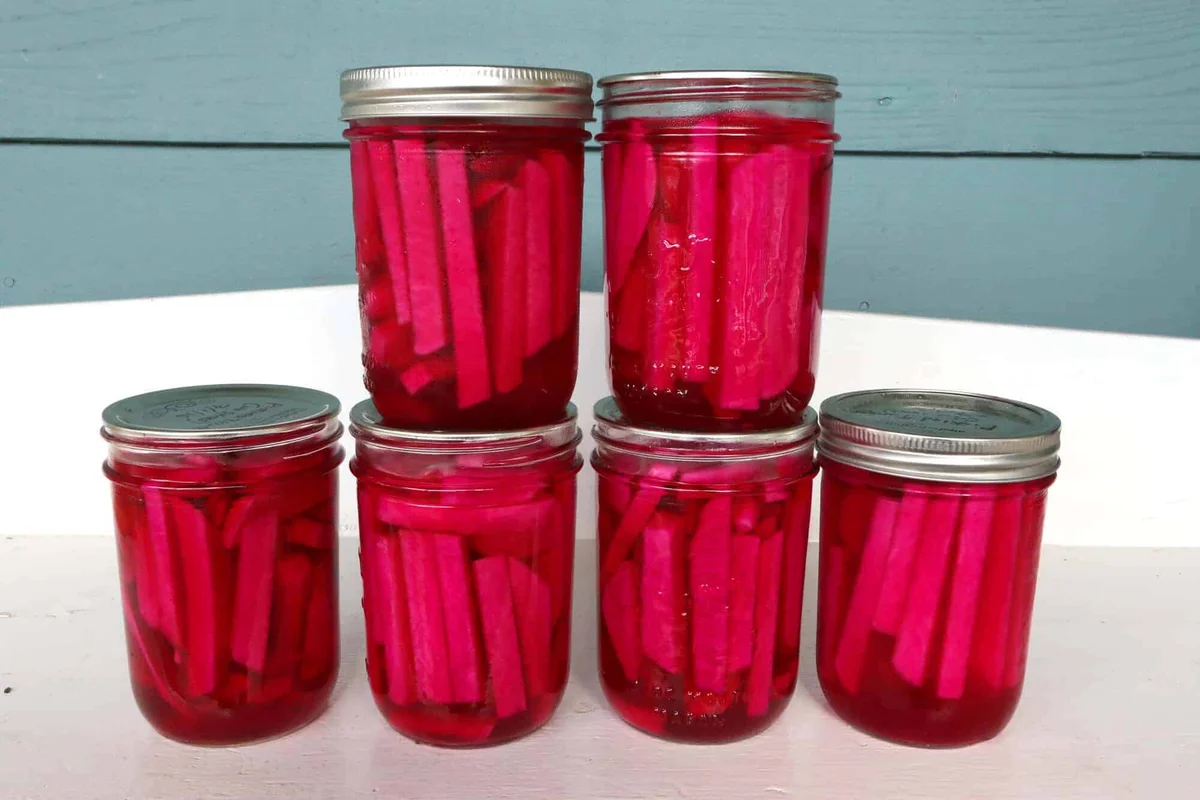
Pickled turnips are crunchy, tangy Middle Eastern preserves coloured pink with beetroot. Serve them alongside hummus and flatbread, tuck them into falafel or shawarma, or add them to a plate of mezze.
Ingredients
- 1.36 kg (3 pounds)fresh, firm turnips, peeled and cut into sticks or slices about 8 mm thick
- 1 largered beetroot, peeled and cut into sticks or slices about 8 mm thick
- 1 peeled clove for each jargarlic
- 3bay leaves
- 15 ml (1 tablespoon)fennel seeds
- 15 ml (1 tablespoon)coriander seeds
- 475 ml (2 cups)white vinegar
- 710 ml (3 cups)water
- 120 ml (1/2 cup)kosher or sea salt; avoid regular table salt, which can give the brine a bitter flavour
Instructions
- 1
Simmer the brine
Put the bay leaves, fennel seeds, coriander seeds, vinegar, water and salt in a small saucepan and bring to the boil. Lower the heat to medium, cover and simmer for 10 minutes, then leave the brine to cool completely.
- 2
Fill the jars
Pack the turnips into sterilised jars with a few pieces of beetroot and one peeled garlic clove per jar. Pour in the cooled brine, including the seeds, until the turnips are fully covered, leaving 6 mm of space at the top. Screw on the lids. See the note in the source recipe for canning instructions.
- 3
Ferment and chill
Leave the jars in a relatively cool place for one week to allow fermentation. Then refrigerate them and, ideally, eat the turnips within two months. This method gives them a more complex flavour than canning.
- 4
Can for storage
For long-term storage, pour the brine into the sterilised jars while it is still hot, covering the turnips and leaving 1.3 cm of space at the top, then screw on the lids. Process pint-sized jars in a boiling water bath for 10 minutes. Remove them and leave undisturbed for 24 hours before moving; store in a cool, dark place for up to a year, using within six months for the best flavour and texture.
What are pickled turnips?
Pickled turnips are a familiar Middle Eastern condiment, often served with mezze or tucked into wraps and sandwiches. Their sharp, savoury brine makes a lively contrast to creamy dips and rich fillings.
In this version, beetroot lends the turnips their vivid pink colour, while fennel, coriander and bay add fragrance. A brief simmer infuses the brine before the vegetables are left to ferment.
Nutrition and macros by portion
The nutrition label shows one serving as written: 48 calories, 0g protein, 0g carbs, 0g fat.
| Portion | Adjustment | kcal | Protein | Carbs | Fat |
|---|---|---|---|---|---|
| Lighter | Use a smaller side portion | 34 kcal | 0g | 0g | 0g |
| This serving | As written | 48 kcal | 0g | 0g | 0g |
| Hungry | Serve a larger portion | 72 kcal | 0g | 0g | 0g |
The supplied nutrition per serving lists 48 kcal and zero grams of protein, carbohydrate and fat, so it does not identify which ingredients contribute the energy or macros. Serve the turnips as a condiment alongside a meal with a source of protein and a more substantial carbohydrate, such as hummus and flatbread.
Choosing and cutting the vegetables
Firm turnips: choose fresh ones that feel solid, then peel them and cut them into sticks or slices about 8 mm thick. Keeping the pieces a similar size helps them sit neatly in the jars.
Beetroot: a few pieces are enough to tint the turnips as they pickle. Cut it to a similar thickness so it fits alongside them.
Building the brine
Salt choice: use kosher or sea salt, as specified, rather than regular table salt, which the recipe notes can give the brine a bitter flavour.
Spice infusion: simmer the vinegar, water, salt and aromatics together for 10 minutes. Let the mixture cool completely before pouring it over the vegetables for the refrigerator-fermented method.
Packing the jars
Layering: fit the turnips into sterilised jars with a few pieces of beetroot and a peeled garlic clove in each. Pour in the brine and its seeds, making sure the vegetables are fully covered.
Headspace: leave 6 mm at the top for the fermentation method, or 1.3 cm when following the recipe's canning method. Use the appropriate amount for the method you are making.
Fermentation and flavour
Cool rest: the recipe calls for the jars to sit in a relatively cool place for one week. This gives the turnips time to ferment and develop a more complex flavour than the canned version.
Doneness: after the week, refrigerate the jars as directed. The recipe does not specify a particular colour or texture test, so follow its stated timing rather than waiting for a particular visual cue.
How to serve them
Mezze plate: set the turnips out with hummus, baba ganoush, flatbread, olives and peppers for a sharp, crunchy counterpoint.
Wraps and sandwiches: add them to falafel or shawarma for tang and colour. Their briny flavour also works well as a small side alongside other savoury dishes.
Recipe notes & tips
- Cut the turnips into evenly sized pieces so they pack consistently into the jars.
- Use a few pieces of beetroot in each jar to colour the turnips.
- Make sure the vegetables are completely covered by brine.
- Let the brine cool completely before using it for the fermentation method.
- Keep the jars refrigerated after the one-week rest.
- Use kosher or sea salt rather than regular table salt, as directed in the recipe.
Variations
- More garlic: add another peeled clove to a jar if you want a stronger garlic note.
- Extra fennel: increase the fennel seeds for a more pronounced anise-like aroma.
- More coriander: add extra coriander seeds for a warmer, citrusy spice character.
- Turnip slices: cut the vegetables into slices rather than sticks, keeping them about 8 mm thick.
- Canned version: use the hot-brine method and boiling water bath described in the recipe for long-term storage.
Common mistakes to avoid
- Using table salt: the recipe warns it can make the brine bitter; choose kosher or sea salt.
- Leaving vegetables uncovered: add enough brine to cover all the turnips.
- Filling to the rim: leave the specified headspace, 6 mm for fermentation or 1.3 cm for canning.
- Using hot brine for fermentation: let it cool completely before pouring it over the vegetables.
- Moving canned jars too soon: leave them undisturbed for 24 hours after the water bath.
How to store
For the fermentation method, refrigerate the jars after one week and ideally eat the turnips within two months. For the canning method, store processed jars in a cool, dark place for up to a year; use within six months for optimal flavour and texture.
Frequently asked questions
How long do the turnips need to pickle?
For the fermentation method, leave them in a relatively cool place for one week, then refrigerate. The recipe recommends eating them within two months.
Can I use table salt?
The recipe advises against regular table salt because it may give the brine a bitter flavour. Use kosher or sea salt instead.
Why is there beetroot in the jar?
The beetroot colours the turnips pink and is packed into the jars with them. The recipe calls for a few pieces in each jar.
Should the brine be hot or cool?
Cool it completely for the fermentation method. For canning, the recipe says to add the brine while it is still hot.
Can I keep these turnips for longer than two months?
The refrigerator-fermented method is ideally eaten within two months. The recipe gives a separate canning method for longer storage, with jars kept in a cool, dark place for up to a year.
What can I serve with pickled turnips?
Serve them with hummus, baba ganoush, flatbread, olives or peppers, or add them to falafel and shawarma.
Cook it from the original
This recipe comes from daringgourmet.com. Their page has the author’s own photos, notes and tips — the best place to cook it from.
Open the recipe on daringgourmet.com