
Pimentões recheados à moda filipina
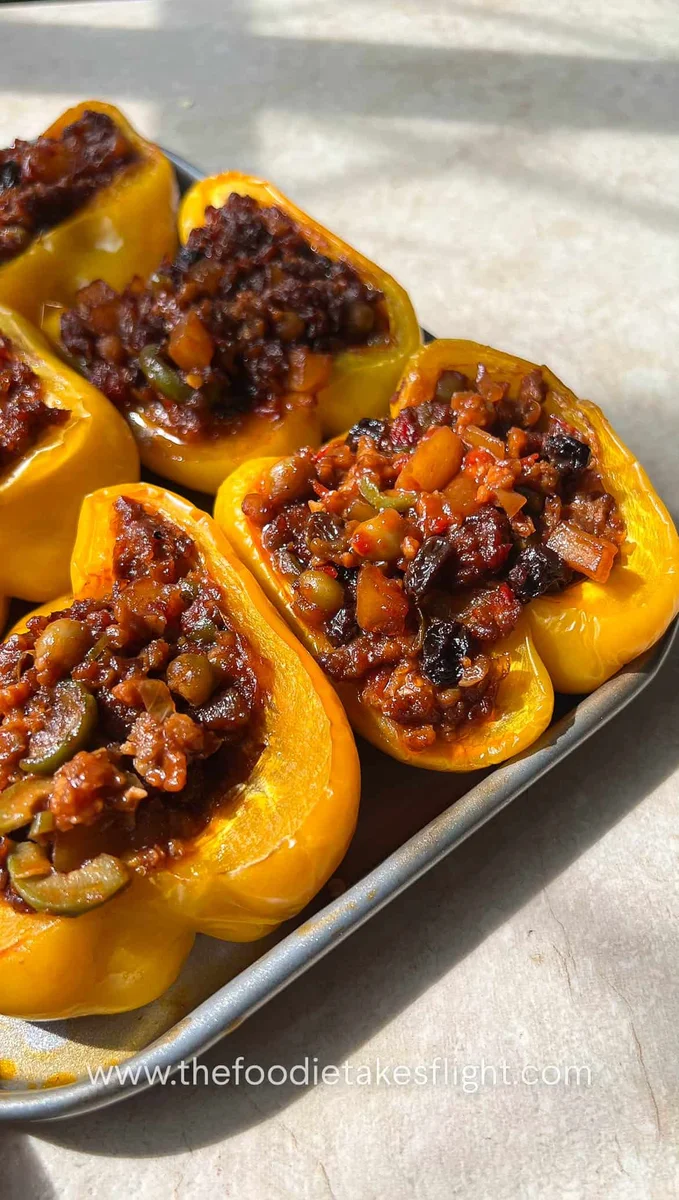
Estes pimentões recheados à moda filipina levam carne moída vegetal cozida em um molho encorpado à base de tomate, inspirado no arroz a la cubana filipino. A carne moída vegetal é preparada com batatas, pimentões, uvas-passas e azeitonas, dando ao recheio sabores adocicados, salgados e umami, além de texturas variadas. Cada metade de pimentão é recheada com essa mistura e assada até começar a soltar seus sucos e os sabores do recheio continuarem a se combinar. Como nós, filipinos, adoramos arroz, servi esses pimentões recheados com sinangag, ou arroz frito filipino com alho.
Ingredientes
- 1 tbsp neutral cooking oil
- 1/2 small white onion
- 2 cloves garlic (minced)
- 1/2 small red bell pepper
- 1 small green chili (optional for extra head)
- 1 small potato (peeled and diced)
- 10.5 oz vegan ground ‘meat’ or mince ((plant-based ground meat substitute), see notes)
- 1/2 to 1 tbsp soy sauce
- 2 tsp liquid seasoning (I used Knorr, option - you can just season with salt or soy sauce)
- Freshly ground pepper
- 2.5 tbsp tomato paste
- 1/2 cup water
- 1.5 - 2 tbsp brown sugar (adjust to desired sweetness)
- 4 green olives (sliced)
- 1.5 tbsp dried raisins
- 3.5 oz green peas
- 3 large bell peppers (I used yellow bell peppers)
- Filipino Fried Garlic Rice or Sinangag
Modo de preparo
- 1
--- PREPARE THE FILLING ---
- 2
Heat a large pan or skillet over medium heat. Add the oil.
- 3
Once hot, sauté the onion until translucent, around 1 minute.
- 4
Add the garlic and sauté until lightly brown. Mix in the diced red bell peppers and chili (if using) and cook until tender.
- 5
Add the diced potatoes. Turn up the heat and leave the potatoes to cook for 2-3 minutes or until half-cooked.
- 6
Season the potatoes with some liquid seasoning (I used Knorr) or some salt, and pepper to taste.
- 7
Afterwards, add in the vegan ground ‘meat’ or mince.
- 8
Separate with your spatula and allow the ground ‘meat’ to cook.
- 9
Once the vegan ground ‘meat’ is cooked, taste a portion and then season with soy sauce and liquid seasoning, as needed.Note: This will depend on the type of ground ‘meat’ you used - some brands already come seasoned, so just adjust to your taste as needed.
- 10
Mix in the tomato paste and water into the pan. Stir until the tomato paste is dissolved. Add the sugar and pepper. Mix until well incorporated.
- 11
Add the olives, raisins, and peas. Mix well with the ‘meat’ mixture. Taste the filling and season with more soy sauce and/or sugar if needed.
- 12
The filling will be quite saucy, while will be just right to stuff into the peppers so the filling will not be too dry.
- 13
--- STUFFING THE PEPPERS ---
- 14
Preheat your oven to 350F/180C.
- 15
Slice the bell peppers vertically in half. Remove the seeds.
- 16
Place the bell peppers on baking tray. You can brush some oil onto the tray to avoid the peppers from sticking.
- 17
Scoop generous amounts of the filling. Carefully press the filling down into the peppers.
- 18
Repeat for the rest of the peppers.
- 19
Bake the stuffed bell peppers in the oven for 30-35 minutes or until the bell peppers are cooked and tender to your liking.
- 20
If air-frying you can start by air frying these for 15 minutes or until tender.
- 21
--- TO SERVE ---
- 22
Since we Filipinos love rice, I served these peppers with Filipino Fried Garlic Rice or Sinangag - you can find the recipe here. But of course, it's really up to you how you want to enjoy these peppers. They're great as-is or pair it with a salad.
- 23
Enjoy the peppers while still hot!
Cozinhe pela receita original
Esta receita é de thefoodietakesflight.com. No site estão as fotos, as notas e as dicas do autor — o melhor lugar para prepará-la.
Ver a receita em thefoodietakesflight.com